3
B. Category #2
RM2620 RM2652 RM2820 RM2852
*RM3662 *RM3663 *RM3862 *RM3863
*NDR1062
* Optional Ice Maker Cycle
STEP 1. REMOVAL OF COOLING UNIT
1. See General Instructions for all models.
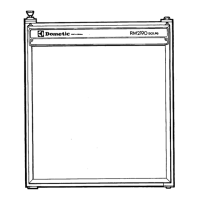
2. Remove thermistor bracket and 4 screws from fins (FIG.
B1). DO NOT remove fins. They are taped to the rear of the
cabinet liner.
3. In the freezer, remove shelves and grill covering screws.
Pull out center of grill to allow right or left side to pop out
of slot (FIG. B1).
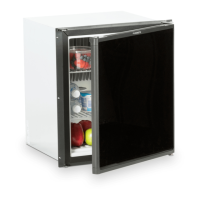
4. Models with Ice Maker: Remove the cover of cycle and
the 2 screws holding cycle to the side wall (FIG. B2).
5. Remove 4 screws holding cycle bracket. Be careful not to
drop. Unplug electrical connection and take cycle out of
freezer. Remove the remaining screws. (FIG. B2)
6. Lay the refrigerator face down on two 2x4’s to protect the
face of the appliance.
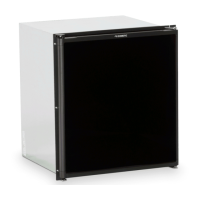
7. Remove heater cover and heater(s) (FIG. B3 & B4). Also
disconnect ice wire harness leads from electrical connec-
tions on the refrigerator.
Note: NDR models - pull wire harness out of the cooling unit
from the inside of freezer. Pull water fill tube from rear of
refrigerator. Disconnect water line from water solenoid valve.
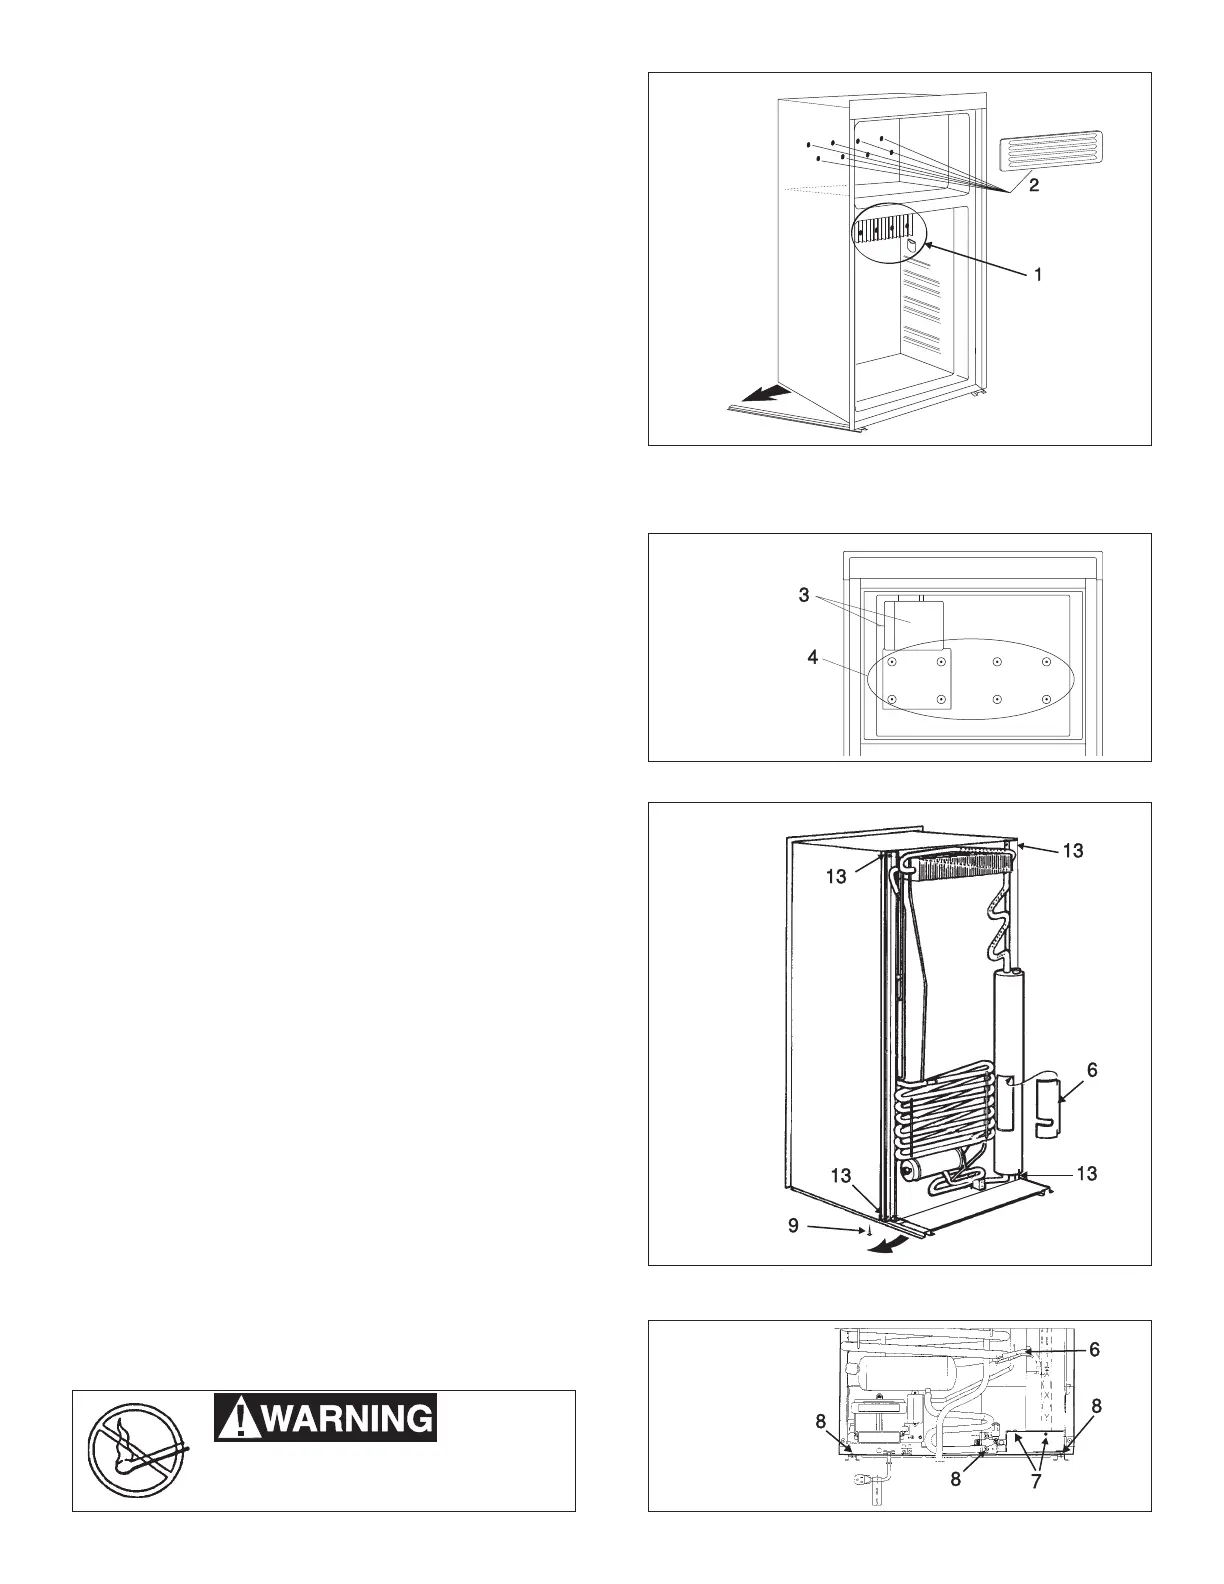
8. Remove burner cover (1 screw) and screw holding the
burner to flue tube. Pull burner down and off tube (FIG. B4).
9. Remove 2 screws holding control panel to runner and 2
screws holding gas solenoid valve to cooling unit (FIG. B4).
10. Take out screws (1 on each side) where runner fastens to
the rear of cabinet. Swing runners out to the side to clear
cabinet (FIG. B3).
11. Cut wire ties holding cables and thermistor to frame of
cooling unit.
12. Disconnect climate control and interior (red wires) from J2
on circuit board and black wires from ground.
13. Cut red and black wires from interior light. Strip back 3/8”
to reconnect using butt connectors after cooling unit has
been installed.
14. Remove 4 screws holding cooling unit to cabinet (2 on top
and 2 on bottom). (FIG. B3). Lift cooling unit out of cabinet.
STEP 2. INSTALLATION OF COOLING UNIT
1. Refer to Step 2, Category A, 1–5.
2. Install cooling unit back in cabinet. Replace screw holding
unit.
3. Replace the components removed in Step 1, 2-14.
4. Stand refrigerator upright. Transfer the flue baffle to new
cooling unit. Replace inside parts removed in Step 1, 2–5.
5. Check for proper cooling before installing refrigerator back
into the coach. (See “Important” on Page 1).
6. Install refrigerator back into coach and leak check all gas
fittings. Repair all gas leaks.
Do not use a flame
to check for gas leaks.
FIG. B1
FIG. B2
FIG. B3
FIG. B4
 Loading...