Do you have a question about the Dometic RM2350 and is the answer not in the manual?
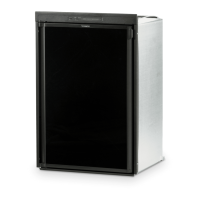
We are pleased that you have chosen this refrigerator and hope you will derive much satisfaction from using it.
Check the data plate, located inside the refrigerator, to ensure that you have received the right model and that it is suitable for the available gas supply and pressure.
Explanation of symbols used throughout the manual, indicating warnings, cautions, and step-by-step instructions.
Identifies and describes the function of each control on the refrigerator's control panel.
Details the working principle of the ammonia-based absorption refrigeration system.
Provides general advice and information for optimal refrigerator use and maintenance.
Critical warning about the sealed cooling system containing hazardous chemicals under high pressure.
Specifies the necessary ventilation for the combustion system and air circulation for efficient operation.
Details the required minimum clearances to combustible materials for safe installation.
Instructions for fitting the refrigerator into its enclosure, including dimensions, sealing, and packaging removal.
Procedure for securely fastening the refrigerator within its enclosure using screws.
Guidance on making LP gas and electrical connections according to regulations and safety.
Details on connecting LP gas, required pressure, and testing the safety shutoff.
Instructions for connecting to 230-240V AC and 12V DC power supplies.
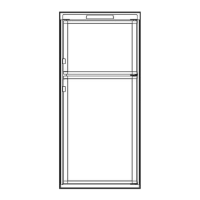
Step-by-step instructions for reversing the door swing direction.
Procedure for attaching the decorative door panel to the refrigerator door.
Instructions for safely disconnecting and removing the refrigerator from its installation.
Instructions for operating the refrigerator using LP Gas, 230-240V AC, and 12V DC.
Guide on using the thermostat knob to set and maintain the desired cabinet temperature.
Procedure for safely shutting down the refrigerator, including storage recommendations.
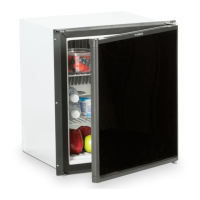
Guidance on proper placement of food items in fresh food and frozen food compartments.
Step-by-step instructions for defrosting the refrigerator and handling defrost water.
Instructions on how to clean the interior and exterior of the refrigerator safely and effectively.
Procedure for replacing the 230-240V AC and 12V DC heater elements.
Routine checks for LP gas connections, pressure, and burner system.
Detailed steps for inspecting and cleaning the burner, flue baffle, and burner jet.
Identifies common causes for the refrigerator not cooling properly.
Lists potential causes for unusual odors related to the burner or flue system.
Step-by-step guide on how to remove and install wire shelves in the refrigerator.
Diagram showing key components located at the rear of the refrigerator.
Detailed wiring diagrams for 230-240V AC and 12V DC operation.
This document provides installation and operating instructions for a Dometic refrigerator designed for LP-gas and electric operation, specifically the RM2350 model. It covers various aspects from initial setup to maintenance and troubleshooting, ensuring safe and efficient use of the appliance.
The refrigerator functions as an absorption cooling system. In this system, ammonia is liquefied in a finned condenser coil at the top rear of the unit. The liquid ammonia then flows into the evaporator, located inside the freezer section, where it is exposed to a circulating flow of hydrogen gas. This process causes the ammonia to evaporate, creating a cold environment within the freezer. The evaporator tubing is specifically sloped to ensure a continuous, gravity-driven movement of liquid ammonia. Proper leveling of the vehicle is crucial when the refrigerator is parked for several hours to prevent liquid ammonia from accumulating in the evaporator tubing, which could slow or block circulation and lead to a loss of cooling. When the vehicle is in motion, the rolling and pitching movements help prevent accumulation, making leveling less critical.
The refrigerator features a control panel with several key components:
To operate on LP gas, first open the shutoff valve of the gas bottle and any onboard shutoff valve. Turn the fuel selector switch (A) to the "GAS" position and the thermostat knob (B) to position 4. Press and hold the flame failure safety valve push-button (C) and repeatedly push the piezo igniter (D) until the flame indicator (E) shows the flame is lit (red indicator in the green field). Continue holding button (C) for 10 seconds after ignition. If the gas line contains air (e.g., after changing an LP tank or a long shutoff), the lighting procedure may need to be repeated. It is crucial not to operate the refrigerator on LP gas while the vehicle is mobile, and the gas bottle should be turned off during transit.
Ensure the power cord is properly connected to the power supply and that the voltage matches the data plate. Turn the fuel selector switch (A) to the "AC" position and the thermostat knob (B) to position 4.
This mode is intended for use only when the vehicle's engine is running to prevent battery discharge. Turn the fuel selector switch (A) to the "DC" position. Note that there is no thermostat function in 12 V DC operation; the refrigerator runs continuously.
The thermostat knob (B) allows adjustment of the cabinet temperature. For gas operation, "OFF" sets the burner to bypass rate, keeping it lit, while "MAX" keeps the burner on high flame continuously. For AC operation, "OFF" turns off the heating elements, and "MAX" keeps them on continuously for the coldest temperatures. Adjusting the knob between "MAX" and "OFF" achieves the desired temperature, with settings closer to "MAX" resulting in colder temperatures. The thermostat will cut the burner back or shut off the heating element once the set temperature is reached. It is recommended to adjust the thermostat to maintain a dry frost on the cooling fins, setting it closer to "MAX" in warmer outside temperatures.
To shut off the refrigerator, turn the fuel selector switch (A) to "OFF." If the refrigerator will not be used for several weeks, it should be emptied, defrosted, cleaned, and the door left ajar, using the travel catch to hold it in position. The ice tray should be dried and kept outside the cabinet.
The food storage compartment is sealed and unventilated to maintain low temperatures. Foods with strong odors or those that absorb odors easily should be covered. Vegetables and salads should also be covered to retain crispness. The coldest areas are under the cooling fins and at the bottom, while warmer areas are on the upper door shelves. This should be considered when placing different food types. For the frozen food storage compartment, quick-frozen soft fruits and ice cream should be placed at the bottom of the aluminum liner. Frozen vegetables can be stored anywhere. This compartment is not designed for deep or quick-freezing. Meat or fish should be precooled before storage. For faster ice making, place the tray in direct contact with the freezer compartment bottom and turn the thermostat to "MAX" a few hours before the anticipated need for ice, then reset to a normal setting.
Defrosting should be carried out periodically. To defrost, turn the refrigerator off (knob A to "OFF"), empty it, and leave the cabinet and freezer doors open. Placing the ice tray with hot water on the freezer shelf can speed up defrosting. Defrost water collects in a drip tray at the rear of the refrigerator, where it normally evaporates. If heavy frost causes a lot of water, remove the drip tray, turn it around, and place a bowl underneath the outlet. After defrosting, dry the interior with a clean cloth, replace the drip tray, and reconnect the draining tube. Then, replace food and set the thermostat to "MAX" for a few hours before resetting to the desired mid-setting. Caution: Never use sharp tools like knives or ice picks to remove frost, as this can damage the ammonia system. Avoid hot air blowers, which can warp metal or plastic parts.
The refrigerator should be kept clean, especially after defrosting or before storage. Use a lukewarm, weak soda solution for the interior liner, finned evaporator, gasket, ice tray, and shelves. Never use strong chemicals or abrasives, as they can damage protective surfaces. It is important to keep the area at the back of the refrigerator clean, checking the lower and upper vents and the space between them for obstructions like bird/insect nests or spider webs. Clean the coils on the back with a soft-bristled brush. Ensure the refrigerator area is free from combustible materials, gasoline, and other flammable vapors or liquids.
The refrigerator has two electrical heaters (230-240 VAC and 12 V DC). To replace a heater, first unplug the refrigerator and disconnect the 12 V DC power. Remove the refrigerator from its enclosure. Disconnect the heater leads, unfold the lug holding the boiler casing lid, and open it. Remove insulation wool to access the heater, then turn and lift the heater out. Fit the new heater, reconnect the leads, replace insulation, and close the boiler lid. Reinstall the refrigerator, check for gas leaks, and reconnect AC and DC power.
Inspect the flue baffle for soot. Heavy soot indicates improper burner function. To clean, unplug the refrigerator and disconnect 12 V DC power. Close the gas valve. Remove the burner housing cover. Disconnect the wire from the high voltage electrode. Remove the burner mounting screw and the burner assembly. Lift out the wire and flue baffle from the top of the flue tube. Clean the flue from the top using a flue brush (compressed air is not effective for soot and scale). Replace the flue baffle. Clean the burner tube with a brush and blow out the burner with compressed air. Before removing the burner jet, clean the burner area of soot and scale. Remove the burner jet, soak it in wood alcohol, and blow it out with compressed air. Reinstall and tighten the burner jet. Warning: Do not use a wire or pin to clean the burner jet, as this can damage the precision opening, leading to refrigerator damage or a fire hazard. After cleaning, ensure the slots are centered under the flue tube and the thermocouple tip extends over two slots of the burner, with a clear blue flame. Reconnect the wire to the high voltage electrode, checking its location and gap (1/8" to 3/16" or 3-5 mm). Open the gas valve, check all fittings for leaks, and reconnect AC and DC power. Finally, check the LP gas safety shutoff.
Common issues and their potential causes include:
The manual also includes instructions for removing and replacing shelves and provides a rearview equipment diagram and a wiring diagram for reference. It emphasizes that installation and servicing should only be carried out by authorized/qualified personnel in accordance with all relevant regulations and codes.
| Door Type | Reversible |
|---|---|
| Type | Absorption |
| Interior Light | Yes |
| Refrigerant | Ammonia |
| Energy Source | AC/DC |