4
STEP 3. PREPARING THE COOLING UNIT
FOR THE ICE MAKER (For only mod-
els with ice maker)
Note: Models that have the water fill for the ice maker entering
through the top do no require drilling of cooling unit
(RM3652, RM3653, RM3862, and RM3863). The cool-
ing unit has been installed in the refrigerator, proceed to
number 2.
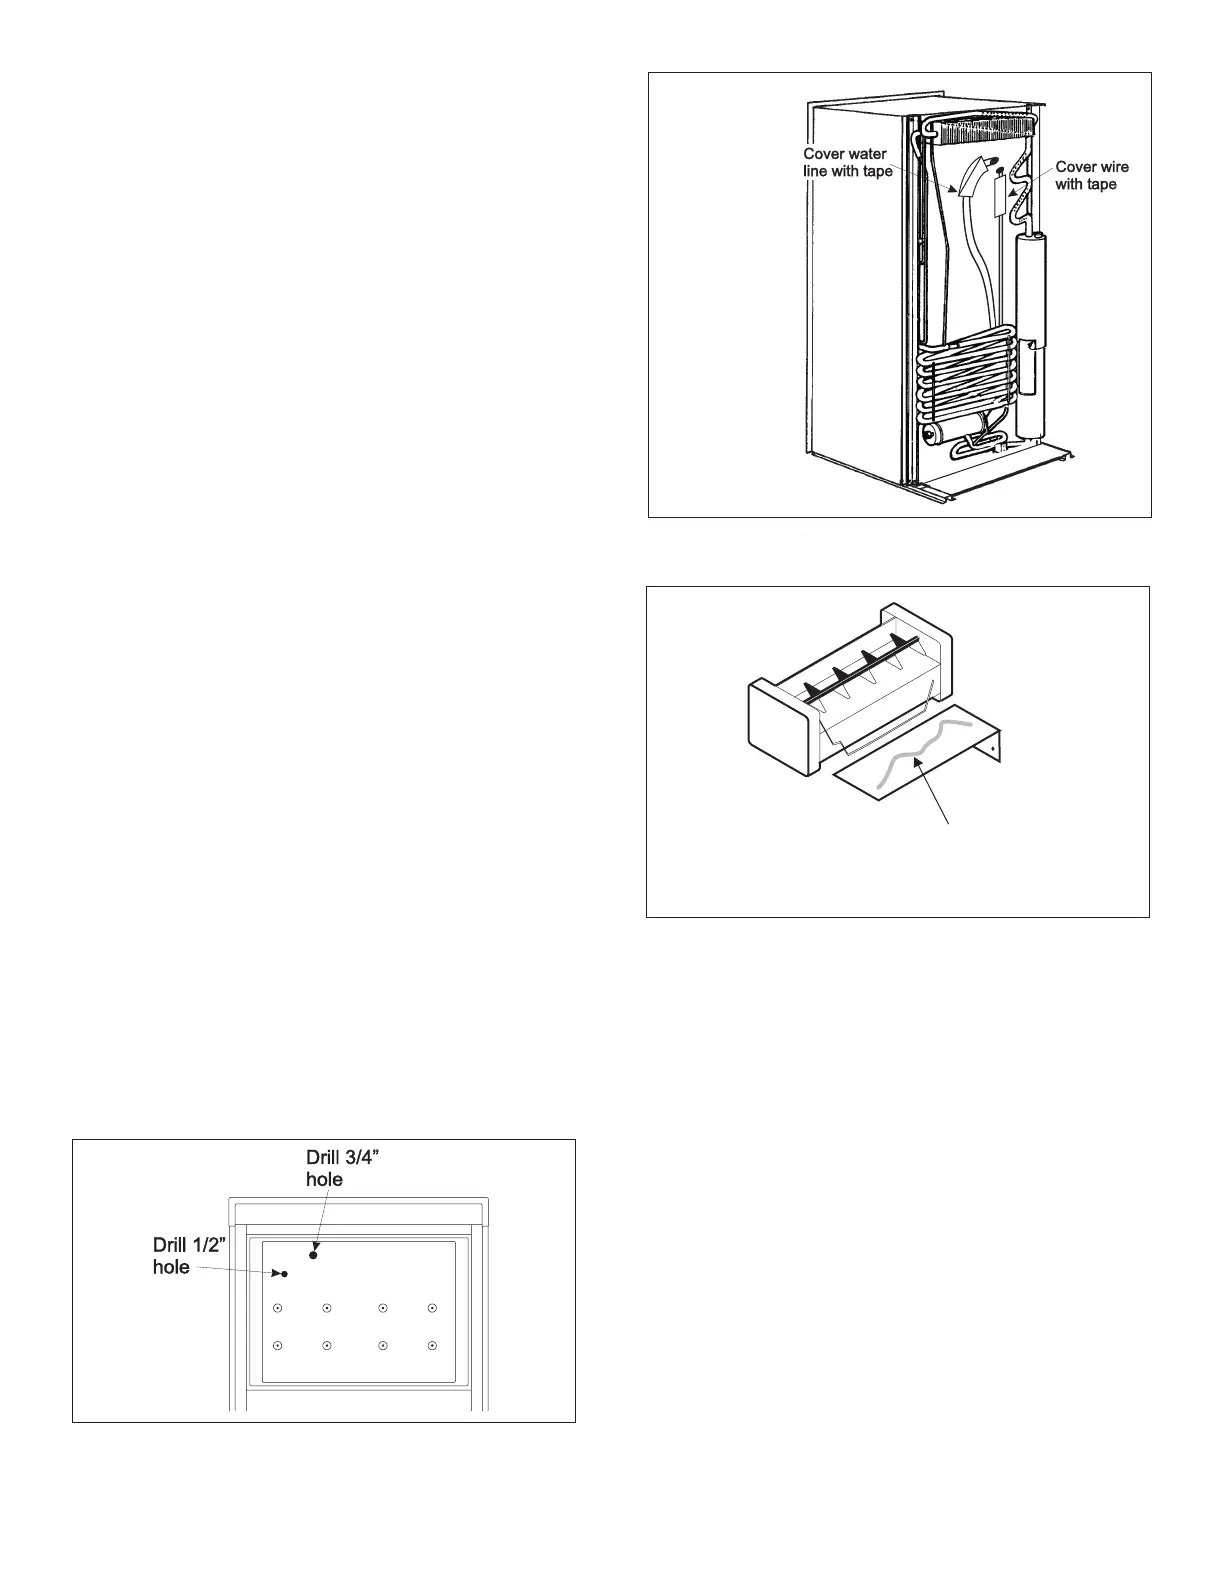
1. Before the shelves and other interior parts are placed into
the cabinet, the opening for the ice maker water lines and
power cords must be made through the foam block of the
cooling unit. Look at the defective cooling unit to determine
the approximate location and angle to drill the hole in the
new cooling unit. The two holes are drilled from the interior
of the cabinet out through the rear of the refrigerator. Use
a 1/2” and 3/4” by 8” long drill bit to make the two holes. Be
careful not to drill into any refrigerant lines, causing a leak.
See FIG. B5.
2. The wire harness is routed from the inside of the freezer
compartment through the 1/2” hole. Pull the wire harness
through the back wall of the freezer compartment. Leave
sufficient length of wires (approx. 8”) to connect to the
cycle. Follow the same path that was used before by the
wire harness and reconnect it to the solenoid and power
cord.
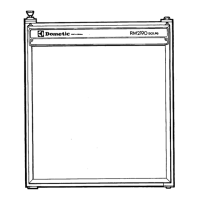
3. Route the water line from the water solenoid up the rear of
the refrigerator. Insert the fill tube from the rear through the
3/4” hole. Use permagum to make an air tight seal around
the wire harness and water fill tube. If water line is not
attached to the fill tube it should be connected now. Make
sure that the same routing is followed between the water
solenoid and fill tube. If the water line has heat tape, be
sure it is in place. Use aluminum foil tape to cover and seal
the water line and wire harness to the back of the cabinet.
See FIG. B6.
4. Spread a thin layer of thermomastic on ice maker shelf.
See FIG. B7. Plug the wire harness to the ice cycle. Install
the cycle using the screws removed. Make sure the end
of the water fill tube will allow water to enter the cycle inlet,
and is free from touching the sides or bottom. This will
allow the water to drain completely out of the fill tube and
prevent freezing.
5. Return to Step 2 (Installation of cooling unit), #3 of this
section.
FIG. B5
FIG. B6
SPREAD A THIN
LAYER OF
THERMOMASTIC
ON ICE MAKER SHELF
SPREAD A THIN
LAYER OF
THERMOMASTIC
ON ICE MAKER SHELF
FIG. B7
 Loading...