5
C. Category #3
NDR1272 **NDR1282 NDR1292
NDR1492 RM1272 **RM1282
** (Ice Maker Cycle/Compressor Operated)
STEP 1. REMOVAL OF COOLING UNIT
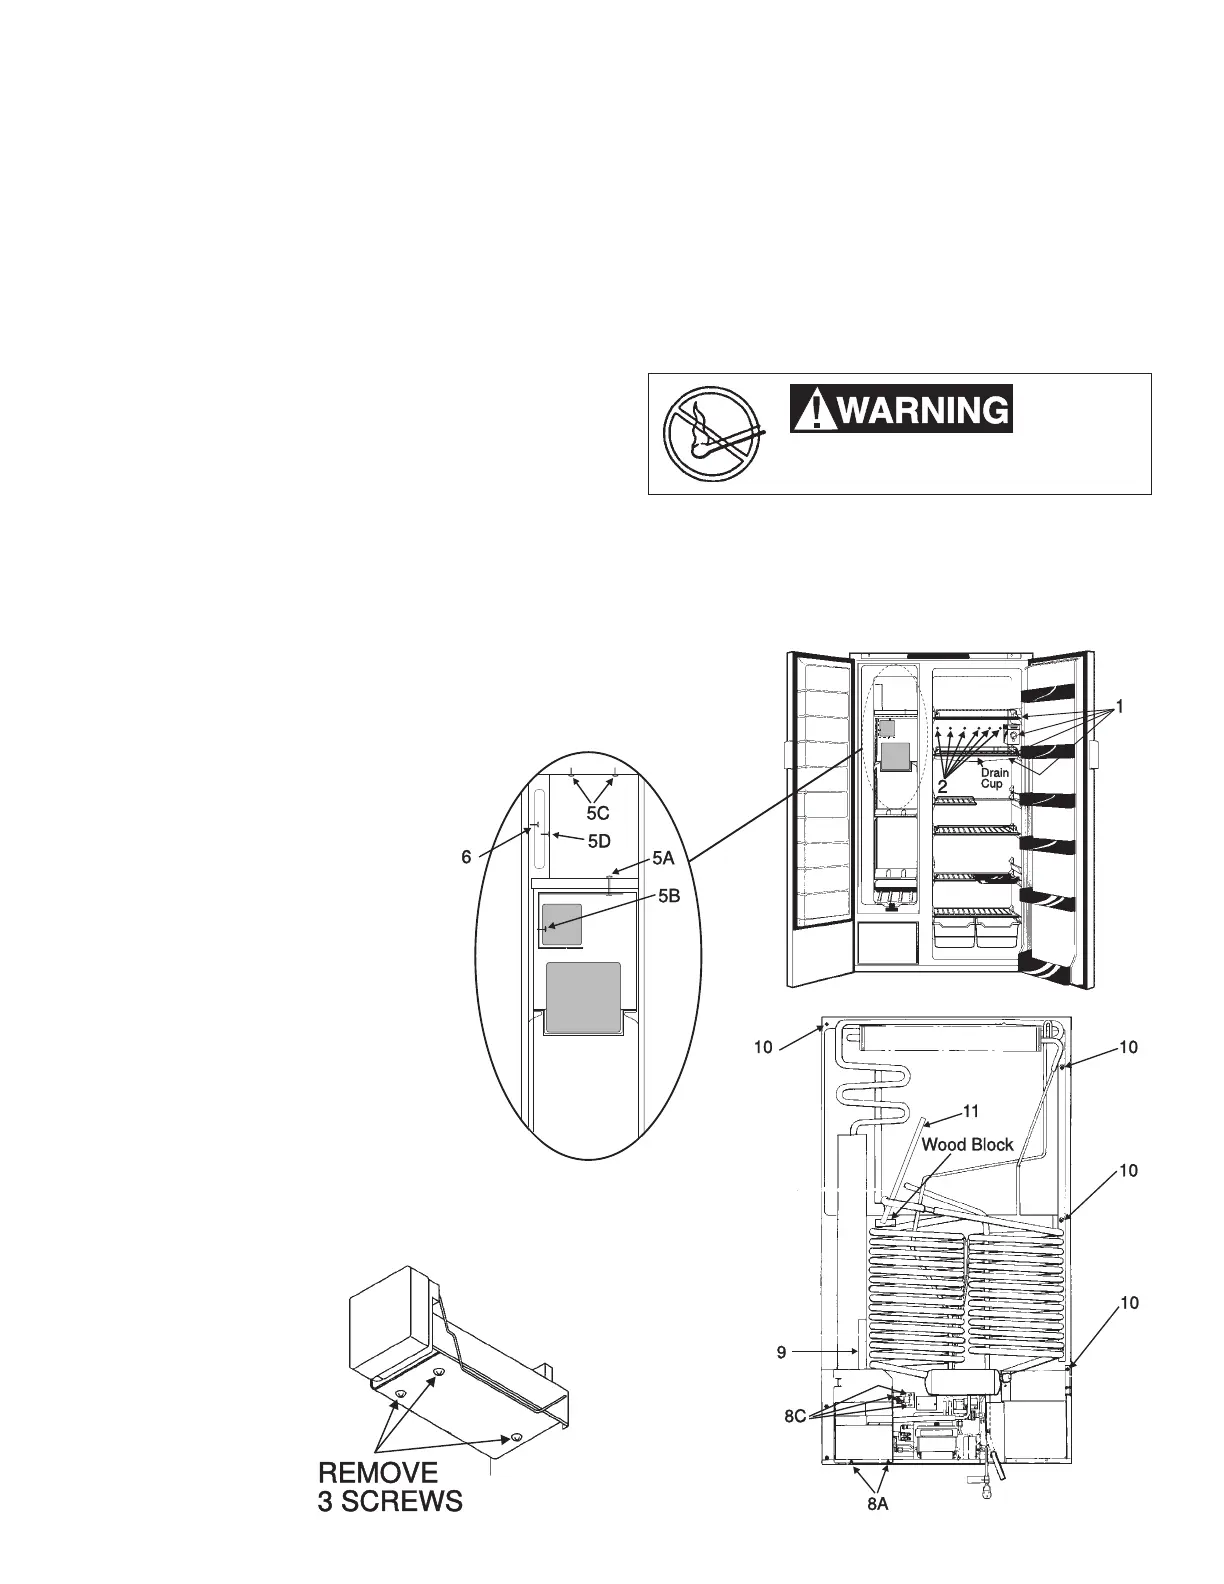
1. See General Instructions for all models.
2. Remove the two top shelves and drip tray. Disconnect
interior light from side of refrigerator. Remove thermistor
with bracket from fins (FIG. C1).
3. Remove cooling fins - right side first (6 screws). Pull
out drain cup and remove tube (FIG. C1).
4. Models with Ice Maker: Remove cycle from shelf
plate (3 screws) (FIG. C2). Lift cycle off shelf. Unplug
the cable and move out of cabinet until you are ready
to reinstall. Disconnect the electrical cable from back
of refrigerator and pull out from inside.
5. All Models: Follow Steps 5 – 11.
6. Remove freezer plates (FIG. C3).
A.Two screws with nuts (hexagon)
B.Two screws (side)
C. Two screws (top)
D. Two screws (side)
7. After freezer plates are re moved, take out 4 screws
holding the cooling unit to circulation tube (FIG. C3).
Remove plastic cover plate on the back of freezer.
8. Lay refrigerator face down on two 2x4’s to protect
handles and frame from damage.
9. Removal of controls at rear of refrigerator (FIG. C4).
A.Two screws (plate protections)
B.Two screws (mounting plate circuit board
- (not shown)
C.Three screws (gas valve bracket)
D.Three screws (burner assembly -
not shown)
10. Remove heater cover, heaters (2) and any
other parts that interfere with the removal
of cooling unit.
Note: Before cooling unit is placed in the
refrigerator cabinet, check the tapped screw
holes. See FIG C3 #6. Paint can fill the
holes and make replacement of screws
impossible. See FIG. C4.
11. Remove screws holding cooling unit to the
cabinet (5).
12. Apply leverage as shown and pull out (FIG. C4).
13. Remove the ground wire (white) from bottom of old
cooling unit and place on new one.
FIG. C3
FIG. C1
FIG. C4
FIG. C2
STEP 2. INSTALLATION OF COOLING UNIT
1. Refer to section A Category #1, Step 2, 1–5.
2. Place cooling unit in cabinet and replace screws.
3. Replace components removed in Step 1, 9–11, FIG.
C4.
4. Stand refrigerator upright. Transfer flue baffle to the
new cooling unit. Replace inside parts removed in
Step 1, 2–4.
5. Check for proper cooling before installing refrigerator
back into coach. (See “Important” on Page 1).
6. Install refrigerator back into coach and leak check all
gas fittings. Repair all gas leaks.
Do not use a flame
to check for gas leaks.
 Loading...