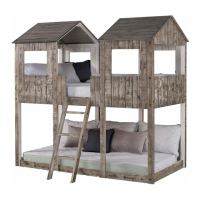
Do you have a question about the Donco 3225TT and is the answer not in the manual?
| Brand | Donco |
|---|---|
| Model | 3225TT |
| Category | Indoor Furnishing |
| Language | English |
Adherence to all safety warnings and precautions for safe assembly and use of the bunk bed.
List and visual guide of all components and hardware required for assembly.
Attaching top front rails and side rails to the main posts for the lower bunk structure.
Connecting main posts and assembling the lower bunk headboards on the floor.
Attaching guardrails to the bunk bed frame using specific hardware.
Securing the lower bunk frame by tightening all previously attached screws.
Connecting the upper bunk support beams using specific hardware for structural integrity.
Attaching the upper guardrails to the frame using specific hardware (H).
Further securing upper guardrails and side panels with specified hardware.
Installing horizontal supports at the mid-level of the bunk bed structure.
Connecting central support beams between the bunk bed towers using specified hardware.
Mounting the main roof panels onto the upper structure of the bunk bed.
Aligning roof panels against a wall and securing them with specified hardware.
Attaching the final roof sections to the bunk bed structure with specified hardware.
Finalizing the roof assembly by attaching remaining panels to the bunk bed.
Assembling the ladder structure using specific components and hardware.
Mounting the assembled ladder securely to the bunk bed structure.
Fixing the bed slats to the frame, adhering to specified spacing requirements.