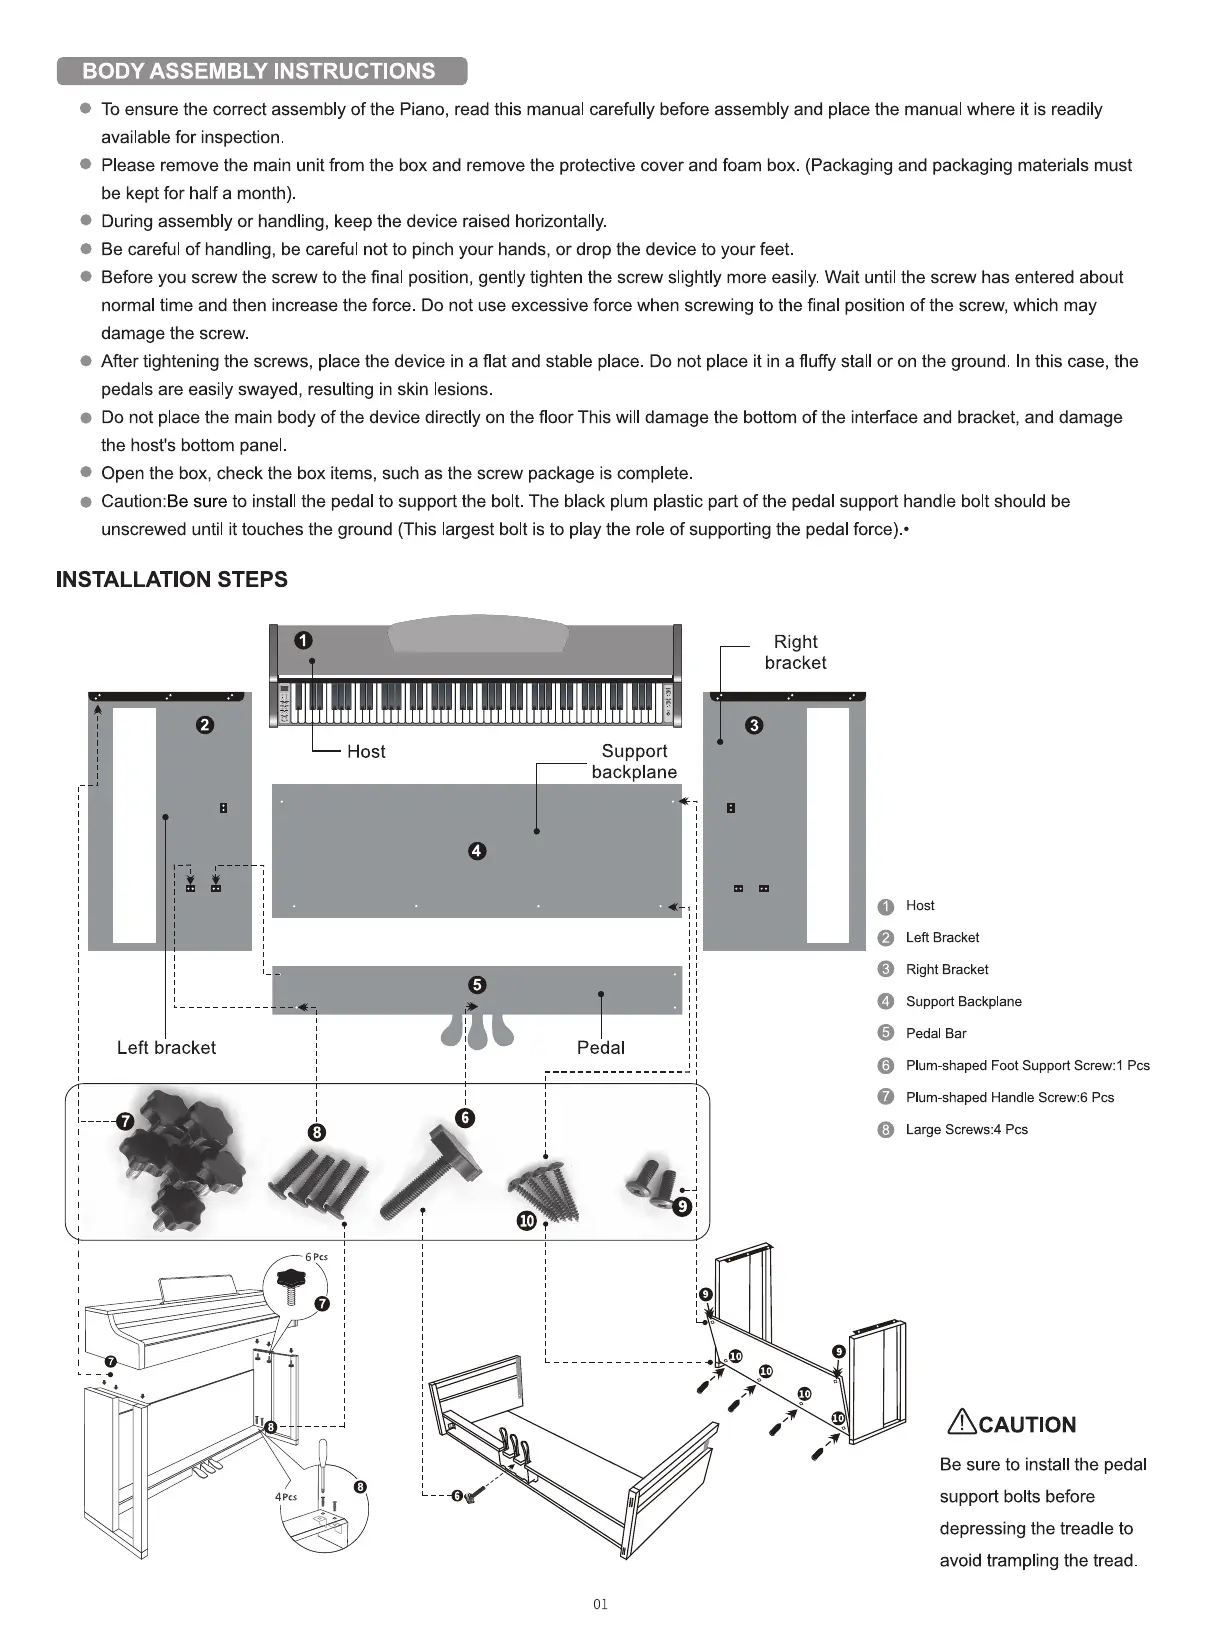
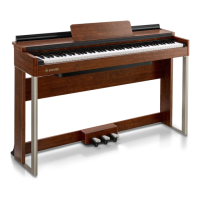
BODY ASSEMBLY INSTRUCTIONS
To ensure the correct assembly of the Piano, read this manual carefully before assembly and place the manual where it is readily
available for inspection.
Please remove the main unit from the box and remove the protective cover and foam box. (Packaging and packaging materials must
be kept for half a month).
During assembly or handling, keep the device raised horizontally.
Be careful of handling, be careful not to pinch your hands, or drop the device to your feet.
Before you screw the screw to the final position, gently tighten the screw slightly more easily. Wait until the screw has entered about
normal time and then increase the force. Do not use excessive force when screwing to the final position of the screw, which may
damage the screw.
After tightening the screws, place the device in a flat and stable place. Do not place it in a fluffy stall or on the ground. In this case, the
pedals are easily swayed, resulting in skin lesions
Do not place the main body of the device directly on the floor This will damage the bottom of the interface and bracket, and damage
the host's bottom panel.
Open the box, check the box items, such as the screw package is complete.
Caution:Be sure to install the pedal to support the bolt. The black plum plastic part of the pedal support handle bolt should be
unscrewed until it touches the ground (This largest bolt is to play the role of supporting the pedal force).•
INSTALLATION STEPS
Right
bracket
Host
Left bracket
Support
backplane
pedal
01
8
6 Pcs
11 .
4 pcs
11
o
o
o
o
O
o
Host
Left Bracket
Right Bracket
Support Backplane
Pedal Bar
Plum-shaped Foot Support Screw: 1 Pcs
Plum-shaped Handle Screw:6 Pcs
Large Screws:4 Pcs
ACAUTION
Be sure to install the pedal
support bolts before
depressing the treadle to
avoid trampling the tread.