This document provides comprehensive instructions for operating and maintaining a motorized screen using a DC2700 single-channel remote. The system is designed for ease of use, allowing users to control the screen's movement, set specific limits, and program preferred positions with simple button presses.
Function Description
The motorized screen system allows for automated control of a projection screen, enabling it to be raised, lowered, and stopped at various positions. The core functionality revolves around the DC2700 remote, which transmits commands to the screen's motor. Key functions include:
- Pairing: Establishing a connection between the remote and the motor.
- Direction Switching: Reversing the screen's operational direction if the initial setup causes it to move contrary to expectations (e.g., pressing "UP" makes it go down).
- Limit Setting: Defining the absolute upper and lower boundaries of the screen's travel to prevent overextension or retraction into its housing.
- Preferred Position Setting: Programming a specific intermediate position where the screen can be quickly deployed or retracted to, without needing to manually stop it each time.
- Limit Adjustment: Fine-tuning previously set upper and lower limits.
- Limit Deletion: Erasing all programmed upper and lower limits, useful for a complete reset or when relocating the screen.
- Remote Management: Pairing additional remotes to control the same screen or removing all paired remotes from the motor's memory.
- Motor Mode Switching: A specific function to change the operational mode of the motor, though the exact modes are not detailed in this document.
The system is designed with user feedback in mind; the motor will "jog" (move slightly) and "beep" to confirm commands and indicate successful operations, guiding the user through the programming process. A crucial operational detail is the 6-second delay time between button presses during programming; if no input is received within this window, the remote will exit the current setting procedure, requiring the user to restart.
Usage Features
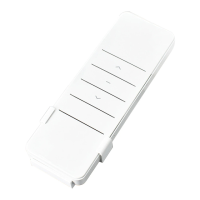
The DC2700 remote offers intuitive control over the motorized screen through a series of button combinations and timed presses.
- Basic Movement: Dedicated UP, DOWN, and STOP buttons allow for straightforward control of the screen's movement.
- Pairing the Remote: To pair the remote, power must be applied to the motor. Within 7 seconds, pressing the STOP button for 2 seconds (indicated by 2 jogs and 3 beeps from the motor) will successfully pair the remote. This quick pairing process ensures the system is ready for use shortly after installation.
- Switching Rotation Direction: If the screen moves in the opposite direction to the remote's commands (e.g., UP button makes it go down), the rotation direction can be switched. This is achieved by simultaneously pressing the UP and DOWN buttons for 2 seconds. The motor will jog once, confirming the successful reversal of direction. This feature is particularly useful during initial setup to correct any wiring or motor orientation discrepancies. It's important to note that this operation requires the motor to be in a state without limits already set.
- Setting Upper and Lower Limits:
- Upper Limit: The screen is first moved to the desired upper position using the UP button. Then, pressing and holding the UP and STOP buttons simultaneously for 2 seconds (confirmed by 2 jogs and 3 beeps) sets the upper limit.
- Lower Limit: Similarly, the screen is moved to the desired lower position using the DOWN button. Pressing and holding the DOWN and STOP buttons simultaneously for 2 seconds (confirmed by 2 jogs and 3 beeps) sets the lower limit.
These limits are fundamental for safe and consistent operation, preventing the screen from rolling too far up into its housing or unrolling excessively.
- Adjusting Limits: If the initial limits need fine-tuning:
- Adjusting Upper Limit: Press and hold UP + STOP simultaneously for 5 seconds (1 jog, 1 long beep). The system then prompts a repeat of the upper limit setting procedure (step 3), allowing for precise adjustment.
- Adjusting Lower Limit: Press and hold DOWN + STOP simultaneously for 5 seconds (1 jog, 1 long beep). This prompts a repeat of the lower limit setting procedure (step 3), enabling fine-tuning of the lower boundary.
This adjustment feature is valuable for adapting to changes in room setup or screen usage requirements without needing to delete all limits and start over.
- Setting a Preferred Position: This advanced feature allows users to program an intermediate stop point for the screen. After ensuring both upper and lower limits are set, the screen is moved to the desired preferred position. The sequence to set this is: Press P2 (1 jog and 1 beep), then STOP (1 jog and 1 beep), and finally STOP again (2 jogs and 3 beeps). This creates a shortcut for frequently used screen positions, enhancing convenience.
- Removing a Preferred Position: If a preferred position is no longer needed, it can be deleted. The sequence is: Press P2 (1 jog and 1 beep), then STOP (1 jog and 1 beep), and finally STOP again (1 jog and 1 long beep). This provides flexibility in managing screen presets.
- Deleting All Limits: For a complete reset of the screen's travel boundaries, all limits can be removed. This involves pressing P2 (1 jog and 1 beep), then DOWN (1 beep), and finally P2 again (2 jogs and 3 beeps). This is useful when moving the screen to a new location or troubleshooting complex limit issues.
- Pairing Additional Remotes: To control the screen with multiple remotes, additional DC2700 units can be paired. Using an already paired remote, press P2 (1 jog and 1 beep), then P2 again (1 jog and 1 beep). Immediately after, on the new remote, press P2 (2 jogs and 3 beeps). This links the new remote to the motor. This process can be repeated for any number of additional remotes, offering multi-point control.
- Removing All Remotes: To clear all paired remotes from the motor's memory, press P2 (1 jog and 1 beep), then STOP (1 jog and 1 beep), and finally P2 again (2 jogs and 3 beeps). This is useful for security or when replacing all remotes.
- Motor Mode Switching: The document mentions a "Motor Mode Switching" function, initiated by pressing P2 (1 jog and 1 beep), then UP (1 jog and 1 beep), and finally UP again (1 jog and 1 long beep). While the specific modes are not detailed, this indicates the motor may have different operational profiles that can be selected.
Maintenance Features
The troubleshooting section of the manual provides guidance on common issues and their solutions, effectively outlining maintenance procedures and diagnostic steps for the motorized screen system.
- No Response from Motor:
- Possible Cause: No power or poor wire connection.
- Solution: Check power supply and all wire connections to ensure they are secure and providing adequate power. This is a fundamental first step for any electrical device.
- Possible Cause: Remote battery low.
- Solution: Replace the battery in the remote control. A dead or weak battery is a common reason for unresponsive remotes.
- Possible Cause: RF Interference.
- Solution: Check the motor antenna for any obstructions or damage. Also, investigate for other sources of radio frequency interference in the vicinity that might be disrupting the remote's signal. This could involve temporarily turning off other wireless devices to isolate the issue.
- Possible Cause: Out of remote control range.
- Solution: Move the remote control closer to the motorized unit. The remote has a limited operational range, and exceeding it will prevent commands from being received.
- Motor Starts Slow or Makes Loud Noise:
- Possible Cause: Incorrect installation or overload.
- Solution: Verify that the screen has been installed correctly and is level. Incorrect installation can put undue stress on the motor, leading to inefficient operation or noise. An overload might suggest the screen is too heavy for the motor's capacity or there's an obstruction.
- Motor Stops During Travel (Motor Reached Limit):
- Possible Cause: Motor has reached a programmed limit.
- Solution: This is expected behavior if the screen reaches its set upper or lower limit. No action is required unless the limits are incorrectly set, in which case they should be adjusted.
- Motor Stops During Travel (Run Time Exceeds 4 Minutes):
- Possible Cause: Internal thermal fuse activated.
- Solution: Allow the motor to cool down. Motors are often equipped with thermal protection to prevent overheating. If the motor runs continuously for an extended period (e.g., 4 minutes), it might trigger this fuse. Once cooled, it should reset automatically.
- Screen Does Not Reach Lower Limit or Goes Too Far Into Housing:
- Possible Cause: Screen has re-wrapped itself.
- Solution: This indicates an issue with the screen material itself, where it might have rolled up incorrectly on the internal tube. The solution involves removing the hood of the screen housing to inspect for re-wrap. If found, the limits might need to be "broken" (deleted) to allow manual manipulation of the screen to relieve the re-wrap, and then new limits set. This is a more involved maintenance task that might require careful handling to avoid damaging the screen material.
These troubleshooting steps empower users to diagnose and resolve common operational issues, ensuring the longevity and reliable performance of the motorized screen system. Regular checks of power, remote battery, and proper installation are implicit in these maintenance guidelines.