ASSEMBLY INSTRUCTIONS
Find a clean disinfected environment to work in. Practice hand hygiene using hand
sanitizer or soap and water.
Don a pair of clean gloves and don a face mask for the assembly process.
Inspect the respirator body (including filter), clips and strap, to ensure nothing is
damaged or dirty, as above.
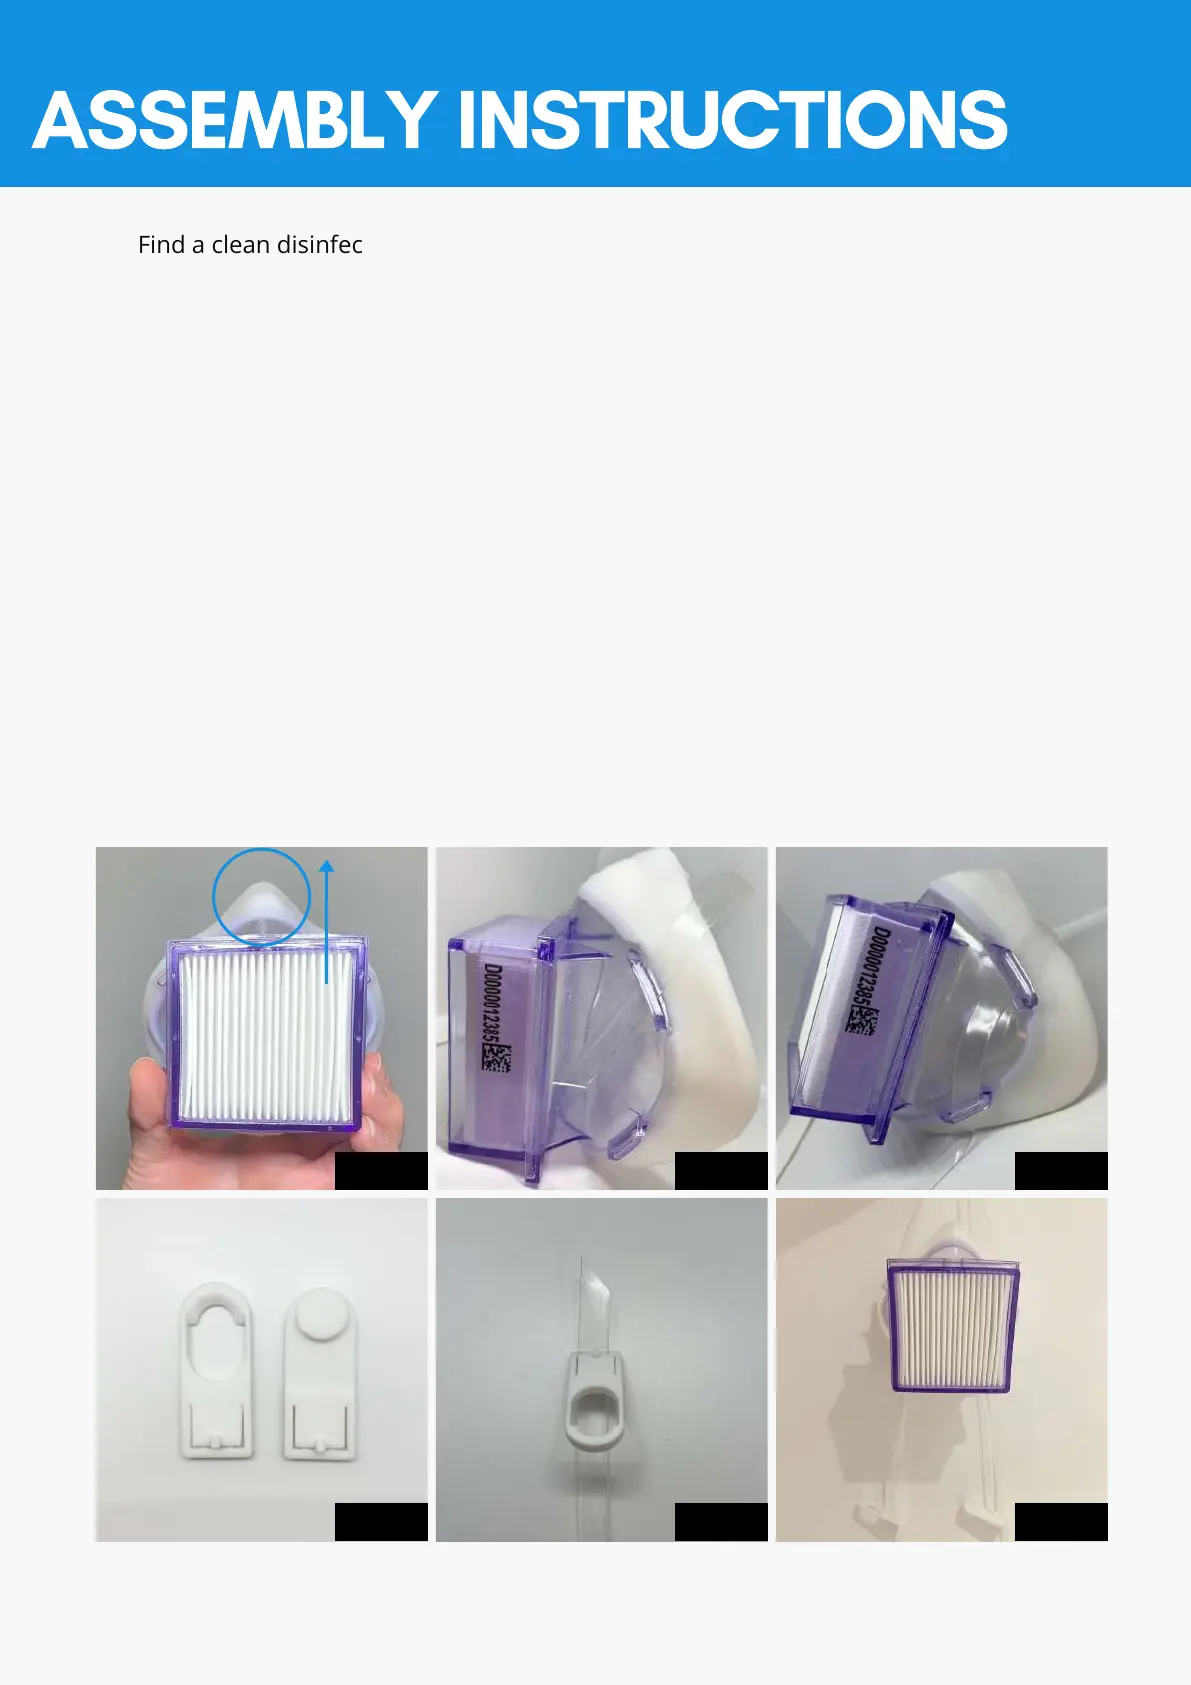
On the respirator body, identify the nose feature, this will indicate the top part of the
respirator (Fig. 1). Select a strap. With the printed lot number facing up, thread the
end of the strap under the upper left strap eyelet (Fig. 2) and then through the lower
left strap eyelet. Take the other end of the strap, check the strap is not twisted, and
thread through the upper right eyelet, then lower right strap eyelet (Fig. 3).
Thread the left strap through clip A (Fig. 4, 5) . Thread the right strap through clip B
(Fig. 4, 5).
Do a final inspection of the respirator with all components assembled to ensure
everything has been assembled properly.
Once final inspection is complete (Fig. 6), this respirator is ready to be used.
1.
2.
3.
4.
5.
6.
7.
Fig. 1 Fig. 2 Fig. 3
Fig. 4 Fig. 5 Fig. 6
A B