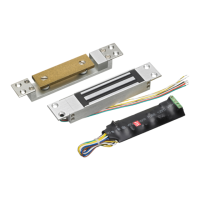
M9000 MORTISE LOCK
—
Installation Instructions
76013499 07/2015www.dorma.com
Tools required for installation
#2 Cross drive screwdriver
1. Install chassis
1.1 Place the chassis into
the door edge.
Orient such that the
beveled edge of
the latch faces the
door jamb.
1.2 Secure with two
12-24x1” combo
screws.
M9000 with H escutcheon trim part list
1 - 10-32x1-¼ ” screws
2 - Inside escutcheon assembly
3 - Chassis
4 - 12-24x1” combo
screws
5 - Armor plate
6 - 8-32x¼ ” screws
7 - Outside escutcheon
assembly
8 - Mortise cylinder
1
Beveled
edge
Overall Exploded View
M9000 with rose part list (sectional trim)
1 - Inside rose
2 - 10-32x1-¼ ” screws
3 - Inside rose assembly
4 - 6-32x⅜ ” screws
5 - Thumb turn
6 - Chassis
7 - 12-24x1” combo screws
8 - Armor plate
9 - 8-32x¼ ” screws
10 - Outside rose assembly
11 - Cylinder ring
12 - Wave washer
13 - Mortise cylinder
1
8
7
6
5
43
2
1
12
11
10
9
8
7
6
54
32
13
2
2. Install inside escutcheon or trim
Inside rose trim
2.1B Place the inside lever assembly against the
face of the door and secure using two
10-32x1-¼ ” screws.
2.2B Press the rose onto the insert, oriented with the
dimples on the sides.
2.3B Secure the thumb turn to the door using two
6-32x
⅜ ” screw.
Ensure that the spindle and thumb turn engage
the mortise chassis.
Inside escutcheon
2.1A Place the escutcheon against the
face of the door and secure
using two 10-32x1-¼ ” screws.
Ensure that the spindle and
thumb turn engage the mortise
chassis.
10-32x1-¼ ”
6-32x
⅜ ”
10-32x1-
¼ ”
Inside rose
assembly
Rose dimple
Inside escutcheon
assembly
Spindle
Thumb turn
Thumb turn
Spindle