EasyManua.ls Logo

Doro 2414 - User Manual

Doro 2414
9 pages
Print Icon
To Next Page IconTo Next Page
Loading...
www.doro.com
Insert SD card (optional)
GB
Locate the SD card holder
and gently slide the card
in the holder.
Note! The circuit
boards (metal part) on
the cards must not be
scratched or bent. Try
not to touch the circuits with your ngers.
Use only compable memory cards with
this device. Compable card type: microSD,
microSDHC. Incompable cards may damage
the card itself, the device and corrupt any
data stored on the card.

Insert the baery by
sliding it into the baery
compartment with the
circuits facing up to the
le. Replace the baery
cover.
3. CALLS
Make a call
1. Enter the phone number. Delete with Clear.
2. Press to dial. Press Abort to cancel
the call.
3. Press to end the call.
Note! For internaonal calls, always use +
before the country code for best operaon.
Press
*
twice for the internaonal prex +.
Call from the phonebook
1. Press Name to open the phonebook.
2. Use / to scroll through the
phonebook, or quick search by pressing the
key corresponding to the rst leer of the
name.
3. Press  â Call, alternavely, press
to dial the selected entry, or press
Back to return to standby.
4. PHONEBOOK
The Phonebook can store 300 entries with 1
phone numbers in each entry.
Add a contact
1. Press Menu â Phonebook â
-New contact- â OK.
2. Enter a Name for the contact, see Enter
text. Delete with Clear.
3. Use / to select Number and
enter the phone number.
4. When done, press Save.
Doro 2414
Quick Start Guide
1. Speaker
2. Scroll buons
3. Le selecon buon
4. Call key
5. Speed dial A
6. Speed dial B
7. Internaonal prex /
symbols/
*
/8
8. Right selecon
buon
9. End call /
Power on/
10. Camera key
11. Microphone
12. Silent / Input
method/
#
/9
13. Torch/Camera ash
14. Headset socket
15. Torch key
16. Charging cradle
connectors
17. Camera lens
18. Lanyard hold
19. Assistance buon
20. Volume
21. Loudspeaker
22. Charging socket
1. GET STARTED


Be careful not to damage
your ngernails when
you remove the baery
cover. Do not bend or
twist the baery cover
excessively as it may be
damaged.
Insert SIM card (required)
Remove the baery if it
is already installed. Slide
the card under the metal
part, with the gold-col-
oured circuit board facing
down. The cut-o corner
of the card helps you to
place the card, correct placement is indicated
in the compartment.
Note! This device accepts micro SIM or 3FF
SIM card. Use of incompable SIM cards
may damage the card or the device, and may
corrupt data stored on the card.
Charge the phone
CAUTION
Only use baeries, charger and accessories
that have been approved for use with
this parcular model. Connecng other
accessories may be dangerous and may
invalidate the phone’s type approval and
guarantee.
When the baery is running low, is
displayed and a warning signal is heard.
Connect the mains adapter to the wall
socket and to the charging socket y.
Tip: Don’t forget to remove the protecve
plasc lm from the display.
2. GET TO KNOW YOUR PHONE
Turn the phone on and off
1. Press and hold the red buon on the
phone to turn it on/o. Conrm with Yes to
power o.
2. If the SIM card is valid but protected with a
PIN code (Personal Idencaon Number),
PIN is displayed. Enter the PIN code and
press OK. Delete with Clear.
Note! If PIN and PUK codes were not provided
with your SIM card, please contact your
service provider.
 shows the number of PIN aempts
le. When no more aempts remain, PIN
blocked is displayed. The SIM card must now
be unlocked with the PUK code (Personal
Unblocking Key).
1. Enter the PUK code and conrm with OK.
2. Enter a new PIN code and conrm with OK.
3. Re-enter the new PIN code and conrm
with OK.
Start-up wizard
When starng the telephone for the rst me,
you can use the start-up wizard to set some
basic sengs.
Tip: You can run the start-up wizard later if
you want.

In this document the arrow (â) indicates next
acon in the step-by-step instrucons.
To conrm an acon in the phone, press OK.
To select an item, scroll vercally or highlight
the item using / and then press OK.
To scroll horisontally, use
*
(8 ) or
#
( 9).
Enter text
Press a numerical key repeatedly unl the
desired character is shown. Wait a few
seconds before entering the next character.
Press
*
for a list of special characters.
Select the desired character with /
and press OK to enter it.
Use / to move the cursor within the
text.
Press
#
to cycle upper case, lower case and
numerals.
Change language, time and date
The default language is determined by the SIM
card.
Receive a call
1. Press to answer, or press Silent to
switch o the ring signal and then Reject
(busy signal).
Alternately, press to reject the call
directly.
2. Press to end the call.
Volume control
Use / to adjust the sound volume
during a call. The volume level is indicated on
the display.
Silent
Silent is a xed prole with keypad tone,
message tone and ring tone disabled, while
vibraon, tasks and alarm are unchanged.
Press and hold
#
to acvate and to
deacvate silent.
Call options
During a call the so keys ( ) give access to
addional funcons.
Speed dial
Use
2
9
to speed dial an entry from standby.
Press and hold the corresponding buon to
dial.
Add speed dial numbers
1. Press Menu â Phonebook â.
2. Use / to scroll through the
phonebook, or quick search by pressing the
key corresponding to the rst leer of the
name.
3. â  â â
Speed dial â Set number.
4. Select
2
â Edit and select an entry from
the phonebook.
5. Press OK to conrm.
6. Repeat to add speed dial entries for buons
2
9
.
SOS calls
As long as the phone is switched on, it is always
possible to place an SOS call by entering the
main local emergency number for your present
locaon followed by .

Received, missed, and dialled calls are saved in
a combined call log. 20 calls of each type can
be stored in the log. For mulple calls related
to the same number, only the most recent call
is saved.
1. Press .
2. Use / to scroll through the call log.
= Received call
= Dialled call
= Missed call
3. Press to dial, or .

In the event of a trauma, it is crical to have
this informaon as early as possible to increase
the chances of survival. Add ICE contact to
improve your own safety. First responders
can access addional informaon such as
medicaon and next of kin from your phone in
case of an emergency. All elds are oponal,
but the more informaon provided the beer.
Press Menu â Phonebook â ICE.
1. Use / to scroll the list of entries.
2. Press Edit to add or edit informaon in each
entry. Delete with Clear.
3. Press Save when done.
5. ASSISTANCE BUTTON
The assistance buon allows easy access to
contact your predened help numbers should
you need help. Make sure that the assistance
funcon is acvated before use and make all
necessary conguraons.Test the applicaon
thoroughly.
Make an assistance call
1. When help is needed, press and hold the
assistance buon for 3 seconds, or press it
twice within 1 second.
The assistance call begins aer a delay of
5 seconds. In this me you can prevent a
possible false alarm by pressing .
2. An assistance text message (SMS) is sent to
all recipients. The rst recipient in the list
is dialled. If the call is not answered within
25 seconds, the next number is dialled.
Dialling is repeated 3 mes or unl the call
is answered, or unl is pressed.
CAUTION
When an assistance call is acvated the phone
is pre-set to handsfree mode. Do not hold
the device near your ear when the handsfree
mode is in use, because the volume may be
extremely loud.
Settings
Press Menu â  â Assistance.
6. MESSAGES
Create and send text messages
1. Press Menu â Messages â Write
message.
2. Write your message.
3. Then press  â To.
4. Select a recipient with Add from Phonebook.
Alternavely, select Enter number to add
recipient manually and press OK.
5. You can modify the recipients by selecng
one and press  â Edit/Delete/
Delete all.
6. When done, press  â Send.
Create and send picture messages
Both you and the recipient must have sub-
scripons that support picture message. The
sengs for picture message are supplied by
your service provider and can be sent to you
automacally via text message.
Press Menu â Messages â MMS.
1. Write your message, see Enter text.
2. Press  â Add picture:
 to select a le.
Note! To keep best picture quality, send only
one picture per message.
You can also Add sound, Add video, and
Preview MMS using the  menu.
3. Press  â Add subject and enter
your subject, then press Done.
4. Press  â To and select select a
recipient with Add from Phonebook.
Alternavely, select Enter recipient to add
recipient manually and press OK.
5. When done, press  â Send.
Settings
Press Menu â Messages â Messages â
SMS / MMS.
English
Note! All illustraons are for illustrave
purposes only and may not accurately depict
the actual device. This guide is for reference
only. This guide is for reference only. The actual
device and the items supplied, including but
not limited to the colour, size, and screen
layout, may vary depending on the soware
and accessories available in your region or
oered by your service provider. Supplied
accessories provide the best performance with
your phone. Your local Doro dealer provides
addional accessories.
A B
1
8
9
10
6
11
12
19
21
22
16
3
4
5
7
2
15
14
18
20
13
17
Question and Answer IconNeed help?

Do you have a question about the Doro 2414 and is the answer not in the manual?

Summary

GET STARTED

SIM card, memory card and battery

Guide for inserting SIM, memory, and battery into the device.

Charge the phone

GET TO KNOW YOUR PHONE

Turn the phone on and off

Steps to power the phone on and off, including PIN code entry.

Start-up wizard

Guide to initial phone setup using the start-up wizard.

CALLS

Make a call

Instructions on how to dial numbers and initiate calls.

Receive a call

How to answer or reject incoming calls and control volume.

Speed dial

Setting up and using speed dial numbers for quick calling.

SOS calls

Procedures for making emergency SOS calls.

PHONEBOOK

Add a contact

Steps to add new contacts to the phonebook.

ASSISTANCE BUTTON

Make an assistance call

How to use the dedicated button for emergency assistance.

MESSAGES

Create and send text messages

Guide to composing and sending SMS messages.

Create and send picture messages

Instructions for creating and sending MMS messages.

CAMERA (TAKE PHOTOS)

Camera settings

How to adjust camera settings and take photos.

BLUETOOTH

Activate Bluetooth

Steps to turn on and manage Bluetooth connectivity.

Search device

How to search for and connect to Bluetooth devices.

SOUND & DISPLAY

Tone setup

Customizing ringtones and notification sounds.

LCD backlight

Adjusting screen brightness and backlight duration.

ADDITIONAL FUNCTIONS

Alarm

Setting and managing alarms on the device.

Torch

How to turn the phone's torch on and off.

Resetting the Phone

Instructions for resetting phone settings or all data.

TROUBLESHOOTING

SAFETY INSTRUCTIONS

Network services and costs

Information on network usage, subscriptions, and associated costs.

Operating environment

Guidelines for using the device in different environments and conditions.

Implanted medical devices

Precautions for users with medical implants, like pacemakers.

Areas with explosion risk

Safety advice for using the phone in potentially explosive environments.

CARE AND MAINTENANCE

WARRANTY

COPYRIGHT AND OTHER NOTICES

TECHNICAL DATA

Specifications

Key technical specifications of the Doro 2414 mobile phone.

Specific Absorption Rate (SAR)

Information on radio wave exposure limits and compliance.

Correct disposal of product

Environmental guidelines for disposing of the product and accessories.

Declaration of Conformity

Statement of compliance with EU directives for radio equipment.

Overview

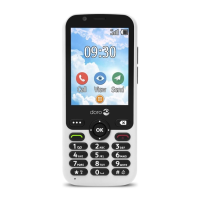
The Doro 2414 is a user-friendly mobile phone designed for ease of use, particularly for individuals who may prefer a simpler interface. This quick start guide provides comprehensive instructions on how to set up, operate, and maintain the device, ensuring a smooth user experience.

Function Description

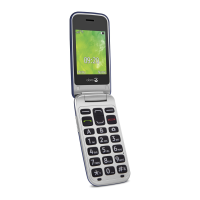
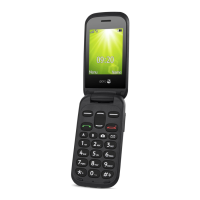
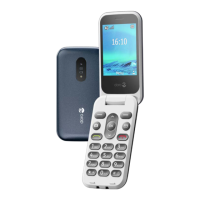
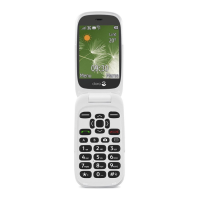
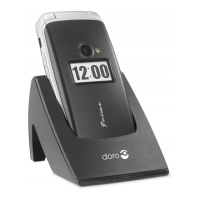
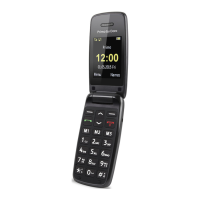
The Doro 2414 serves as a basic mobile phone, primarily focused on communication through calls and text messages. It features a traditional keypad with large, well-spaced buttons, making dialling and text input straightforward. The device includes essential functions such as a phonebook, call history, and an alarm. A notable safety feature is the assistance button, which allows users to quickly contact predefined help numbers in case of an emergency. The phone also incorporates a camera for taking photos, a torch for illumination, and Bluetooth connectivity for pairing with other devices like headsets.

Usage Features

Getting Started:

To begin using the Doro 2414, users first need to install a SIM card (required) and, optionally, an SD card for expanded storage. The battery must then be inserted, and the battery cover replaced. The guide provides clear instructions on how to remove the battery cover without damage, slide in the SIM card (micro SIM or 3FF SIM card type), and gently insert the SD card (microSD, microSDHC compatible). It emphasizes the importance of using compatible cards to prevent damage to the device or data corruption. After inserting the battery, the phone is ready to be charged using the provided mains adapter and charging socket or cradle.

Turning On/Off and PIN Code:

To turn the phone on or off, users press and hold the red button. If a SIM card is protected by a PIN code, the phone will prompt for the PIN. The guide explains how to enter the PIN and confirms that if the PIN is blocked after too many incorrect attempts, the PUK code will be required to unlock it.

Start-up Wizard:

Upon first starting the phone, a start-up wizard guides users through basic settings, simplifying the initial setup process. This wizard can also be run later if needed.

Step-by-step Instructions:

The manual uses an arrow (→) to indicate the next action in step-by-step instructions, making it easy to follow. Actions are confirmed by pressing the OK button. Items can be selected by scrolling vertically using the scroll buttons or highlighting them and pressing OK. Horizontal scrolling is achieved using the * or # buttons.

Text Input:

Entering text is intuitive: users repeatedly press a numerical key until the desired character appears, waiting a few seconds before entering the next character. A list of special characters can be accessed by pressing the * button, and the cursor can be moved within the text using the scroll buttons. The # button cycles between upper case, lower case, and numerals.

Calls:

Making a call involves entering the phone number and pressing the green call key. Calls can be ended by pressing the red end call key. For international calls, the guide advises using the + prefix before the country code, which can be accessed by pressing the * button twice. Calls can also be made directly from the phonebook by selecting a contact and pressing the call key.

Receiving Calls:

To answer an incoming call, users press the green call key. Alternatively, pressing the left selection button allows users to silence the ring signal and then reject the call, or reject it directly.

Volume Control:

During a call, the scroll buttons can be used to adjust the sound volume, with the current level indicated on the display.

Silent Mode:

The phone features a silent profile that disables keypad, message, and ring tones while keeping vibration, tasks, and alarms active. Silent mode can be activated or deactivated by pressing and holding the # button.

Call Options:

During a call, the soft keys provide access to additional functions.

Speed Dial:

The Doro 2414 supports speed dial for numbers 2-9. Users can press and hold the corresponding button from standby to dial a predefined contact. The guide explains how to add speed dial numbers through the Phonebook settings.

SOS Calls:

A critical safety feature, the SOS call function allows users to place an emergency call by entering the local emergency number and pressing the green call key.

Call History:

The phone stores a combined log of received, missed, and dialled calls, with up to 20 entries of each type. For multiple calls from the same number, only the most recent call is saved. Users can scroll through the call log to view entries and redial directly.

Phonebook:

The phonebook can store 300 entries, each with one phone number. Adding a contact involves entering a name and phone number, then saving the entry.

ICE (In Case of Emergency):

The ICE feature allows users to store vital information such as medication and next of kin contacts. This information can be accessed by first responders in an emergency, enhancing safety. Users can edit and save this information through the Phonebook menu.

Assistance Button:

The dedicated assistance button provides quick access to predefined help numbers. When pressed and held for 3 seconds, or pressed twice within 1 second, the phone initiates an assistance call after a 5-second delay, during which a false alarm can be prevented by pressing the red end call button. An assistance text message (SMS) is sent to all recipients, and the phone dials the first recipient. If unanswered, it proceeds to the next number, repeating three times or until a call is answered or the red end call button is pressed. During an assistance call, the phone defaults to handsfree mode, and users are cautioned not to hold the device near their ear due to potentially loud volume.

Messages:

The Doro 2414 supports both text (SMS) and picture (MMS) messages. To create and send a text message, users write their message, select a recipient from the phonebook or enter the number manually, and then send. For picture messages, users can write a message, add a picture from their gallery, and optionally add sound, video, or a subject before sending. Both the user and recipient must have subscriptions that support picture messages.

Camera:

The phone includes a camera for taking photos. Users can access the camera via a shortcut button or the menu, take a photo, and access additional settings through the Options menu.

Bluetooth:

Bluetooth connectivity allows the phone to connect wirelessly to other compatible devices. Users can activate Bluetooth, search for new devices, and bond with them. The guide advises turning off Bluetooth connectivity and visibility when not in use and avoiding pairing with unknown devices.

Sound & Display:

Users can customize tone settings, such as ringtones, by selecting from available melodies. LCD backlight settings, including brightness and time, can also be adjusted.

Additional Functions:

The phone includes an alarm function, which can be set for single occurrences or repeated for specific days. The alarm works even when the phone is switched off. A built-in torch can be turned on or off by sliding a dedicated switch.

Reset Settings:

The phone offers options to reset either specific phone settings to default values or to perform a full reset, which deletes phone settings and content like contacts, number lists, and messages (SIM memory is unaffected). Both reset options require a phone code (default is 1234).

Maintenance Features

Charging the Phone:

The guide emphasizes using only Doro-approved batteries, chargers, and accessories to avoid danger and invalidate the warranty. When the battery is low, a warning signal is heard, and an icon is displayed. Users are instructed to connect the mains adapter to the wall socket and the charging socket. A tip is provided to remove any protective plastic film from the display.

Care and Maintenance:

The Doro 2414 is a technically advanced product that requires careful handling. Negligence can void the warranty. Key maintenance tips include:

  • Protection from Moisture: Keep the unit away from rain, snow, and all types of liquid, as these can corrode electronic circuits. If the unit gets wet, remove the battery and allow it to dry completely before reinserting.
  • Cleanliness: Avoid using or keeping the unit in dusty or dirty environments, as this can damage moving parts and electronic components.
  • Temperature Control: Do not keep the unit in warm places, as high temperatures can reduce battery lifespan, damage components, and distort plastics. Similarly, avoid cold places, as warming up can cause condensation inside the unit, damaging electronic circuits.
  • Physical Handling: Do not attempt to open the unit in any way other than indicated in the manual. Avoid dropping, knocking, or shaking the unit, as rough treatment can break circuits and precision mechanics.
  • Cleaning: Do not use strong chemicals to clean the unit.
  • Troubleshooting: If the phone is not working as expected, users should contact the place of purchase for service and retain their receipt or a copy of the invoice as proof of purchase.

Battery Care:

The product contains a Li-ion battery, and improper handling can pose a risk of fire and burns. Users are warned not to disassemble, crush, puncture, short external contacts, expose to temperatures above 60°C (140°F), or dispose of in fire or water. Used batteries should be recycled or disposed of according to local regulations.

Safety Instructions:

The manual includes important safety instructions, such as keeping small parts out of reach of children, ensuring the mains adapter is easily accessible, and being aware of network services and associated costs. It also details operating environment guidelines, emphasizing turning off the unit where its use is prohibited or could cause interference or hazards. Specific warnings are given regarding medical units (pacemakers, hearing aids), areas with explosion risk (e.g., filling stations, chemical factories), and vehicle safety (airbags).

The document clarifies copyright information, Doro AB's ownership of trademarks, and disclaimers regarding the accuracy and reliability of the document's content. It also states that Doro does not provide warranty or support for third-party apps and warns against unauthorized copying of copyrighted materials.

Doro 2414 Specifications

General IconGeneral
Display diagonal2.4 \
Display resolution320 x 240 pixels
RAM capacity8 MB
Flash card support-
Compatible memory cardsMicroSD (TransFlash)
Rear cameraYes
Rear camera resolution (numeric)3 MP
Data networkGSM
2G bands (primary SIM)900, 1800 MHz
Mobile network generation2G
Bluetooth version3.0+HS
Multimedia Messaging Service (MMS)Multimedia Messaging Service (MMS) is a standard way to send messages that include multimedia content to and from a mobile phone over a cellular network
Ringer typePolyphonic
Talk time (2G)8 h
Battery capacity800 mAh
Standby time (2G)300 h
Standby time (3G)- h
Product colorSilver
Subscription typeNo subscription
Form factorClamshell
Personal info management (PIM)Alarm clock, Calculator, Calendar
Weight and Dimensions IconWeight and Dimensions
Depth18.5 mm
Width52 mm
Height103 mm
Weight89 g

Related product manuals