51
50
CONTENTS
Banknote counter DORS 820 Banknote counter DORS 820
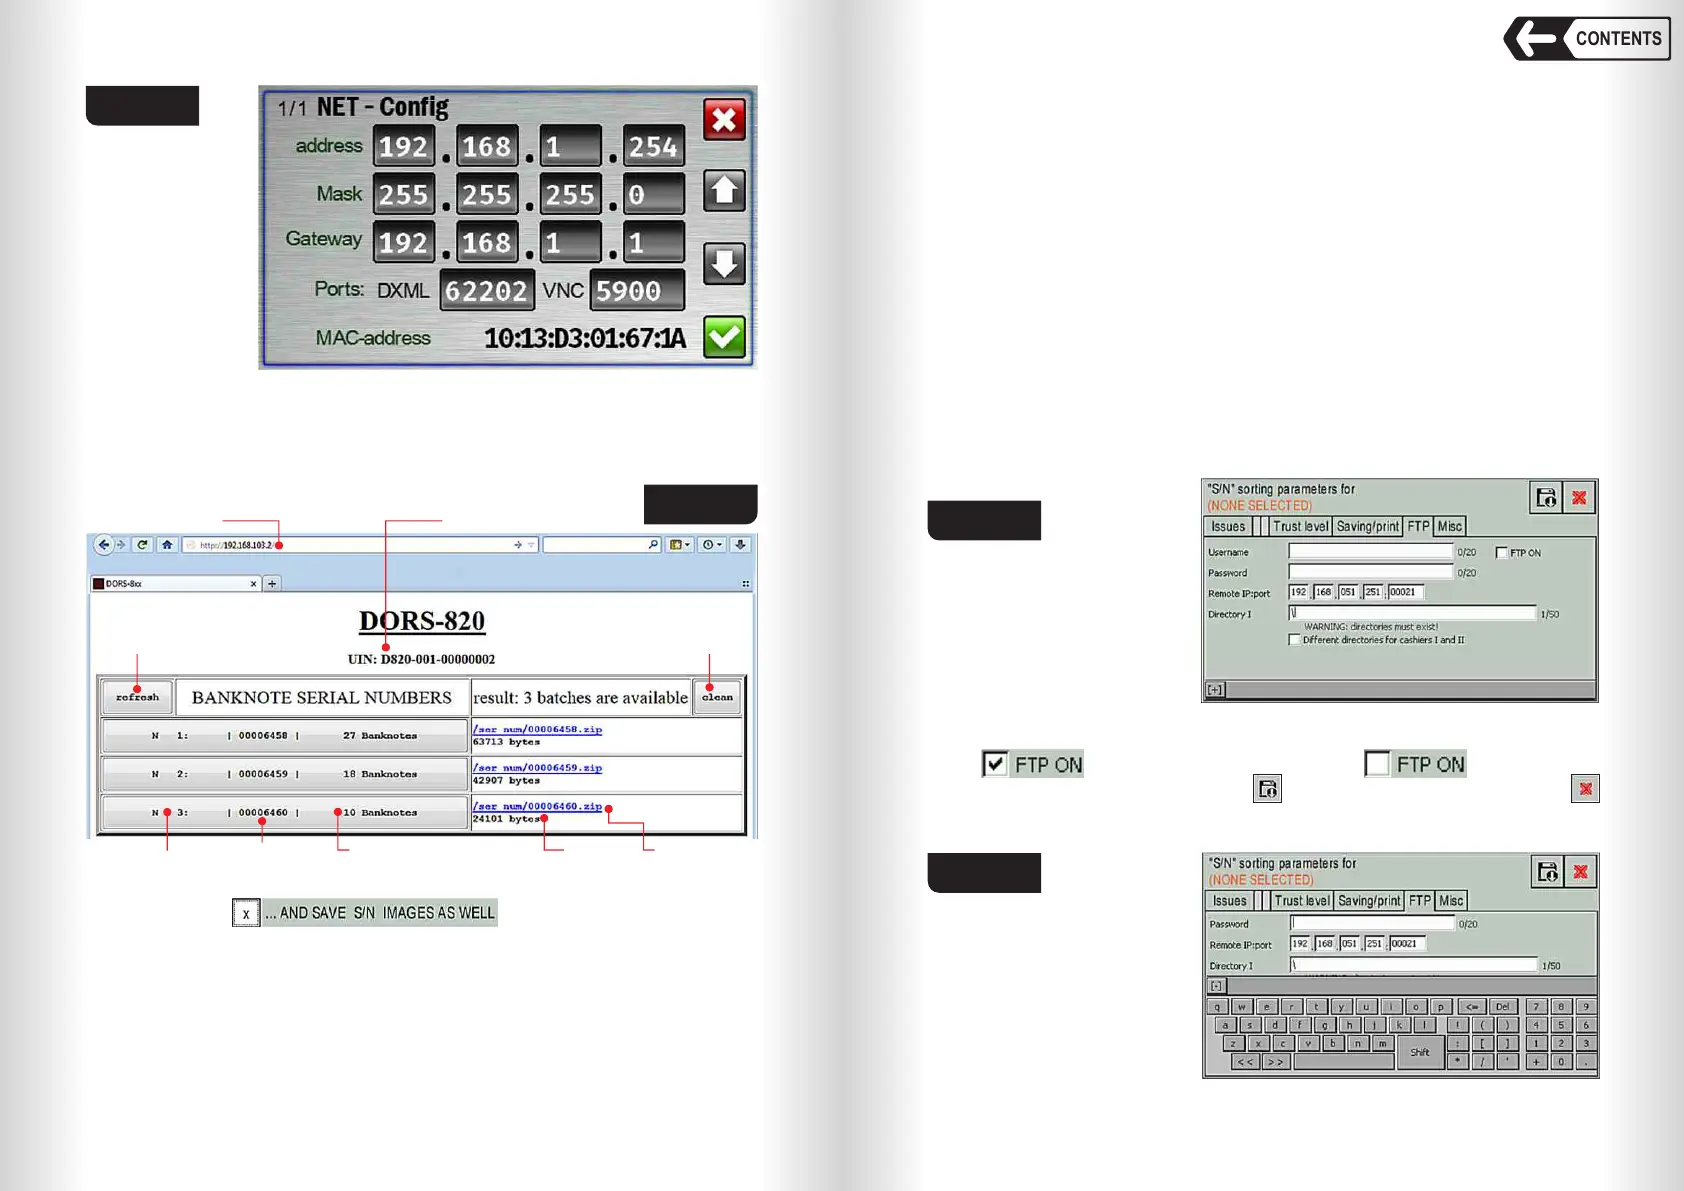
banknotes in a count, a link to the archive with the results of the count, and the
size of the archive. The name of the archive matches the unique number of
single count. Archives are created only if saving the count data is included in
the serial number parameters menu (see Fig. 80). If you turn off the counter,
the archives are deleted.
Fig. 83
Fig. 84
Counter’s IP address
Refresh button Clean button
The unique number of the device
Serial number
Archive size Link to the archive
The number of banknotes in termsUnit Conversion Number
Each zip archive contains a *.csv table with count results. If the serial
number option ( ) is enabled, then the archive
will also contain a folder with the images of serial numbers.
Zip archives can be downloaded and deleted using standard HTTP protocol
tools. To download the archive using a browser, click on the link of the archive.
To delete all archives from the device’s memory, click the «clean» button
(see Fig. 84). External software should provide saving and/or deleting of the
archives as they become available.
FTP tab (see Fig. 85).
The counter contains a built-in FTP client for automatically saving counts’
data to FTP server. When the archive with the counts’ data appears in the
counter, the FTP client sends a request to the server to transfer the data in
passive mode and, after obtaining permission, sends the archive.
Before using the FTP client, you must enable the mode of saving the counts’
data, configure the local network parameters and connect the counter to the
Ethernet connector (item 18 Fig. 2) with the Ethernet cable of the local
network (see Fig. 81). Also, the local network must be configured to allow the
passing of FTP packages from the in-built client to the server (this setting has
to be done by the administrator of the local network). To save the data, please
configure and enable the FTP client (see Fig. 85).
– Login – the username of the FTP server (maximum 20 characters);
– Password – password for this user (maximum 20 characters);
– Remote IP: port – IP address and port of the FTP server on which the data
will be stored;
– Directory I – the path to the folder in which the data will be saved
(maximum 50 characters). Warning: this folder must exist on the server.
– Different directories for cashiers I and II - to specify separate folder for
each teller.
Fig. 85
These settings must be
made by the administrator. A
virtual keyboard is used to
enter the settings (see Fig.
86). It opens when you touch
any input field or the [+] button
in the lower left corner of the
screen (see Fig. 85). You can minimize the keyboard by touching the [-] button
in the upper left corner of the keyboard (see Fig. 86). To enable the FTP client
check , uncheck it to turn FTP client off .
After entering all the settings, touch and save the settings, then touch
to exit. After that, the FTP client will start working.
Fig. 86
 Loading...