SAFETY PRECAUTIONS
READ AND FOLLOW ALL INSTRUCTIONS
Failure to followimportant safety instructions and
precautions may result in serious personal injury.
1. The Stair Entry System must be installed in accordance
with these instructions.
2. NEVER JUMP OR DIVE from the platform or steps. The
Stair Entry System is for sitting, standing, and entering or
exiting the pool only.
3. Keep the Stair Entry System free of pool toys and other
objects or debris that people could trip over causing personal
injury.
4. Always use the handrails when entering or exiting the pool.
5. CAUTION: Never install the stairs on a sloping uneven
pool bottom that could result in tilted or rocking steps. Uneven,
unbalanced footing may lead to personal injury.
6. DANGER! ELECTRICAL HAZARD. Use extreme
caution when using an electric drill when near water. Never
use an electric drill when standing in or touching water. Always
use a cordless drill when working in or near water.
PREPARATIONS
See Fig. 1
The Stair Entry System may be installed at any point around
the pool frame that provides a solid flat surface for mounting
the platform. The in-pool stairs must rest on a flat level pool
floor. See SAFETY PRECAUTIONS above.
To prevent unauthorized access to your pool, select a position
on your pool that can be viewed from all directions.
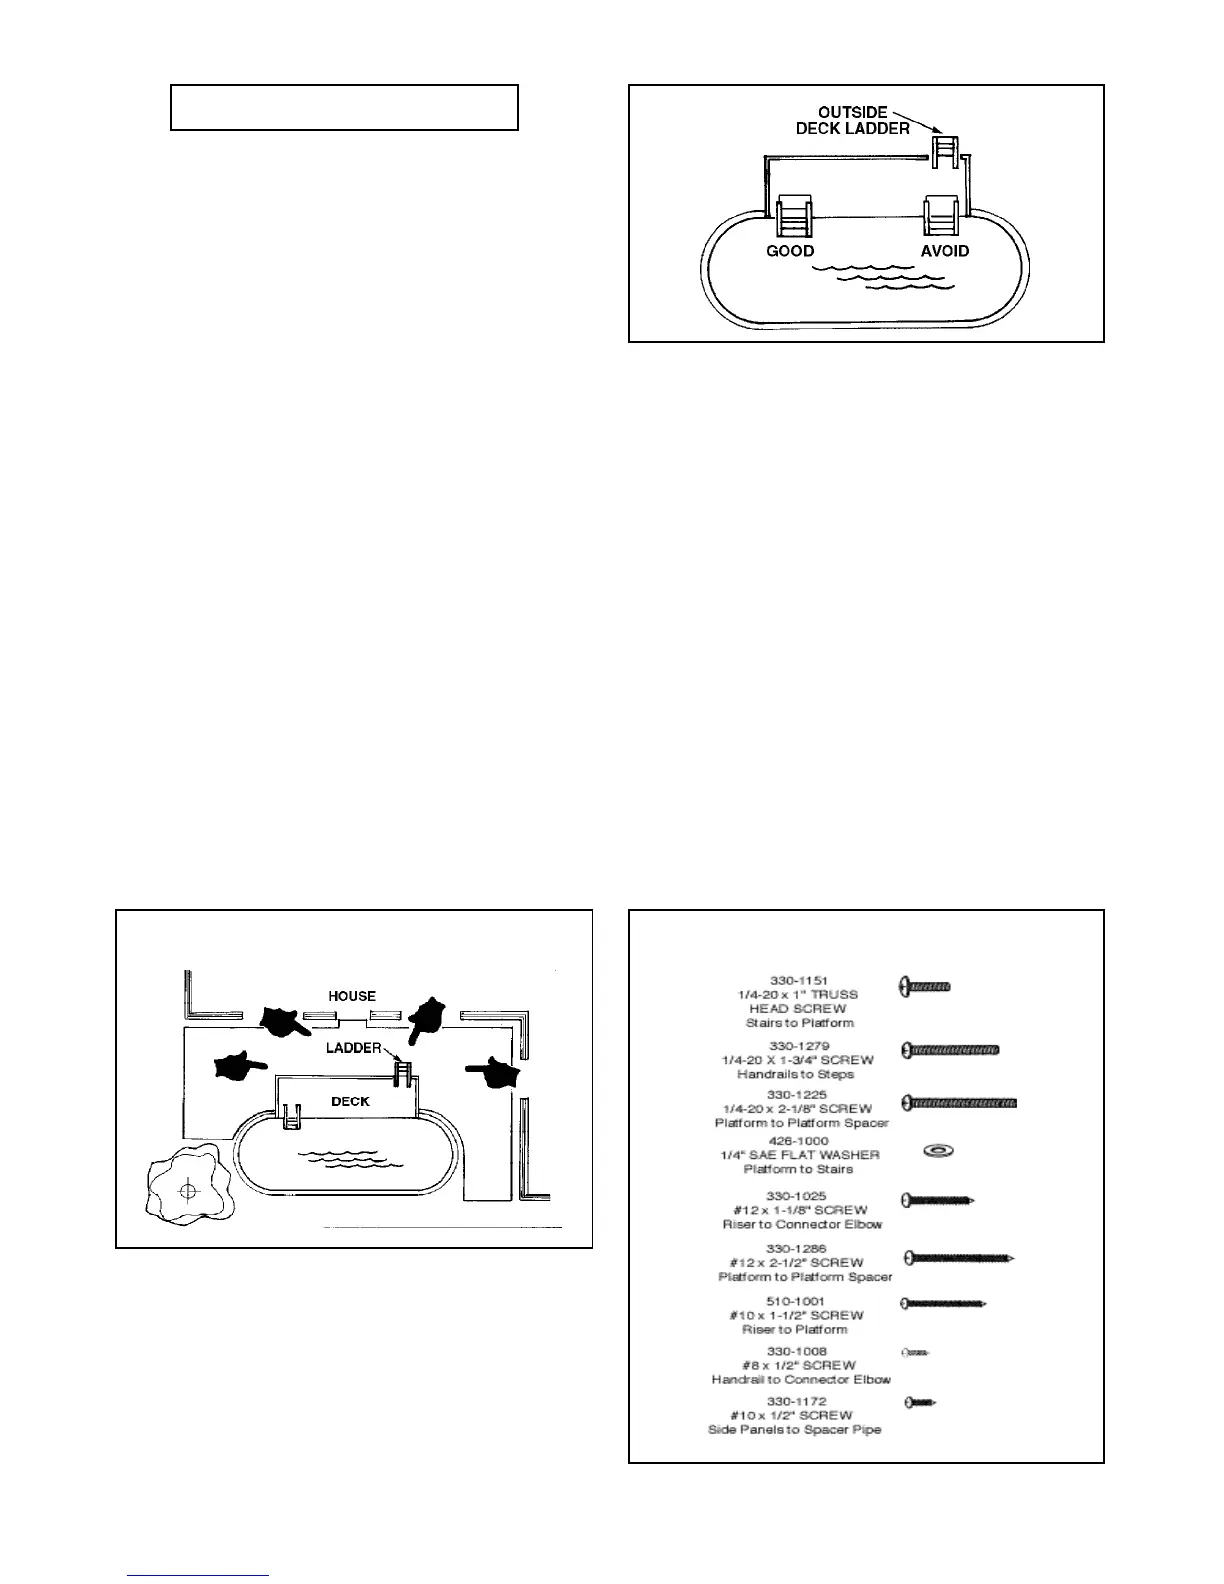
SELECT LADDER LOCATION
See Fig. 2
Locate the stairs for convenient access to and from the pool.
Avoid locating the stairs adjacent to an outside deck ladder or
stairway traffic.
Tools Required
You will need the following tools for installation:
• Flat-bladed Screwdriver
• Phillips Screwdriver
• Hacksaw
• Drill (cordless type recommended)
• Drill bits - 1/8’ for spacer pipe & side panels holes,
5/32” for riser holes, 5/16” for 1/4” bolts.
• Pencil
Materials Required
To neutralize the steps natural buoyancy, you must weight
down the pool steps using two (2) or more 8” x 16” x 2” thick
concrete block wall capstones, or use a similar material of
equal weight.
Before You Begin
Unpack each carton and inventory the parts within against the
parts list on page 5. Be sure that you have all the parts listed
before you begin assembly. Report any missing parts to your
pool dealer for prompt replacement.
Hardware
Refer to the illustration below to identify the hardware used
for assembly.
2
FIG. 1
FIG. 2
HARDWARE
 Loading...