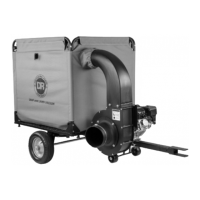
CONTACT US AT w w w .DRpow er.com 31
Collapsing the Collector for Compact Storage
The Collector can be stored fully assembled, but can also be collapsed for more
compact storage.
1. Unlatch the Buckles that secure the left and right side Doors (Figure 83).
2. Unlatch the Buckles that secure the top and bottom Doors (Figure 84).
Note: Only the Battens in the top and bottom Doors need to be removed to fold the
Enclosure for storage.
3. On the inner right side corner of the top Door, push the Batten into the
Elastic Flap (Figure 85), Fold the Elastic Flap down over the end of the
Batten to expose it (Figure 86). Remove the Batten.
4. Remove the Batten in the bottom Door.
5. Reconnect the Buckles to secure all four Doors.
6. Unhook the Velcro Flaps that secure the Enclosure to the Top Front Tube
(Figure 87).
7. Remove the Hand Knobs and the C-Head Bolts that secure the Top Front
Tube Frame and remove the Tube Frame.
8. Remove the Hand Knobs and the C-Head Bolts that secure the Top Rear
Tube Frame and remove the Tube Frame from the Enclosure Loop.
9. Tuck in the Enclosure ends as you bring the two Collector Tubes together for
storage (Figure 88).
Front
Velcro
Flaps
Figure 87
Top
Front
Tube
Top Rear Tube
Rear Loop
C-Head Bolts
and Hand
Knobs
Batten
Figure 86
Batten
Inside
Figure 85
Small
Pocket
Buckle
Figure 84
Top
Bottom
Buckles
Figure 83
Left
Side
Right
Side
Figure 88