Tools needed:
• 1/2" Wrench
• 7/16" Wrench
• 3/16" Allen Wrench
Attaching the Shredder Hopper, Guard, and Handle
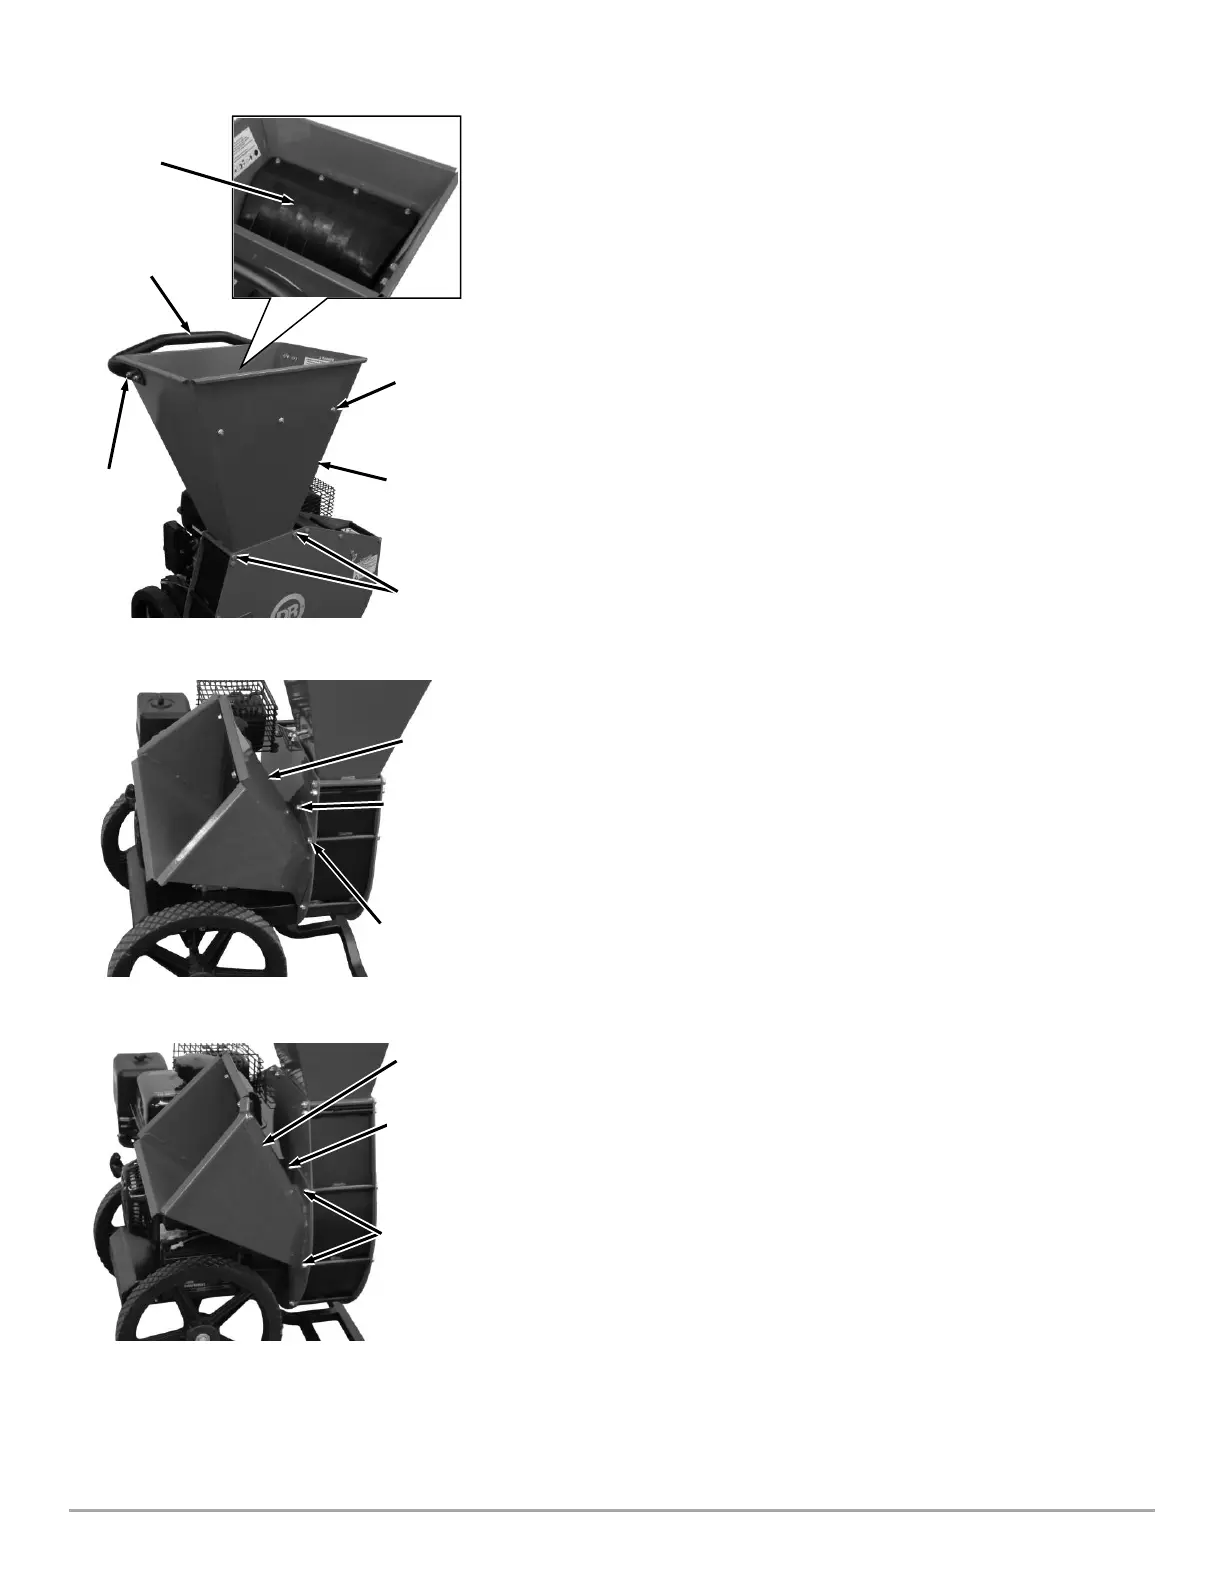
1. Position the Shredder Hopper onto the Power Unit with the handle
mounting holes facing the engine side (Figure 3).
2. Secure the Shredder Hopper with the two 5/16-18 X 5.5" Bolts (PREMIER
320) or 5/16-18 X 6" Bolts (PRO 420) and Locknuts from the Product
Package using two 1/2"Wrenches.
3. Insert the Hopper Guard Studs through the front of the Hopper and secure
with three 1/4-20 Locknuts using a 7/16″ Wrench.
4. Install the Handle onto the Hopper with four Button Head Screws (inside)
and four Locknuts (outside) using a 1/2" Wrench and 3/16" Allen Wrench.
Attaching the Chipper Chute (PREMIER 320)
Note: Leave the Bolt in place when the Locknuts are removed in step 1.
1. Remove the Pre-assembled Locknut from the Bolt using two 1/2" Wrenches
(Figure 4a). Leave the Bolt in place.
2. Position the Chipper Chute onto the Side Plate Studs and Bolt.
3. Secure the Chipper Chute with two Locknuts from the Product Package, and
the two you removed, using two 1/2"Wrenches.
Attaching the Chipper Chute (PRO 420)
Note: Leave the two Bolts in place when the Locknuts are removed in step 1.
1. Remove the Pre-assembled Locknuts from the Bolts using two
1/2"Wrenches (Figure 4b). Leave the Bolts in place.
2. Position the Chipper Chute onto the Side Plate Studs and Bolts.
3. Secure the Chipper Chute with two Locknuts from the Product Package, and
the one you removed, using two 1/2"Wrenches.