Chapter 3: Operating the DR CHIPPER SHREDDER
This chapter covers the procedures for starting and stopping your new DR CHIPPER SHREDDER and discusses basic operation
features. It may be helpful to better familiarize yourself with the features of your CHIPPER SHREDDER by reviewing Figure 2 in
Chapter 2 before beginning the steps outlined in this chapter.
Before You Begin
• Visually check the Chipper Knife and Shredder Hammers for damage each
time you use the machine.
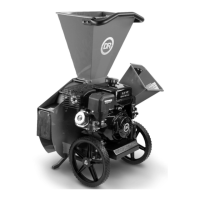
• ALWAYS operate the DR CHIPPER SHREDDER from the Operator Zones
(Figure 8).
• When viewed from the Chipper Chute side the Flywheel turns in a clockwise
direction.
• ALWAYS stop the Engine when leaving the Operating Zone or when moving
the machine.
Starting and Stopping the Engine
1. Check the Oil and Fuel level every time you use the DR CHIPPER
SHREDDER.
2. Check the Shredder Hopper, Chipper Chute, and Discharge Chute debris
and remove any buildup from the machine as described in Chapter 4.
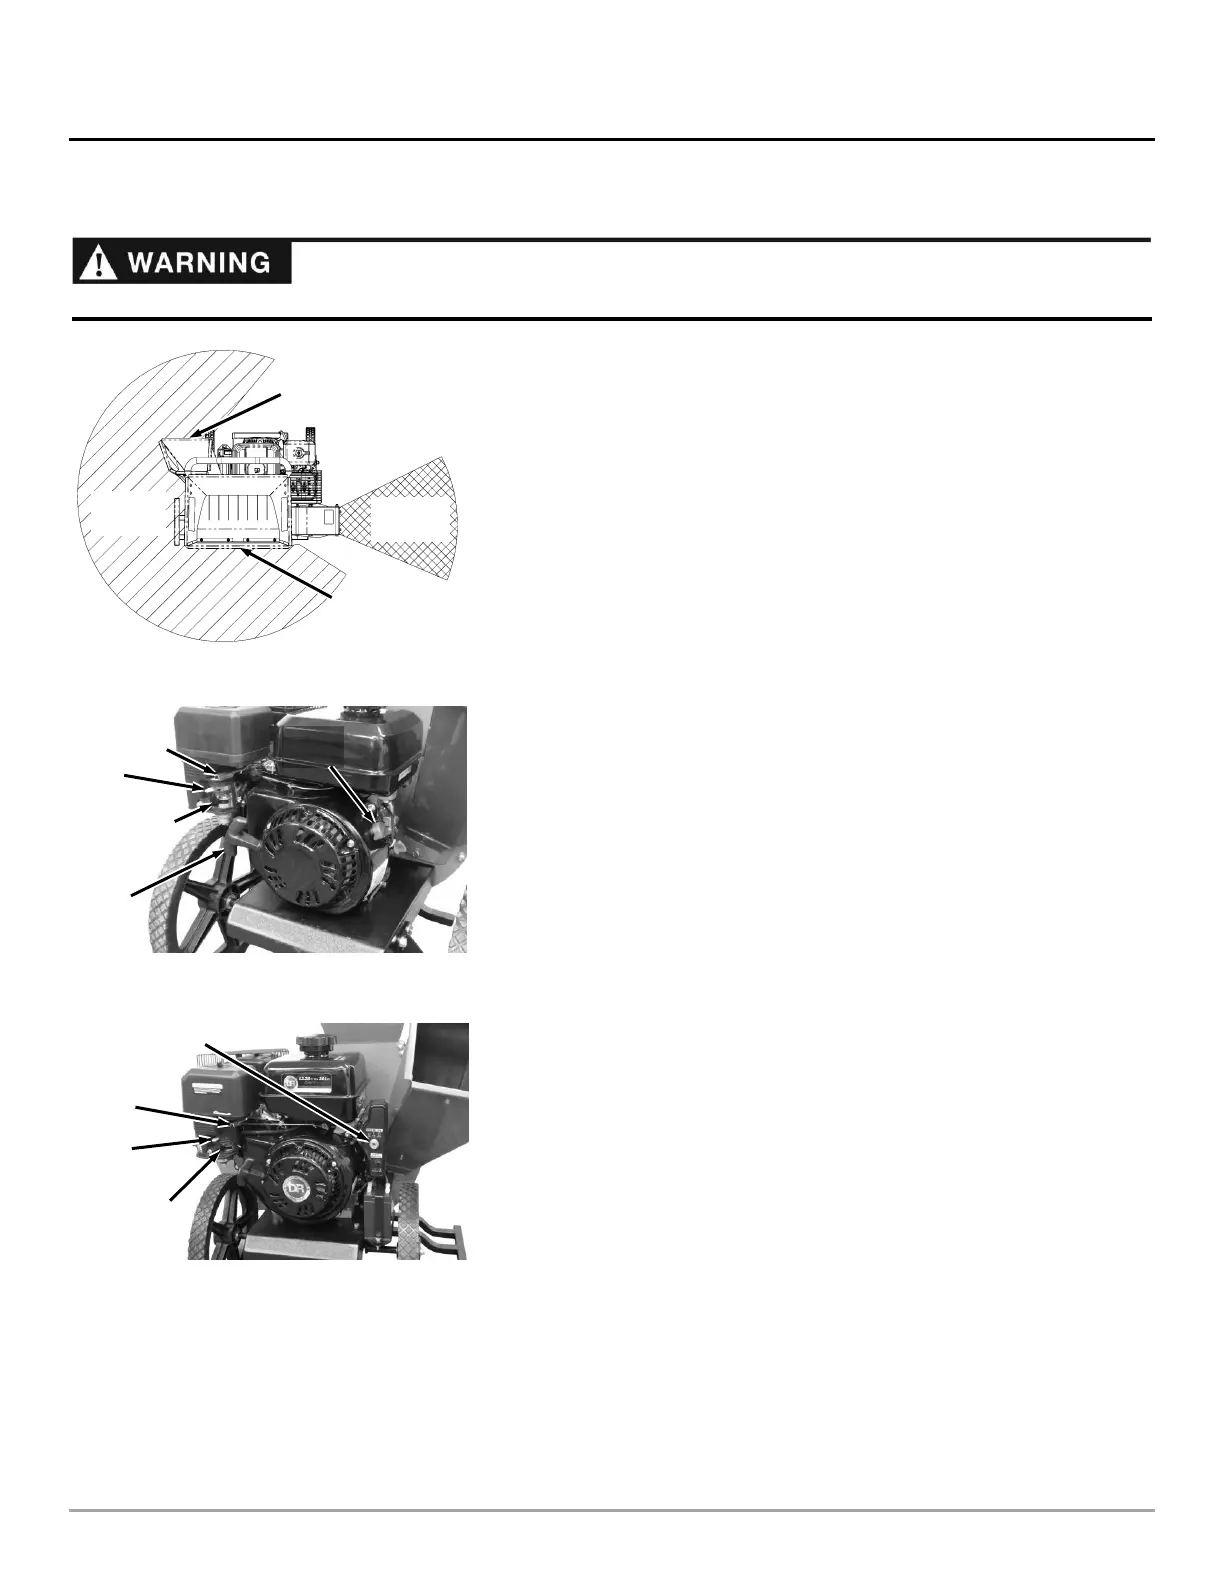
3. Move the Fuel Shut-Off Valve fully to the right to its OPEN position (Figure
9a and 9b).
4. Move the Choke Control Lever to the left to the Choke position (leave in the
Run position to the right if the Engine is already warm).
5. Move the Throttle Control Leaver to about halfway between Slow (turtle) and
Fast (rabbit) Position.
6. Manual Start –Turn the On/Off Switch to the “On” position (Figure 9a).
Grasp the Recoil Starter Handle and slowly pull until you feel resistance,
then pull the cord with a smooth accelerating motion to start the engine.
One or two pulls usually starts the DR Chipper Shredder.
7. Electric Start - Turn the Key to START until the Engine starts and then
release (Figure 9b). The Key will snap back when released and the Engine
will continue to run.
8. After the Engine starts when the Choke is on, the Engine will soon begin to
run rough. Adjust the Choke Lever until the engine runs smoother. Continue
this process until the engine runs well with the Choke fully in the RUN
position.
9. When the Engine is warmed up and running smoothly, ensure that the
Choke is fully to the right and the Throttle Control Lever is fully to the left at
the Fast (rabbit) Position for Chipping and Shredding.
Note: The Throttle should always be fully to the left when Chipping/Shredding.
 Loading...