20 DR
®
PRO CHIPPER SHREDDER
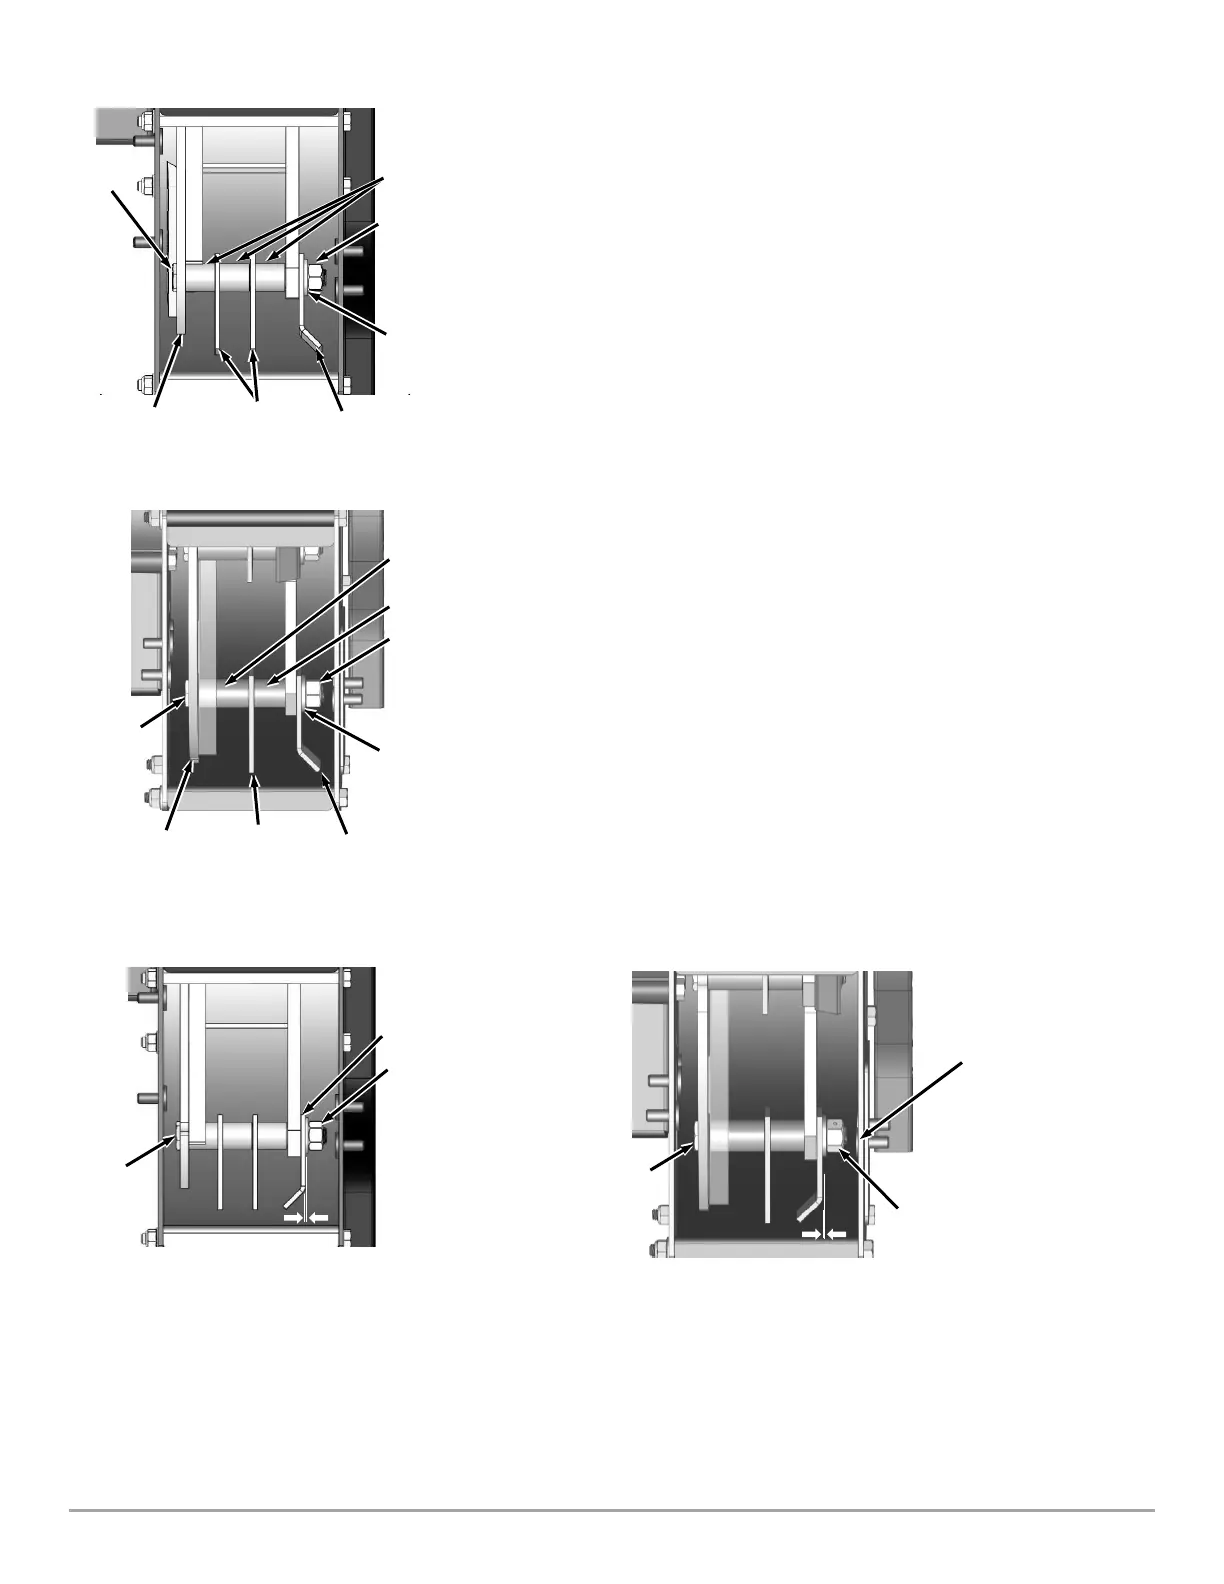
4. Align one of the Hammer Shafts with the Chipper Chute Access Hole (Figure
27a or 27b). Carefully note the orientation of each Hammer on the Hammer
Shaft you are working on.
5. Use a 3/4" Wrench and a 3/4" socket to remove the Center Locknut from the
Hammer Shaft. Discard the Center Locknut, it is not reusable.
6. Remove the Hammer Shaft, Washer, Spacers, and Hammers.
7. Reinstall the parts, but with the orientation of the Hammers flipped to a
clean cutting edge. If your Hammer Shaft assembly looked like Figure 27
before then it should look like Figure 28 after, or vice versa. Make sure to use
a new Center Locknut.
NOTE: On the PREMIER 320 you will have one long Spacer and one short; the
longer Spacer sits against the Flywheel.
8. Use a 3/4" Wrench to hold the Hammer Shaft Head against the Flywheel
and incrementally tighten the Center Locknut using a 3/4" Socket Wrench
until a small gap remains between the Center Locknut and the Washer. Use
Feeler Gauges to set an 0.008"-0.030" clearance between the J Hammer and
Washer.
NOTE: When done all Hammers should spin freely, and the Hammer Shaft should
have minimal back and forth play.
9. Repeat steps 4 through 9 for the remaining three Hammer Shafts.
NOTE: When done confirm that the J-Hammer orientation is alternating as shown
in Figure 26.
10. Reinstall the Access plate.
11. Reinstall the Chipper Chute.
12. Reinstall the Shredder Hopper.