20 DR
®
PRO-62V CHAINSAW
Motor Air Vent Cleaning
Tools and Supplies Needed:
• Clean Rags
• Pick
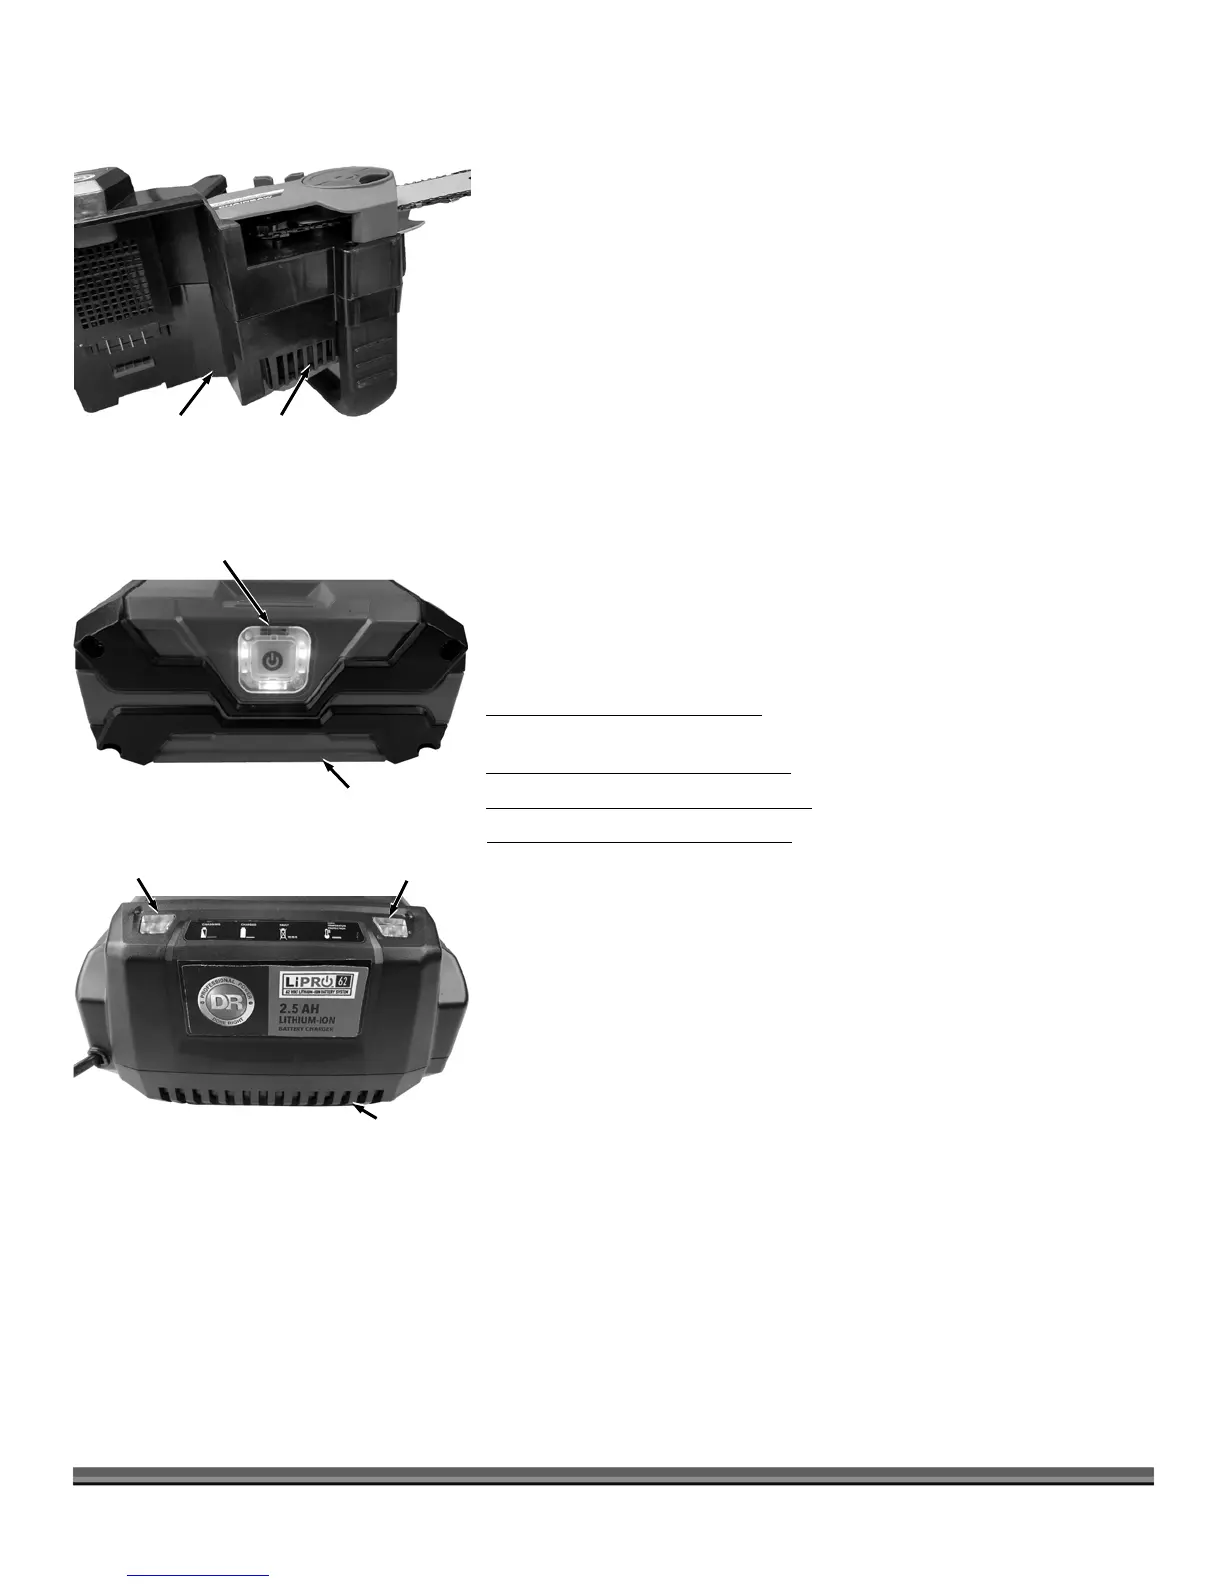
The Motor on your DR PRO-62V CHAINSAW breathes through Vents on the
bottom of the Chainsaw Body (Figure 34). These may become blocked with
Sawdust during the Sawing operation. The vents should be checked and
cleaned before each use. To check and clean the Vents remove the Battery Pack
and turn the Chainsaw Body on its side. Use a pick to remove any debris from
the Vents and wipe the area Clean with a Rag.
Battery LED Lights (Figure 35)
You can check the charge percentage of your 62V Battery by pushing the
Indicator Button on the front of the Battery. The number of Green LED
indicators will tell you the % of power left in the Battery. 1-25%, 2-50%, 3-75%
and 4-100%.
If you press the Indicator Button and only the fourth LED flashes, the Battery
needs charging.
Charger indicator Lights (Figure 36)
Red LED Lit, Green LED is not lit; The Charger is plugged in but the Battery is
not installed (no load condition).
Green LED blinks, Red LED is not lit; Battery is charging normally.
The Green LED is lit, Red LED is not lit; Battery is fully charged.
Green LED is not lit, Red LED blinks; There is a fault with the Battery or Charger.
Remove the Battery from the Charger and wait about 30 minutes, then reinsert
the Battery into the Charger.
If the Battery does not hold its charge for very long under normal conditions or
it simply won’t hold a charge, then replace it. You can purchase a replacement
Battery directly from us at www.DRpower.com.
Figure 36
34