CONTACT US AT www.DRpower.com 19
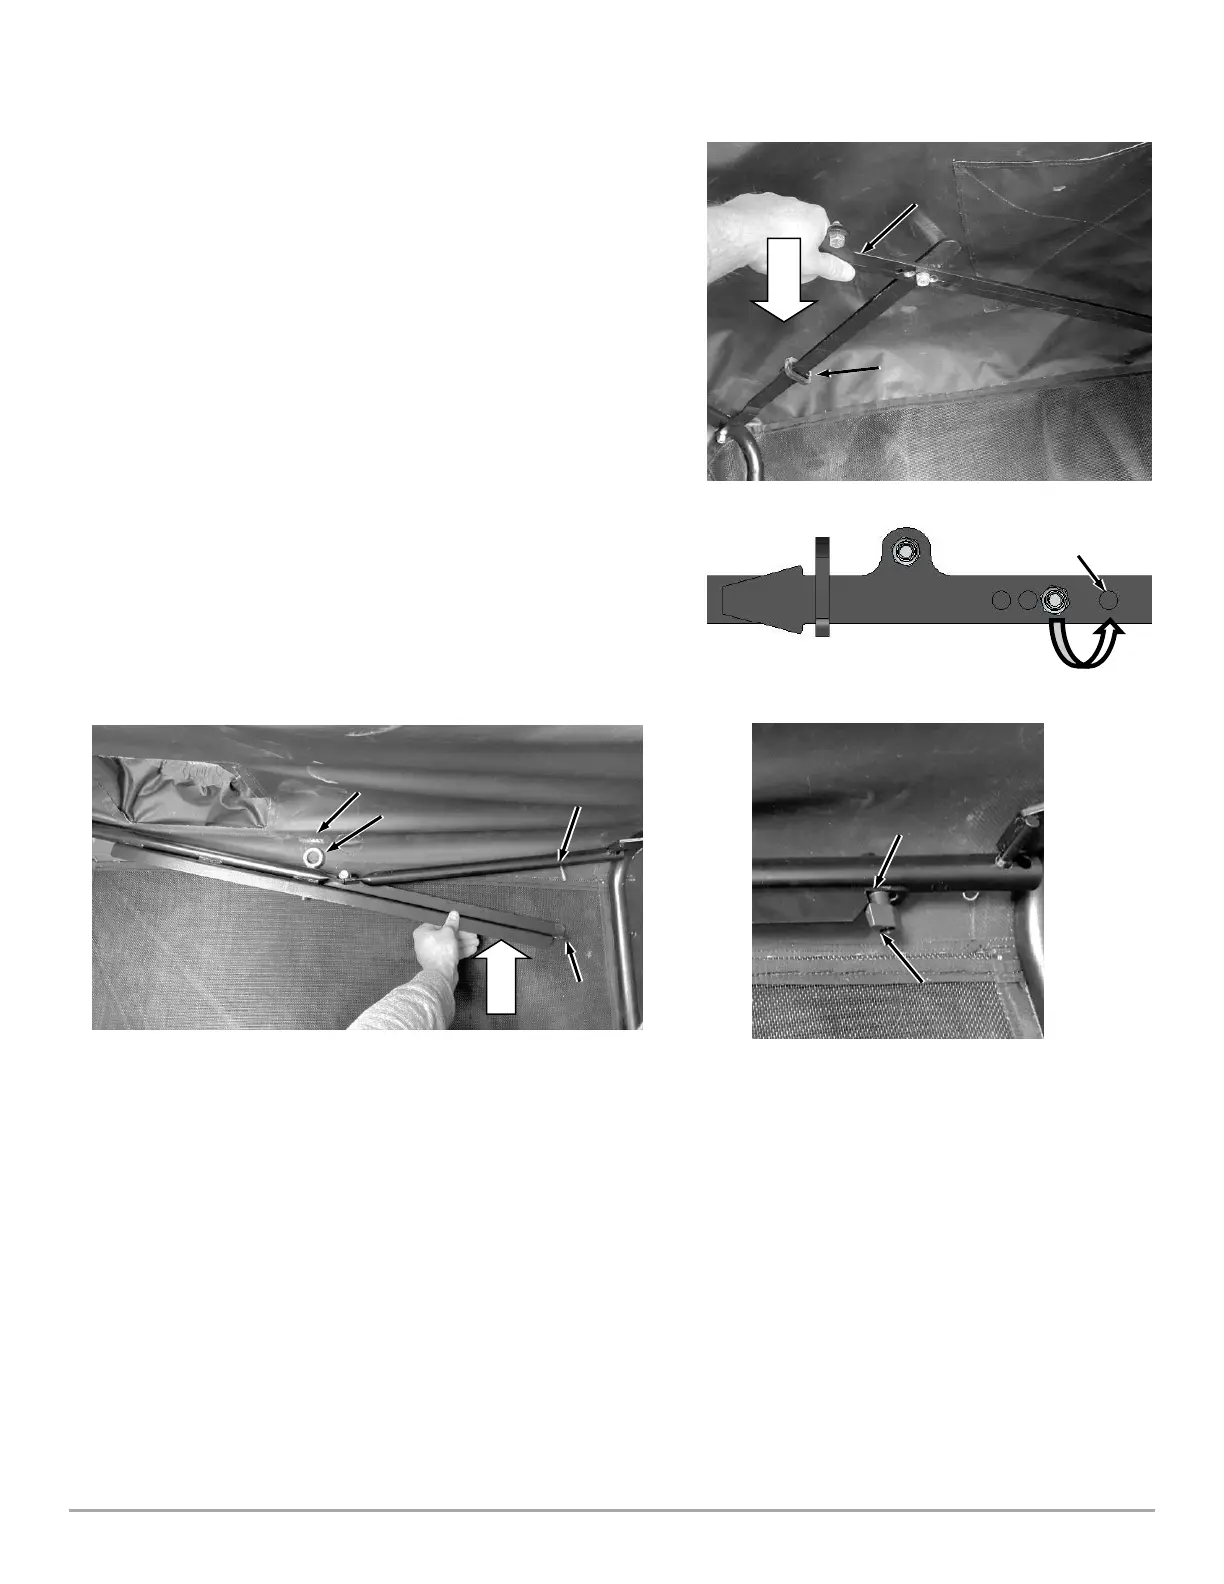
Setting the Initial Canvas Width
1. Step into the open canvas and push the sides out with both feet to
aid in setting the canvas width.
2. Set the Inner Scissor Link assembly width by pushing down on the
flat link until both parts come to parallel. When parallel, slide the
ring link across to prevent the scissors from coming apart (Figure
39).
Note: The canvas is intended to be tight but if the scissor links start to
bow out, an adjustment can be made. You can adjust the center bolt
and nut to another hole location to reduce the difficulty of this action
(Figure 40).
3. Next set the width of the front of the canvas by pushing in the Tube
Hinge Assembly until both tube parts come together and the
threaded stud feeds through the open slot. Make sure the Eyebolt is
able to feed through the Canvas Hole during the process (Figure 41).
4. With both Tube Hinge parts coming together, secure them with a
Thumb Screw Knob onto the threaded stud. Screw until tight (Figure
42).