18 DR
®
LEAF and LAWN VACUUM
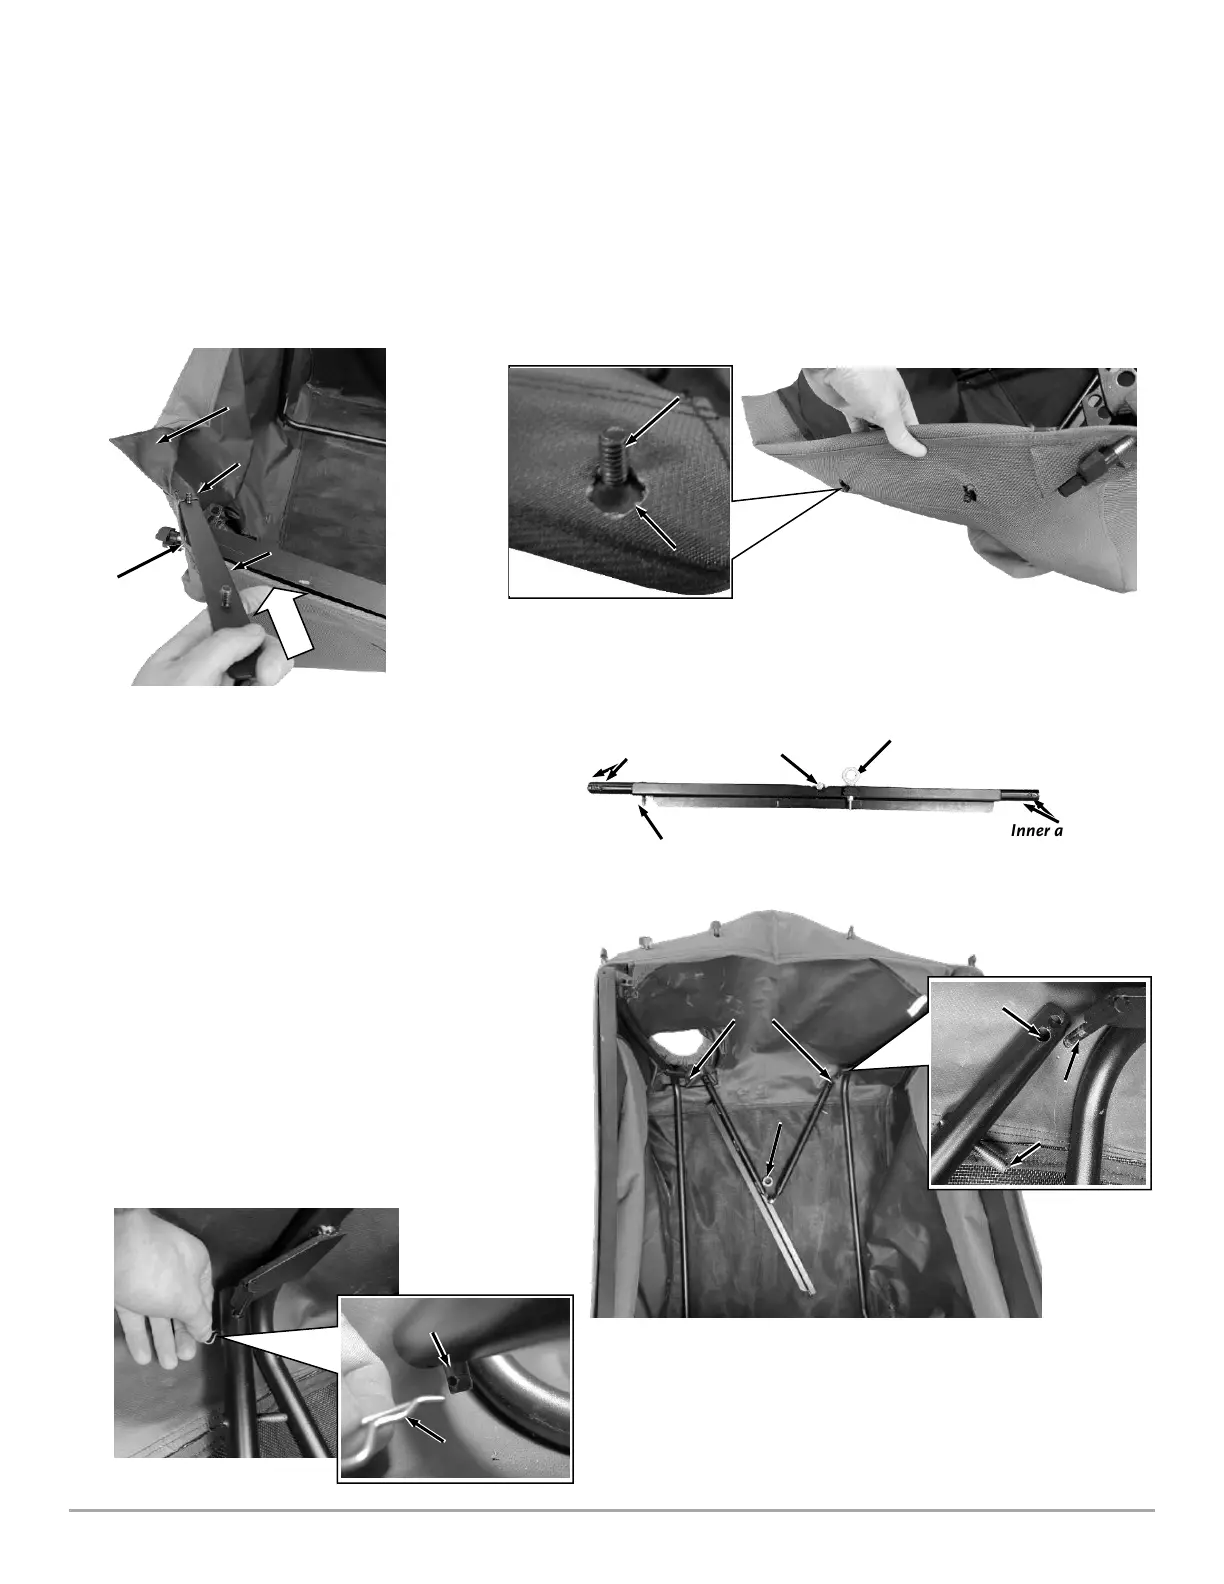
Installing the Front Retainers
1. Insert one of the Front Retainers into the Front Corner canvas pocket. Slide the Front Retainers in at an angle to avoid the
studs catching on the canvas as they are inserted (Figure 34).
2. Align the studs through the holes in the canvas (Figure 35).
3. Repeat steps 1 and 2, inserting the remaining Front Retainer into the canvas from the other front corner.
4. Screw on four Thumb Screw Knobs finger tight onto each of the four exposed studs to keep the retainers from moving while
we install the other components.
Installing the Hinge Tube Assembly (Figure 36)
1. Lay the Hinge Tube Assembly into the canvas with
the eyebolt laying flat on the canvas floor as shown
in Figure 37.
2. Align one end of the assembly underneath the
Tube Frame Pin. Insert the pin through the inner
hole on the Hinge Tube ends.
Note: The outer holes on the Hinge Tube Assembly
should only be used if the canvas needs to be adjusted
tighter, once fully assembled.
3. Secure the Hinge Tube Assembly onto the pin with
a hair pin (Pin, Cotter, Hair, 1/4-3/8) that can be
found in the Product Pack (Figure 38).
4. Repeat steps 2 and 3 to secure the other end of the
Hinge Tube Assembly to the frame.
 Loading...