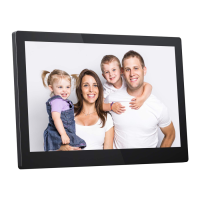
This document describes the Dragon Touch Digital Photo Frame Classic 15, a device designed to display digital photos and videos, offering various features for content management, sharing, and customization.
Function Description
The Dragon Touch Digital Photo Frame Classic 15 serves as a dedicated display for digital media, primarily photos and short videos. It allows users to store and view their memories in a dynamic slideshow format. The frame connects to a Wi-Fi network, enabling remote uploading of content via a dedicated mobile application called OurPhoto, email, or a computer. It also supports local content transfer through USB drives and SD cards. The device is designed for continuous operation, requiring a constant power supply as it does not have a built-in battery. Its primary function is to provide an easy and engaging way to share and relive digital memories with family and friends, regardless of their physical location.
Usage Features
The frame offers a comprehensive set of features to enhance the user experience:
Getting Started and Connectivity:
- Powering On: Simply connect the power cable to the frame and plug the adapter into a wall outlet. The frame will boot up within seconds.
- Initial Settings: Upon first use, the frame guides you through initial settings, including Wi-Fi configuration, device information, and sleep mode.
- Wi-Fi Connection: The frame supports 2.4GHz Wi-Fi networks. Users can select their network from a list and enter the password. If the network isn't visible, moving the frame closer to the router or restarting the frame may help. A private Wi-Fi network is recommended for optimal performance.
OurPhoto App Integration:
- App Download: The OurPhoto app is available on both the App Store and Google Play for smartphones and tablets.
- Account Creation and Login: Users can create an OurPhoto account by signing up and filling in the required information. Email verification is part of the registration process. Existing users can log in directly.
- Binding the Frame (Owner): The frame owner or the first user to bind the frame follows a specific process:
- Log in to the OurPhoto app.
- Navigate to "Devices" and click "+" next to "My Devices."
- Enter the frame's 6-digit Frame ID (found in Settings → Device Info on the frame).
- Create a unique Device Name for easy identification (e.g., Frame123456 if the Frame ID is 123456).
- Create a unique email account for the frame (e.g., frame123456@ourphoto.cn).
- Click "Bind."
- On the frame, go to Settings → User Management → Pending User Requests and click "Accept." Ensure "Accept New Users" is turned on.
- Once confirmed, this account becomes the main account for the frame.
- Inviting Others to Bind: Non-frame owners can also bind to the frame with the owner's confirmation. They need to download the OurPhoto app, create an account, log in, go to "Devices" → "Bound Devices," click "+", enter the frame ID (provided by the owner), create a device name, and click "Bind." The frame owner then accepts the request on the frame.
- Binding with Email: Users can bind their email accounts to the frame by sending an email with the subject "bd + Frame ID" (e.g., "bd123456") to the frame's email account. A confirmation email from OurPhoto signifies successful binding.
Uploading Photos and Videos:
- Via OurPhoto App:
- Log in to the OurPhoto app and ensure the account is bound.
- Click "Media" to select photos or videos from the smartphone/tablet.
- Choose the target frame and click the right arrow icon to confirm.
- Alternatively, click "Photo" or "Video" to capture new media, select the frame, and confirm.
- Uploaded content appears on the frame within seconds.
- Note: Video clips are limited to 30 seconds or 100MB. The app supports sending full images (version 1.1.94 iOS / 1.0.4 Android or above). OurPhoto provides 10GB of free data traffic for uploads; additional traffic can be topped up via their website.
- Via Email: Photos can be uploaded by attaching them to an email sent to the frame's email address. Videos cannot be uploaded this way.
- Via Computer (PC Control):
- Ensure the frame and computer are on the same Wi-Fi network.
- On the frame, go to Settings → PC Control and click "Start" to reveal an FTP address.
- On the computer, open File Explorer, enter the FTP address in the address bar.
- Drag and drop photos and videos into the displayed folder.
- Click "Stop" on the frame to end the connection.
- Via USB Drive:
- Insert a USB drive into the frame. The frame will confirm successful connection.
- Go to the Photo or Video library, select "USB" to view content.
- Click the "More" icon, select desired photos/videos, and then click the "Share" icon (followed by "OK") to import them to the frame's internal memory.
- Note: Large files on the USB drive may take longer to read. The system may lock the USB drive after inactivity; re-plugging it will reactivate it. Remove external devices before resetting the frame.
- Via SD Card:
- Insert an SD card (max 32GB) into the frame. The frame will confirm successful connection.
- Go to the Photo or Video library, select "SD card" to view content.
- Click the "More" icon, select desired photos/videos, and then click the "Share" icon (followed by "OK") to import them to the frame's internal memory.
- Note: Large files on the SD card may take longer to read. The system may lock the SD card after inactivity; re-inserting it will reactivate it. Remove external devices before resetting the frame.
Main Menu Features:
- Device Info: Displays the Frame ID and app download information.
- User Management: Allows users to enable/disable "Accept New Users" for binding requests. Bound users can be managed, including viewing their photos, renaming accounts, deleting users, or deleting users and their photos. Pending requests can be accepted or refused.
- PC Control: Shows Wi-Fi connection status and enables the FTP server for computer file transfers (Windows only).
- Album Settings:
- Full Screen: Toggles full-screen display for photos.
- Slideshow: Sets the inactivity period after which the frame automatically starts a slideshow. Exiting is done via the "Back" icon on the suspended ball or the "Return" button on the remote.
- Slideshow Mode: Choose between "Sequential" or "Random" display modes.
- Slideshow Interval: Adjusts the duration each photo is displayed.
- Slideshow Transition Effect: Selects the visual effect between slideshow photos.
- System Settings:
- Sound: Adjusts media volume.
- Display:
- Brightness: Adjusts screen brightness.
- Suspended Ball: Enables a floating navigation key for quick access to the Home page and volume control.
- Auto-rotate Screen: Automatically adjusts the display to landscape or portrait based on frame placement.
- Date and Time: Sets the date and time.
- Language: Selects the system language (English, Français, Deutsch, Italiano, Español, 日本語).
- Auto On & Off: Configures automatic power on/off times for the frame.
- About: Provides information about the frame. Users are advised to update the system when notifications are received.
Remote Control:
The included remote control (requires 2x AAA batteries, not included) provides convenient navigation and control:
- Power Button: Turns the frame on/off.
- Menu: Accesses the Main Menu for settings adjustments.
- Source: Enters the library and switches between folders.
- Up/Down/Left/Right and OK Buttons: Navigates menu options, highlights icons, confirms selections, and skips files during slideshows.
- Play/Pause Button: Starts or pauses slideshows, press again to exit.
- Return Button: Returns to the main menu.
- Volume Control: Adjusts media volume.
- Mute: Mutes audio.
- Note: Avoid simultaneously using the remote and touching the screen to prevent conflicts.
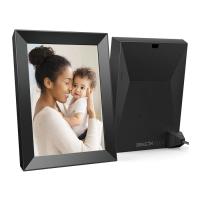
Physical Installation:
- Back Stand Installation: Push the stand into the positioning holes, insert the fixing screw, and tighten it to secure the stand.
- Wall Mounting:
- Preparation: Ensure the metal wall mount, screw kit (anchors + long screws), frame back bracket, short screws, and spring washers are included. Tools needed are an electric hand drill, hammer, and Phillips screwdriver.
- Determine Location: Place the frame against the wall to find a suitable position, ensuring proper spacing.
- Drill Holes: Remove the frame, position the wall mount (V-shape, big opening up), mark the four mounting holes, and drill into the wall.
- Install Anchors: Tap the four anchors into the drilled holes with a hammer.
- Secure Wall Mount: Attach the wall mount to the wall using the four long screws driven into the anchors.
- Install Frame Back Bracket: Lay the frame face-down. Attach the back bracket to the frame's back using the 4 short screws and spring washers.
- Attach Frame to Wall: Plug the power cord into the DC IN port. Hold the frame with the screen facing you, align the frame back bracket slightly above the wall mount, and slide it down to hang the frame.
Maintenance Features
The Dragon Touch Digital Photo Frame Classic 15 includes features for managing content and maintaining system health:
Deleting Photos and Videos:
- From Photo or Video Library:
- Enter the Photo or Video library and select "Internal Storage."
- Click the "More" icon, select the desired photos/videos, and then click the "Delete" icon (followed by "OK").
- During a Slideshow:
- During a slideshow, tap the photo/video to delete.
- Click the "Delete" icon on the menu below (followed by "OK").
- From Album Settings: Users can delete all photos from internal storage via "Album Settings."
Exporting Photos and Videos:
- Photos and videos can be exported to an SD card (max 32GB) or a USB drive.
- Insert the storage device, go to the library, select the desired files, and click "Share" to export.
Storage:
- All received photos and videos are stored in the built-in 16GB SD card. It is estimated to hold over 40,000 photos (300KB/pc).
- The Dragon Touch server caches data for 30 days; photos are encrypted and deleted after this period. This allows the frame to receive photos even when offline.
Restoring Default Settings and Factory Reset:
- Restore Default Settings: This option removes all user information, settings, and files from the frame.
- Factory Data Reset:
- Disconnect the frame from Wi-Fi first.
- Uncheck "Delete all users and restore the device to inactive."
- Click "OK" to reset the frame.
- Note: It is crucial to remove all external devices (USB drives, SD cards) before performing a factory reset.
Troubleshooting and Support:
- The manual includes a FAQ section addressing common issues like Wi-Fi connectivity, wall mounting, frame orientation, finding the Frame ID, and binding problems.
- Customer support is available via email (cs@dragontouch.com) and phone (888-811-1140, Mon-Fri 9am-5pm EST) for any inquiries not covered in the manual.
- Regular system updates are recommended for optimal performance.