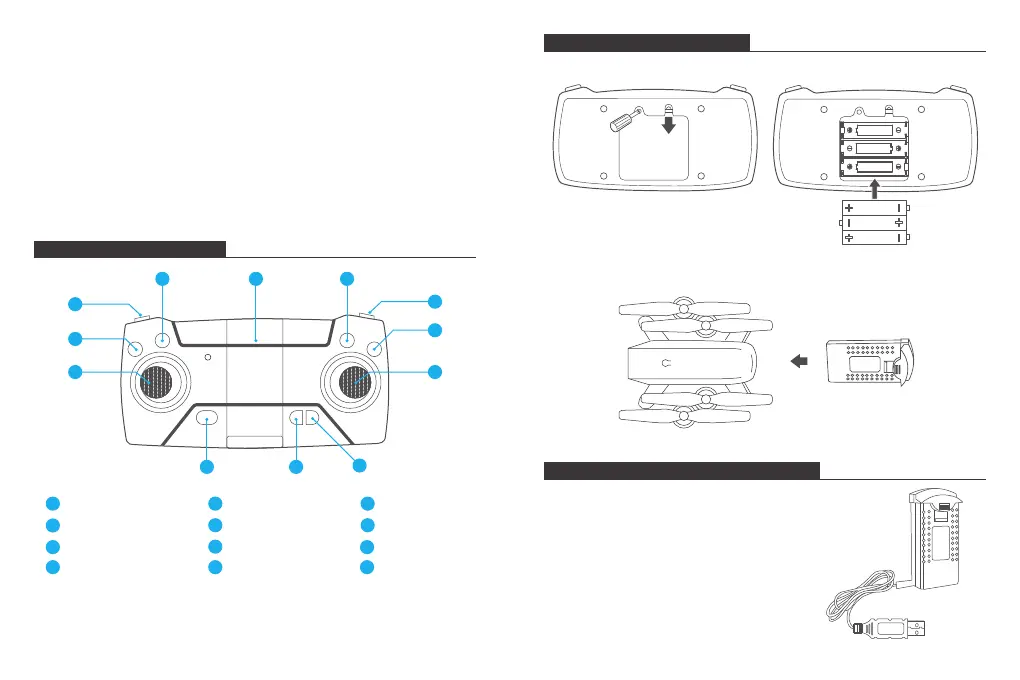
TRANSMITTER DIAGRAM
INSTALLING THE BATTERY
CHANGING A PROPELLER
1. The replacement propeller must be replaced in the proper position on the
machine. Propeller A needs to be installed in the position of A, and propeller B
needs to be installed in the position of B, or you may not be able to properly
control the drone. There are labels for A and B on the bottom of the propellers.
2. When flight begins, propeller A rotates clockwise and propeller B rotates
counterclockwise.
INSTALLING THE PROTECTIVE COVER
Snap the protective frame connectors into the shackles.
Speed Switch
1
One-key Takeoff/Land
2
Left Joystick
3
Orbit Mode
7
GPS Switch
8
Right Joystick
9
Geomagnetic Calibration
4
Phone Clamps
5
Photo/Video
6
Power ON/OFF
10
Headless Mode
11
One-key Return
12
Obtain three 1.5V AA batteries (not included) and install them in the transmitter.
RECHARGING THE DRONE BATTERY
Remove the USB charging cable. Unplug the aircraft battery.
Plug the battery's USB connector into a USB port on a
computer (or a USB power adapter). The LED indicator
light on the cable will turn red while it is charging and
turn off when it is fully charged. The charging time is
about 120-150 minutes.
Note: Only use the provided charger cable. It is
dangerous to use the provided charge cable to
charge other products.
MADE IN CHINA
AA 1.5V
AA 1.5V
AA 1.5V
Insert the battery into drone (7.4V 1200mAh Li-Po battery is included).
10
4
6
5
11
1
2
3
7
8
9
12
3 4