page 20 of 28
Foundation
™
for LED Panels
SIDE BSIDE A SIDE BSIDE A
521mm470mm
521mm470mm
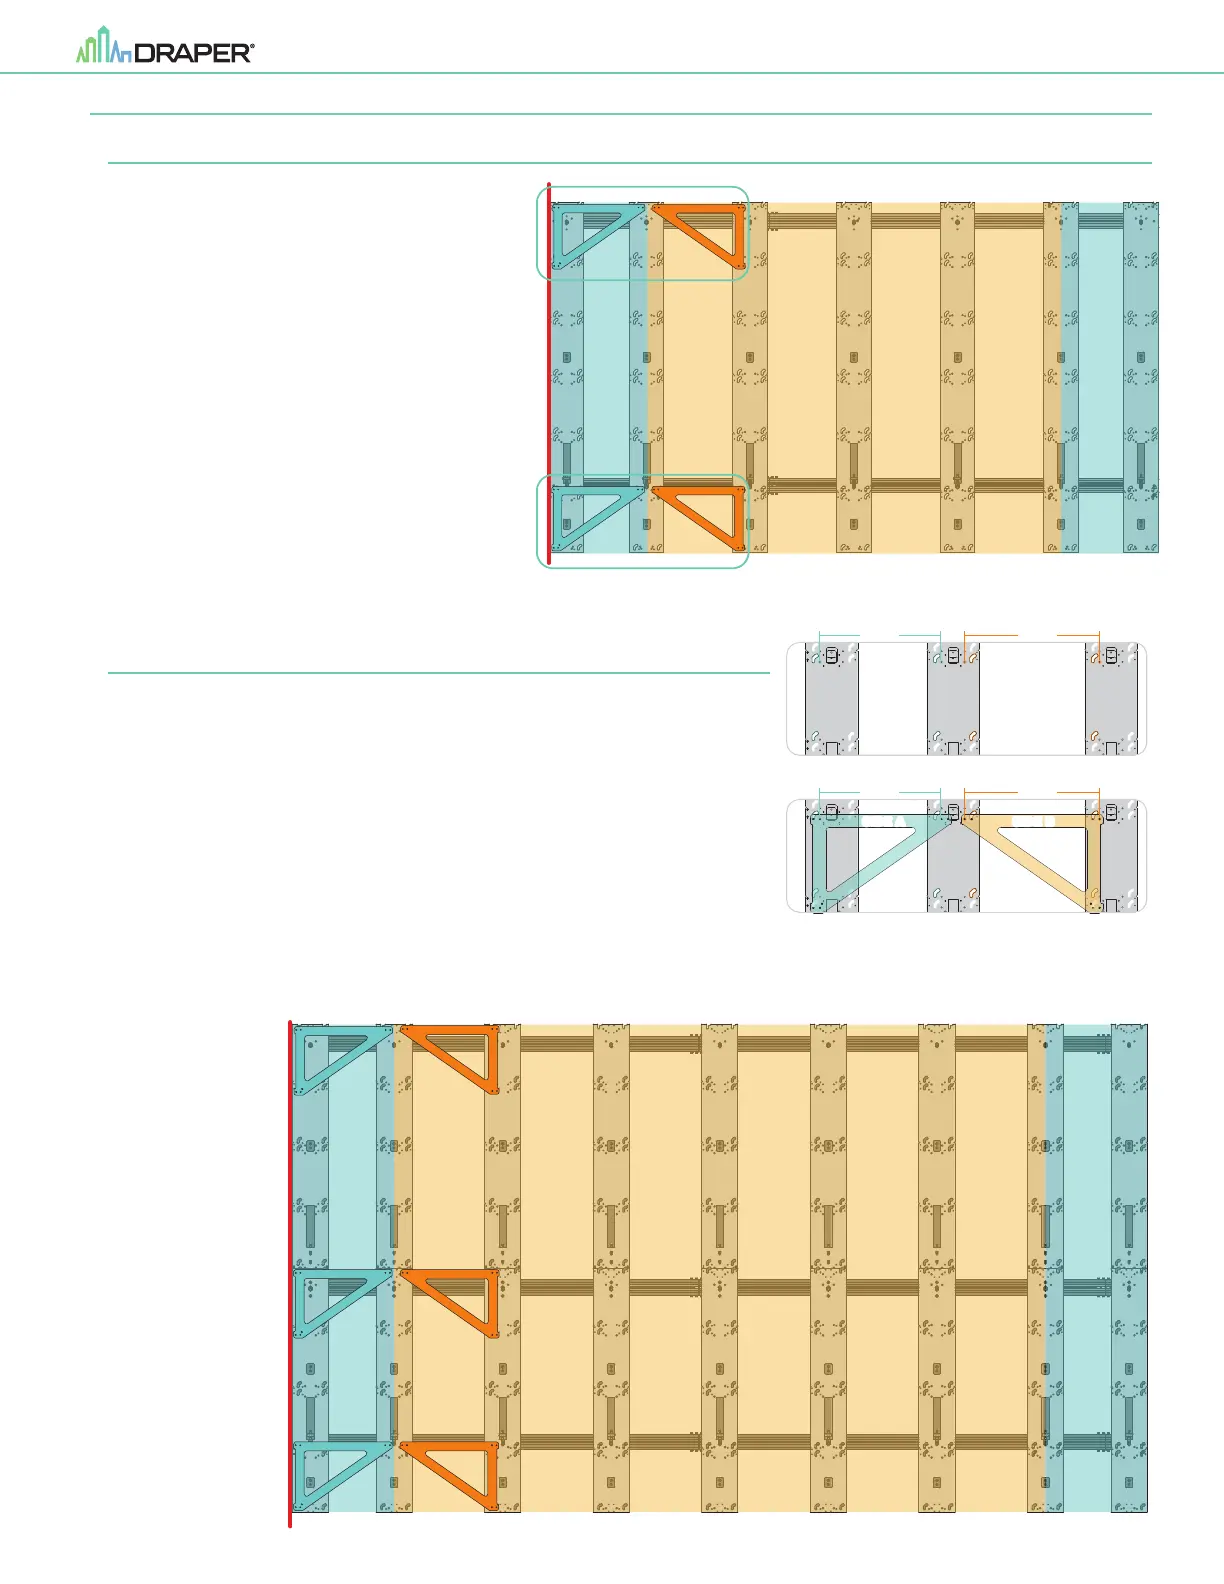
Section 11.2 - X - Axis Adjustment (Squaring Verticals with provided Alignment Tool)
Section 11.2.1 - For LED arrays up to 6 panels high - 2 Horizontal Rails
1.
Shine a laser line at the left edge of the
structure and check that the first Vertical
Rail is square with the floor. To adjust,
loosen the fasteners installed in Section
10, Step 3 and slide the Vertical Rail
along the Horizontal Rail until. Tighten
fasteners when the first vertical is
square.
2.
Attach the two (2) alignment tools to the vertical rail
positioned in step 1.
Using Side A of the alignment tool insert the pins into the
corresponding alignment holes on the first vertical rail at
the top and bottom locations.
3.
Adjust the position of the next vertical rail in order for the
alignment pin on each tool to align with the corresponding
alignment hole in the vertical rail.
4.
Tighten the second vertical rail mounting screws.
Note: Use Side A of the alignment tool for the last vertical rail
alignment procedure.
Section 11.2.2 - For LED arrays 7 panels or higher - 3 Horizontal Rails
1.
Shine a laser line at the left edge of the structure and check that the first Vertical Rail is square
with the floor. To adjust, loosen the fasteners installed in Section 10, Step 3 and slide the
Vertical Rail along the Horizontal Rail until. Tighten fasteners when the first vertical is square.
2.
Attach the 2 alignment tools to the vertical rail positioned in step 1.
Using Side A of the alignment tool insert the pins into the corresponding alignment holes
on the first vertical rail at the top and bottom locations.
3.
Adjust the position of the next vertical rail in order for the alignment pin on each tool to align
with the corresponding alignment hole in the vertical rail.
4.
Tighten the second vertical rail mounting screws.
5.
Remove alignment tools and re-attach each using side B to the 3rd vertical rail using the
corresponding alignment holes at the top and bottom of the rail.
6.
Adjust the position of the 3rd vertical rail so that the pin on the end of the tool aligns with the corresponding hole on the 2nd vertical rail.
7.
Tighten the mounting screws on the 3rd mounting rail and repeat the process moving across the structure from left to right.
Adjust Vertical
Rails Until
Plum with
Laser Line
NOTE: 2 LED Alignment Tools are provided. Mutiple placements are shown.
Adjust Vertical
Rails Until
Plum with
Laser Line
 Loading...