page 8 of 28
Foundation
™
for LED Panels
Section 3 - Determining Mounting Location
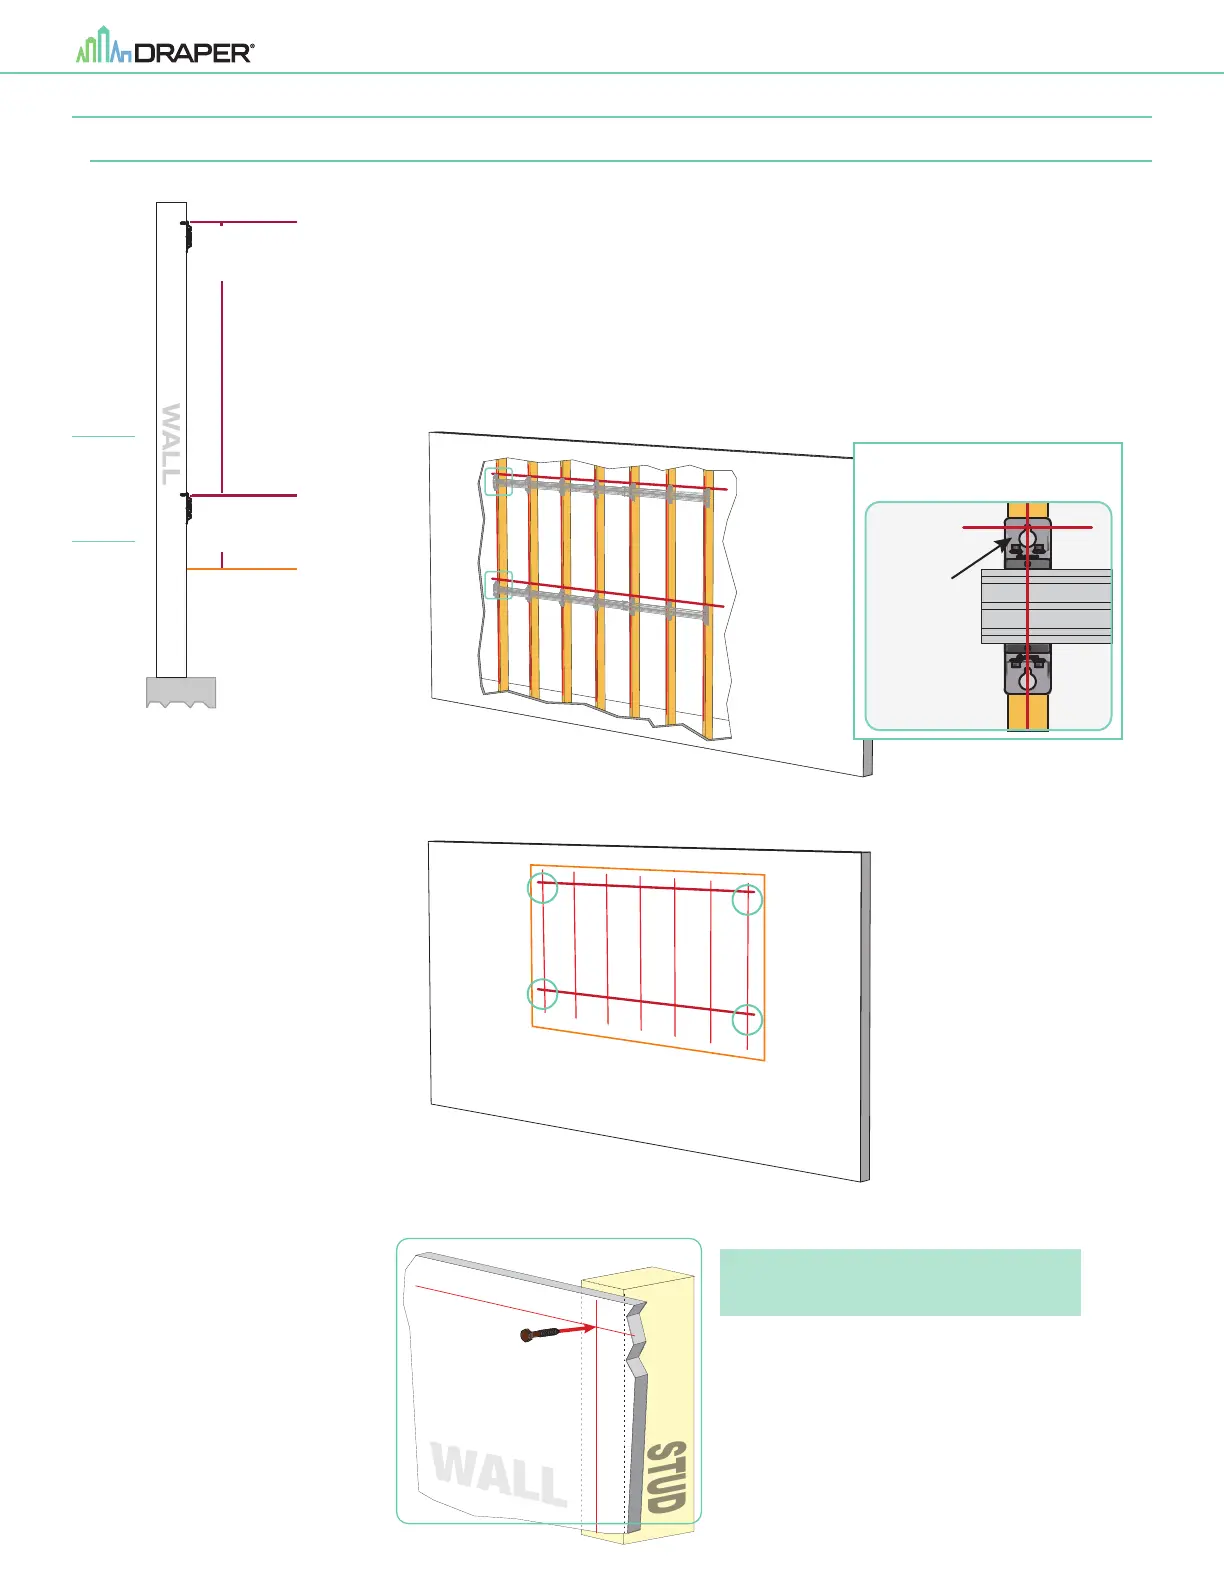
Section 3.1 - For LED arrays up to 6 panels high - 2 Horizontal Rails
The Foundation Wall Brackets must be securely anchored to the wall.
If mounting to drywall
/
gypsum board wall, all mounting hardware (by others) must be anchored to a vertical stud.
If mounting to a brick or block wall, the brackets must be evenly spaced no more then 32” (813mm) apart.
1.
Mark the location of the Bottom Left Corner of the viewing area.
2.
Measure up 19.8” (489mm) and draw a level horizontal line equal to the width of the LED Wall.
This is the location of the bottom rail mounting points.
3.
Measure up 61.22” (1555mm) from the first line and draw a horizontal line parallel to the first line and the floor.
4A.
If installing onto a Drywall
/
Gypsum Board surface, locate the wall studs and mark their location at the intersection
of the lines drawn in steps 2 & 3. These are mounting locations for the wall brackets.
4B.
If installing into brick or block wall, evenly space the vertical lines no more than 32” (813mm) apart.
5.
Loosely attach the wall mounting hardware (provided by others) to the wall at the outer four corners of the grid
created in steps 1-4B. Ensure the head of the hardware is at least
1
/
2
” (12mm) off the surface of the wall.
Stud locations and
Horizontal Rail positions shown
HORIZONTAL RAIL
PLACEMENT
STUD
TOP
KEYHOLE
SIDE
VIEW
61.22”
(1555mm)
BOTTOM
of Viewing Area
19.8”
(489mm)
2
1
BOTTOM
LEFT OF
VEIWING
AREA
Mounting
Hardware
(by others)
5
The assembled Horizontal Rails will be hung from
these in SECTION 5 - Hanging Horizontal Rails.
Please Note: It is the responsibility of the installer to
select mounting hardware appropriate
for the mounting surface
 Loading...