This document is the user manual for the Draper 750W 230V 1100mm Digital Wood Lathe, Stock No. 60990, Part No. WTL1100. It provides comprehensive instructions for the safe and effective use, assembly, operation, and maintenance of the product.
Function Description
The Draper Digital Wood Lathe is designed for turning wood on its axis to perform various operations such as cutting, knurling, and sanding. Any other application is considered misuse. The manual emphasizes the importance of reading and understanding all instructions before assembling, operating, or maintaining the product to ensure both product and operator safety, as well as to prolong the life of the tool.
Important Technical Specifications
The wood lathe has the following key specifications:
- Stock No.: 60990
- Part No.: WTL1100
- Rated Voltage: 230V/50Hz
- Rated Input: 750W
- Woodturning Capacity:
- Diameter: 360mm
- Length: 1100mm
- Spindle Speed: 500 - 2000rpm
- Spindle Thread: 3/4 x 16TPI
- Spindle Taper: MT1
- Sound Pressure Level: 73dB(A)
- Sound Power Level: 86dB(A)
- Vibration Level: N/A
- Weight: 92kg
The manual also highlights the importance of environmental considerations for operation. Damp air can cause components to rust, and dust and debris can clog parts, leading to reduced performance if not properly cleaned and maintained.
Usage Features
The manual details various usage features, from initial setup to basic wood turning techniques.
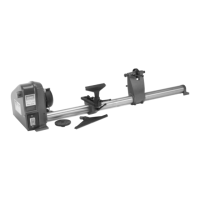
Identification of Components:
The lathe consists of several key parts:
- Bed
- ON/OFF switch
- Locking lever
- Headstock
- Digital speed display
- Speed change lever
- Drive spur
- Motor
- Tool rest
- Tool rest extension
- Tool rest bolt
- Locking tailstock bolt
- Live centre
- Tail spur adjustment knob
- Tailstock
- Stand
- Tool rest locking bolt
- Locking handle
- Cable and non re-wireable plug
Unpacking and Checking:
Upon receipt, users are instructed to carefully remove the product from its packaging, check for any shipping damage, and verify all contents against the provided list. Damaged or missing parts should be reported to Draper Helpline. Packaging materials should be retained during the guarantee period.
Preparing the Wood Lathe:
- Wood Lathe Stand Assembly: The stand (16) is assembled using supplied nuts and bolts, fixing the top plates (15.1) with the four legs (15.2) and the shelf/supports (15.3). It is crucial to securely fasten the stand to the floor using suitable fixings (not supplied).
- Mounting the Lathe to the Stand: The heavy lathe is lifted onto the stand's top plates, aligning holes in the bed with the stand, and bolted in place with 8 supplied fixings.
- No-Volt ON/OFF Switch (2): This switch is recommended to be fixed to a stand leg using two longer bolts (2.1) through the rear of the switch box. The cable from the switch to the motor must allow headstock rotation and never pass between the bed and workpiece.
- Drive Spur (7) and Live Centre (13): The drive spur (with prongs) and live centre (with bearing) are inserted into the tailstock barrel and headstock spindle, respectively, by tapping them securely with scrap timber and a hammer.
- Removal of Spurs: An ejection pin (22) is used to push out the live centre from the tailstock (15.1). For the drive spur, the ejection pin (22) is inserted into a hole in the thread protection cap (4.1) while holding the spindle with a wrench (21), then undoing the cap to force the spur out.
Setting the Wood Lathe:
- No-Volt ON/OFF Switch (2) Operation: The WTL95 features an emergency shut-off cover. Closing the cover firmly triggers the stop button. To re-open, slide the red button. In case of power failure, the machine must be manually restarted. To switch on, lift the sprung cover and push the 'I' button. To switch off, push the 'O' button or strike the cover (2) firmly for emergency stop.
- Changing Speed: The machine must be running to change speed. Pull the speed change lever (6) away from the headstock and move it to the desired speed indicated on the handle. The lathe should be in speed 1 (slowest) before turning off for easier start-up.
- Rotating the Headstock (4): The headstock can be rotated 45°, 90°, 135°, and 180°. Loosen handle (3) and pull release pin (4.2) to rotate. Release the pin to lock it in place, then retighten handle (3). This is useful for turning bowls.
- Sliding the Headstock (4): Loosen handle (3) to slide the headstock along the bed. Lock it in position by retightening handle (3).
- Moving the Tailstock (15): To slide the tailstock along the bed, loosen lever (13.1) and tighten it to lock. To move the live spur in and out, loosen locking lever (12) and rotate wheel (13). Lock in place with lever (12).
- Adjusting the Tool Rest (9): To move the tool rest along the bed, slide it or rotate by loosening handle (18). To change angle or height, loosen handle (17). An extension (10) is provided for bowl turning; it fits by loosening handle (17), removing the tool rest, and sliding the extension in place. Loosen handle (9) on the extension to adjust the tool rest. Ensure all locking handles are secured after adjustment.
- Changing the Belt: Set the lathe to speed position 1, switch off power, and remove the plug. Remove the pulley cover. Insert a disc between the two halves of the motor pulley and between the belt runs. Slowly rotate the drive spindle back and forth by hand while turning the speed lever to a higher speed. Once maximum speed is reached, the belt can be removed. Fit a new belt and reverse the process to return to speed 1, then remove the disc and replace the pulley cover.
Basic Wood Turning:
The manual provides detailed guidance on wood turning, including:
- Spindle Turning: Select wood (e.g., 50x50x300mm), draw diagonal lines on ends to find centres, drill 1.5mm holes (7mm deep). Secure workpiece in a vice, tap drive spur into one hole, check imprints. Clean drive spur and live centre, insert into lathe. Place workpiece between centres, close tailstock, ensuring marked end is at tailstock. Position tool rest approx. 3mm from wood corners and 3mm above centre line. Select appropriate speed and rotate workpiece to check for fouling.
- Using Woodworking Chisels: Professional chisels (approx. 250mm handles) provide good grip and leverage. Sharp chisels are easier to use and give a cleaner finish. Six common types are gouge, skew, parting tool, spear point, flat nose, and round nose.
- Theory of Turning (Cutting vs. Scraping):
- Cutting Chisels: Gouge, skew, and parting types, sharpened to a razor edge on both sides. Held so the sharp edge digs into the revolving workpiece, producing shavings. Faster and smoother finish.
- Scraping Chisels: Flat nose, round nose, and spear point types, not honed on flat sides (wire edges aid scraping). Held at a right angle to the workpiece, producing fine wood pieces. More precise and easier to control, but dulls chisels faster.
- Cutting is used for general spindle turning, while scraping is mainly for faceplate turning (across the grain).
- Tool Rest Positioning for Circumference Turning:
- Correct: Bevel against workpiece, tool rest acts as fulcrum, chisel peels off shavings.
- Too Low: Chisel bevel held out, digs deeper, bounces/chatters, kickback.
- Too High: Chisel strikes near top, horizontal force, kickback.
- Too Far Away: Less leverage, difficult to hold chisel, too high on workpiece.
- Large Diameter: Tool rest can be above centre line and further out.
- Small Diameter: Tool rest should be closer to surface, repositioned as workpiece gets smaller.
- Tool Rest Positioning for Circumference Scraping: Less critical than cutting. Chisel normally held horizontally, or angled for difficult places. Wire edge does the scraping. Chisel positioned correctly on tool rest (Fig.31) prevents "no stock removed" (Fig.30) or "edge digging in" (Fig.32).
- Tool Rest Positioning for Diameter Scraping: Operations MUST be done to the left of the centre, where the workpiece moves upward. If placed to the right, the chisel will be carried up and off the tool rest. Chisel contact points vary; easiest to hold steady when chisel contacts workpiece centre line. Position tool rest approx. 3mm below centre.
- Using the Gouge Chisel: 6, 12, 18mm sizes are common. Used for rough circumference turning, rapid removal of stock, cutting coves, shaping long cuts, and scraping. Held with convex side down, rolled 30-45° in direction of advance, cutting edge slightly in advance of handle.
- Using a Skew Chisel: 12, 25mm sizes are common. Used for finished cuts, vees, beads, and square shoulders. Not for scraping. Held with cutting edge considerably in advance of handle, bevel against work. Place skew over workpiece, pull back until edge cuts, then swing handle to advance cut. Both toe and heel can be used for light cuts. Avoid deep penetration to prevent burning.
- Using a Parting Chisel: Primary purpose is to cut straight into workpiece, or cut off. Narrow (approx. 3mm wide), shaped for clearance to prevent burning. If used as a scraper, back off regularly to prevent overheating.
- Using Scraping Chisels: 12mm spear point, 12mm round nose, and 26mm flat nose are common. Useful for diameter scraping and circumference scraping when cutting methods are not possible. Spear point for fine scraping, beads, parallel grooves, shallow vees. Round nose for rounding edges and bowl contours. Flat nose for flat surfaces.
Maintenance Features
Regular maintenance is crucial for the longevity and safe operation of the lathe.
- Safety First: Always disconnect the lathe from the power source before servicing, changing accessories, or performing any maintenance.
- Gearbox Oil: Check oil level monthly (with bow raised to highest position, observe sight glass). Top up by removing filler bolt if needed. Change oil every 6 months (drain plug at bottom, bow in highest position).
- Cleanliness: Keep all surfaces clean and free from rust, slag, chips, and coolant build-up.
- Cleaning Method: Do not use compressed air as it can force chips into guide bearings. Use a small paint brush or parts cleaning brush to remove metal particles.
- Lubrication: Wipe down with a clean dry cloth and oil all unpainted surfaces with light machine oil.
- Blade Guides: Keep clean and free from metal chips. Check guide bearings frequently for proper adjustment and free running.
- Blade Cleaning Brush: Ensure it is properly adjusted and in good working order. Replace if worn or damaged. WARNING: Do not adjust the blade brush with the machine running; only adjust when disconnected from the power source.
- Coolant Tank: Clean out at least twice a year.
Optional Accessories
Draper Tools offers a range of optional accessories available from local stockists:
- Stock No. 29422 (AWL1): Tailstock Chuck and Arbour Set
- Stock No. 29424 (AWL3): Screw Chuck
- Stock No. 29429 (AWL8): Right Hand Thread Face Plate
- Stock No. 37168 (AWL40): Combination Chuck
- Stock No. 33831 (FS8): Face Shield
- Stock No. 58697 (AWL44): HSS Wood Turning Chisels
A comprehensive range of wood lathe accessories can be found in the Draper Catalogue.
The manual includes extensive health and safety information, emphasizing general safety instructions for power tool use:
- Read Manual: Understand all operations, especially starting and stopping in emergencies.
- Work Area: Keep tidy and clean to prevent trips and maintain concentration.
- Location: Use in a suitable location with good light, avoid damp/dusty areas. Do not expose to rain. Do not operate near flammable materials.
- Electric Shock: Avoid contact with earthed surfaces, protect power cable.
- Bystanders: Restrict children and onlookers from the work area.
- Unplug and Store: Unplug tools not in use, store securely away from children.
- Overload/Misuse: Do not overload or adapt tools for unintended applications. Select appropriate tools for the job.
- Dress Properly: Avoid loose clothing, long hair, and jewellery. Tie back long hair, remove neckties. Wear fully enclosed, non-slip footwear.
- PPE: Wear personal protective equipment (PPE) such as dust masks, vibration-reducing gloves, safety goggles, or a face shield, depending on the hazards.
- Air Quality: Connect to an extraction system if work creates dust/fumes.
- Moving Machine: Do not carry by power cable. Use assistance or mechanical devices for heavy products.
- Overreach: Avoid overreaching to prevent loss of balance and falls.
- Tool Maintenance: Maintain tools correctly, replace damaged/missing parts with original manufacturer parts. Keep blades sharp, moving parts clean/oiled, handles clean, emergency devices working.
- Wait for Stop: Wait for all parts to stop before making adjustments or maintenance.
- Setting Tools: Remove all setting tools/keys before starting.
- Unintentional Starting: Ensure switch is OFF before plugging in.
- Extension Leads: Select approved, compatible leads rated for the appliance. Fully extend leads.
- Concentration: Stay alert, do not operate under influence of drugs/alcohol or when tired.
- Qualified Repair: Have tools repaired by qualified personnel using original parts.
- Specific Lathe Safety:
- Always wear eye protection and a mask/respirator.
- Keep hands clear of moving parts.
- Keep turning chisels sharp.
- Keep pulley cover guards in place.
- Never reach behind or beneath the workpiece.
- Unplug before adjusting or servicing.
- Do not use in damp conditions or expose to rain.
- For indoor use only.
- Secure the workpiece correctly/safely.
Troubleshooting
The manual includes a troubleshooting section with common problems, probable causes, and suggested remedies:
- Motor will not run:
- Probable Cause: Fuse blown, defective on/off switch, defective switch cord, burned out motor.
- Suggested Remedy: Remove plug, replace fuse. Replace defective parts. For burned out motor, repair by qualified service technician only.
- Headstock loose on bed:
- Probable Cause: Locking handle not tight.
- Suggested Remedy: Tighten locking handle.
- Wood burns at tailstock end:
- Probable Cause: Live centre too tight or not lubricated.
- Suggested Remedy: Back off tailstock barrel and lubricate live centre. Refer to "Spindle Turning" section.
Disposal
At the end of its working life, the machine must be disposed of according to national regulations. Users should contact their local authority for collection schemes.
- Do not dispose of power tools with domestic waste.
- Do not incinerate.
- Do not abandon in the environment.
- Do not dispose of WEEE (Waste Electrical & Electronic Equipment) as unsorted municipal waste.
This comprehensive manual ensures users have all necessary information for the safe, effective, and long-lasting operation of their Draper Digital Wood Lathe.