EasyManua.ls Logo

Dream On Me 678 User Manual

Dream On Me 678
11 pages
To Next Page IconTo Next Page
Page #1 background imageLoading...
Page #1 background image
1
STYLE NO: 678
DREAM ON ME INC.
125 HELEN STREET
S.PLAINFIELD NJ 07080
908-791-0555
MADE IN CHINA
Read all instructions before assembling crib.
Save instructions for future use.
Adult assembly required.
Small parts may present choking hazard prior to assembly.
Enclosed please find simple step-by-step instructions to help
you quickly assemble your products.Before you begin we
recommend that you following the steps below:
1.Please read the instructions thoroughl
y.
2. Identify all parts and hardwares
3.You will need the following tools:
Philips head screw driver
Flat head screw driver Hammer
Do Not Use Power Drills or Drivers
To protect your parts during assembly please place them on a
soft surface.
To clean surface use only water on a damp cloth. Do not use
window cleaners or cleaning abrasives as it will scratch the
surface and could damage the protective coating.
Question and Answer IconNeed help?

Do you have a question about the Dream On Me 678 and is the answer not in the manual?

Dream On Me 678 Specifications

General IconGeneral
BrandDream On Me
Model678
CategoryIndoor Furnishing
LanguageEnglish

Summary

General Information and Safety Warnings

Assembly Preparation and Guidelines

Read all instructions, save for future use. Adult assembly required. Beware of choking hazards from small parts. Recommended tools and cleaning advice.

Critical Safety Warnings

Failure to follow warnings can cause serious injury or death. Includes strangulation, suffocation, and entrapment risks. Proper mattress use is essential.

Connection Hardware and Parts

Connection Hardware Identification

Identifies all bolts, barrel nuts, wood dowels, washers, screws, belts, and an Allen wrench for assembly.

Parts Enclosed in Carton

Lists and illustrates all numbered components (A-K) included in the carton for assembly.

Step-by-Step Assembly Guide

Step 1: Assemble Changer Legs and Rails

Connects changer back leg (B1) and front leg (B2) to changer rails (B3-B6) using dowels, barrel nuts, and bolts.

Step 2: Attach Changer Top Rail and Shelf Supports

Attaches changer top rail (C) and shelf supports (D) to changer left side (A) using dowels, barrel nuts, and bolts.

Step 3: Install Changer Shelves and Middle Rail

Slides changer shelves (F) into grooves and attaches changer middle rail (E) to changer left side (A) using dowels.

Step 4: Complete Changer Frame Assembly

Completes the changer frame by assembling parts from Step 1(B) to the structure built in Step 3.

Step 5: Attach Crib Side Rail and Headboard

Connects crib side rail (H) to the headboard (G) and the assembled changer unit using barrel nuts and bolts.

Step 6: Mount Metal Spring Support Platform

Positions and secures the metal spring support platform (J) to the crib legs using 5/8" bolts.

Step 7: Attach Second Crib Side Rail

Attaches the second crib side rail (H) to the assembled crib structure using the same method as Step 5.

Step 8: Install Safety Belt and Changer Pad

Installs the safety belt (j) using a washer and screw, then adds the changer pad (K).

Step 9: Final Assembly View

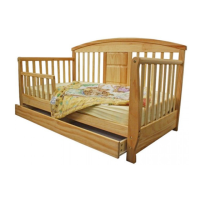
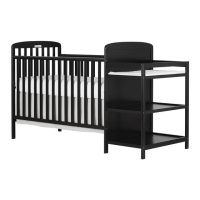
Shows the fully assembled crib and changer unit after all steps are completed.

Furniture Tipping Deterrent Installation

Tipping Restraint Hardware Instructions

Provides step-by-step instructions for securely attaching anti-tip brackets to the furniture and wall.

Related product manuals