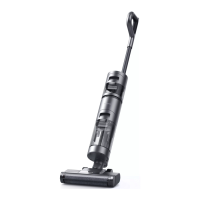
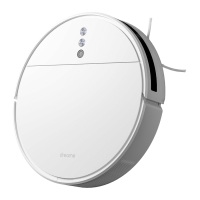
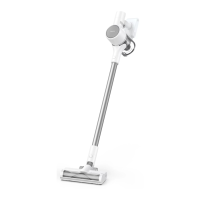
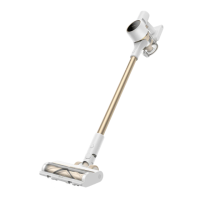
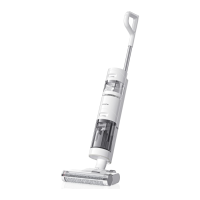
The Dreame H11 Wet and Dry Vacuum is a versatile cleaning appliance designed for both wet and dry messes. It combines the functionality of a vacuum cleaner with the ability to wash floors, making it suitable for a variety of cleaning tasks in the home.
Function Description
The Dreame H11 is primarily a wet and dry vacuum, meaning it can effectively clean up both solid debris and liquid spills. It features a roller brush assembly that scrubs surfaces while simultaneously vacuuming up dirt and water. The device is equipped with separate tanks for clean water and dirty water, ensuring that clean water is always used for washing and dirty water is collected separately. This design prevents cross-contamination and ensures a more hygienic cleaning process.
A key feature of the Dreame H11 is its self-cleaning function. After use, the vacuum can be placed on its charging base, and with a press of a button, it will automatically clean the roller brush. This helps to maintain the hygiene of the brush and prolong its lifespan. The vacuum also includes a voice prompt system that provides real-time feedback and guidance during operation, such as indicating tank status or cleaning modes.
The device offers different cleaning modes, including a Standard Mode and a Turbo Mode, allowing users to adjust the suction level based on the cleaning intensity required. An LED display screen provides visual information about the battery level, cleaning status, and any errors.
Important Technical Specifications
- Model: VVW7
- Rated Voltage: 21.6 V
- Rated Power: 170 W
- Rated Capacity: 2300 mAh
- Nominal Capacity: 2500 mAh
- Clean Water Tank Capacity: 900 mL
- Dirty Water Tank Capacity: 500 mL
- Charging Time: Approx. 3 hours
- Charging Voltage: 26 V
Power Adapter Specifications:
- Model: YLS0251B-E260090 (EU) / YLS0251A-A260090 (AU)
- Input: 100-240 V ~ 50/60 Hz 0.8 A Max
- Average Active Efficiency: 87.28%
- Efficiency at Low Load (10%): 79.74%
- No-Load Power Consumption: 0.08 W
The product contains batteries that are non-replaceable and should be handled by qualified technicians for after-sales service. The lithium-ion battery pack contains substances that are hazardous to the environment. Users are advised to remove the battery, disconnect the power, and run out the battery as much as possible before removing the bottom cover of the device by unscrewing the screws. The terminals should be disconnected to remove the battery. Disposal of the battery should follow local laws and regulations.
Usage Features
- Installation: The handle assembly easily clicks into the main body. The accessory holder can be installed onto the charging base.
- Charging: The vacuum is charged by placing it on the charging base. The display screen shows the current battery level, and the indicator turns off after 10 seconds when fully charged. It's recommended to charge the vacuum on a level ground against a wall.
- Filling the Clean Water Tank: To fill the clean water tank, press the release button and pull the tank outward. Open the tank cover, add clean water, then close the cover tightly and install the tank back into the main body until a click is heard.
- Starting Cleaning: The vacuum is equipped with an upright/tilt switch. To start cleaning, tilt the vacuum at an angle and press the power button. Short presses turn the vacuum on/off, while pressing again stops cleaning. It's important not to lift up or move the vacuum sideways when working to prevent dirty water leakage. The vacuum should not be reclined more than 140° to protect against water leakage.
- Switching Suction Level: The vacuum defaults to Standard mode when powered on. The suction level can be adjusted to Turbo mode as needed.
- Voice Prompt Button: This button allows users to activate voice prompts or adjust the volume. Press and hold for 3 seconds to switch between languages.
Maintenance Features
Regular maintenance is crucial for the optimal performance and longevity of the Dreame H11.
- General Tips:
- Ensure the vacuum is unplugged before any maintenance.
- Parts that need to be replaced should be original parts to avoid damage.
- For extended periods of non-use, fully charge the vacuum, unplug it, and store it in a cool, low-humidity environment away from direct sunlight. Over-discharge of the battery should be avoided by recharging the vacuum at least once every 3 months.
- One-Click Self-Cleaning:
- The self-cleaning function is enabled only when the vacuum is charged and the battery level is more than 10%.
- Place the vacuum upright on the charging base after designated cleanups and ensure the clean water tank is full.
- Press the self-cleaning button on top of the handle. The self-cleaning indicator lights up on the screen, and the self-cleaning starts.
- The vacuum will continue to recharge after the self-cleaning is finished.
- If deep self-cleaning is needed, press and hold the button to activate the deep self-cleaning function. Fill the clean water tank and empty the dirty water tank before activation. This function can be activated only when the vacuum is charged and the battery level is more than 30%.
- After self-cleaning is completed, clean the dirty water tank in time. If there are residual stains on the base, clean up the base in time.
- Cleaning the Roller Brush Cover:
- Press the roller brush cover release buttons on both sides outward to remove the cover.
- Rinse the roller brush cover with clean water until it is clean.
- Thoroughly dry the cover before use.
- Align the brush cover with the right slot on the vacuum and press the cover down until a click is heard.
- Cleaning the Roller Brush:
- Pull up the left handle of the roller brush and take it out.
- Use the included cleaning brush to remove hairs and debris that get stuck in the roller brush. Rinse it with clean water.
- The roller brush must be thoroughly dried before use.
- Wipe dust from the dust intake with a dry cloth or paper towel. Never rinse with water.
- After cleaning, align the right end of the roller brush with the right slot on the vacuum, then push the left end into the left slot on the vacuum until it clicks into place.
- It is recommended to clean the roller brush every 3 to 6 months.
- Cleaning the Dirty Water Tank:
- It is recommended to empty the dirty water tank after each use, and before and after the self-cleaning function is enabled.
- Press the dirty water tank release button and pull it out.
- Hold the tank with one hand and pull up the tank cover with another hand to pour out the dirty water.
- Rinse the tank and tank cover with clean water. Clean the inner wall of the tank with the included cleaning brush.
- After cleaning, snap the bottom of the tank into the support position of the vacuum, and gently push the tank until a click is heard.
- Cleaning the Filter:
- It is recommended to clean the filter after each use and replace it every 3 to 6 months.
- Remove the filter from the top of the dirty water tank.
- Rinse the filter with clean water. Thoroughly dry it before re-installing it.
- Cleaning the Tube:
- Remove the dirty water tank, wipe it with a damp cloth to clean up the dirt in the tube before use.
Troubleshooting and FAQ
The manual provides extensive troubleshooting information, including possible causes and solutions for common errors.
- Vacuum not working:
- Handle assembly not installed in place: Reinstall the handle assembly.
- Out of battery or low on power: Fully charge the vacuum, then continue to use it.
- Vacuum is upright: Recline the vacuum.
- Roller brush issues:
- Roller brush not installed or stuck: Reinstall or clean the roller brush.
- Dirty water tank issues:
- Dirty water tank not installed or full: Reinstall or empty the dirty water tank.
- Filter clogged: Clean the filter.
- Weak suction force:
- Roller brush cover, filter, and clean water tank not installed: Make sure parts are installed correctly.
- Roller brush entangled by hairs: Refer to the maintenance manual for cleaning the roller brush.
- Foreign objects in the tube: Clean the tube.
- Motor making strange noise:
- Too much dirty water in the dirty water tank: Empty the dirty water tank.
- Main suction opening blocked: Clear any blockage in the main suction opening.
- Battery status indicator not lighting up while charging:
- Power adapter not plugged into electrical outlet: Make sure the power adapter is plugged in properly.
- Power adapter not connected to the charging base properly: Make sure they are connected properly.
- No water flow from top of the vacuum:
- Clean water tank not installed, or empty: Reinstall or fill the clean water tank.
- Water leakage from top of the dirty water tank:
- Collision or sharp pull causes water to enter the motor: Move gently back and forth when the vacuum is turned on.
- Filter not completely dry after being cleaned: Thoroughly dry the filter before use.
- Roller brush jammed by large particles: Open the brush cover to check and clean the roller brush.
- Vacuum not being charged: Make sure the vacuum is charged before activating the self-cleaning function.
- Self-cleaning failed:
- Self-cleaning cannot be started if battery level is less than 10%: The self-cleaning function can be enabled only when the vacuum is charged and the battery level is more than 10%.
- Dirty water tank not installed or full: Reinstall or empty the dirty water tank.
- Clean water tank not installed or empty: Reinstall or fill the clean water tank.
Troubleshooting Codes:
The device also displays error codes on the screen for more specific issues:
- E1/EE/EF: Motor error - Please contact customer service.
- E2/E3/E7/E8/E9: Battery failure - Please contact customer service.
- E4/E5: Power adapter incompatible - Please use the original power adapter, or contact customer service.
- E6: Battery overheating - Wait until the battery's temperature returns normal, then continue to use the vacuum.
The Dreame H11 Wet and Dry Vacuum is designed to simplify floor cleaning with its integrated wet and dry capabilities, self-cleaning function, and user-friendly interface. Regular maintenance as outlined in the manual will ensure its efficient and long-lasting operation.