Page 13For technical questions, please call 1-800-444-3353.Item 69230
SAFETYOPERATIONMAINTENANCE SETUP
3.
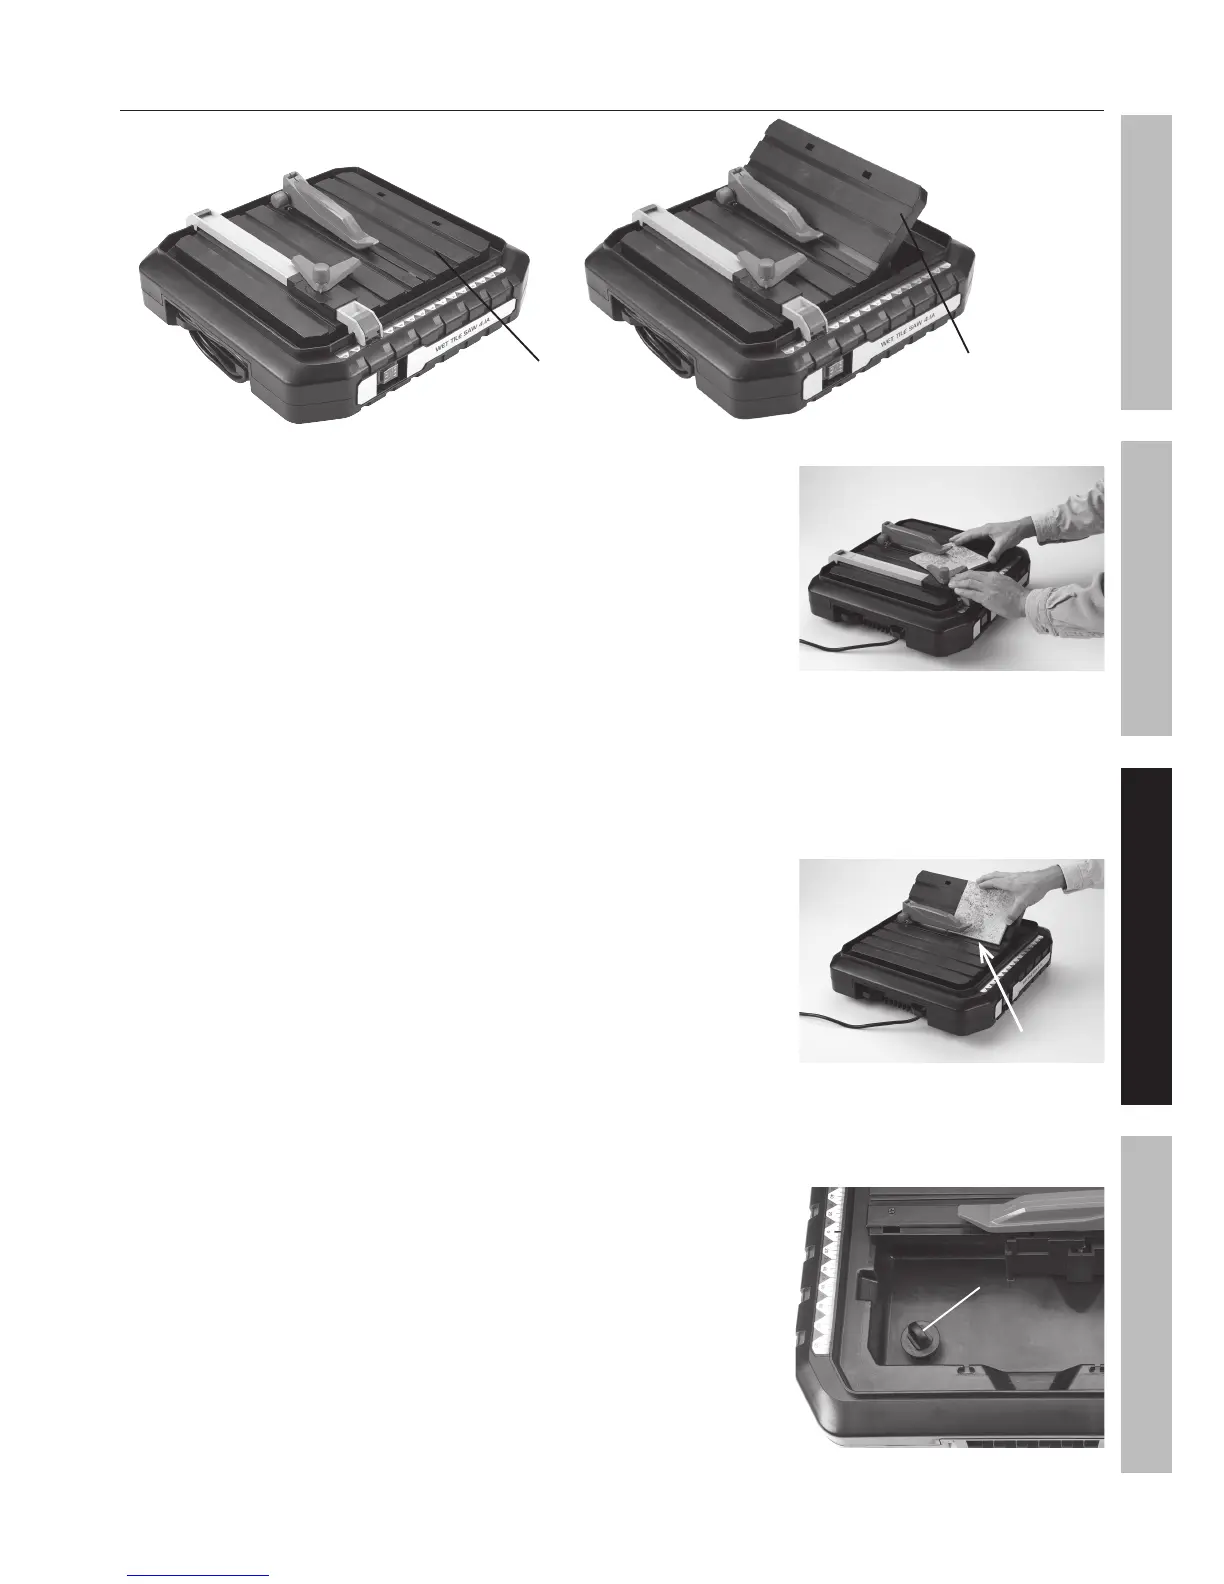
Figure 12
Removable Table Leaf
flat for straight cuts
Removable Table Leaf
hinged in place for
45° bevel cuts
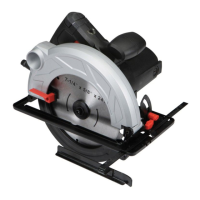
For Straight Cuts:
a. Insert the Removable Table Leaf into the three slots on the Table
Insert and lay it flat so it is even with the rest of the table top.
b. Install the Rip Fence on the Table Top with or without the
Miter Gauge. Adjust the Miter Gauge, if needed.
c. Place the workpiece on the Table and firmly against
the Miter Gauge and/or Rip Fence.
d. Make sure the workpiece is clear of the Blade, then dry your hands,
plug in the Saw, and turn the Power Switch to the ON position (I).
e. Let the Blade build up to full speed before cutting.
f. Hold the material firmly against the Rip Fence
and feed the material into the Blade.
g. When the cut is made, turn the Saw OFF (O). Wait for the Blade to
come to a complete stop before removing any part of the workpiece.
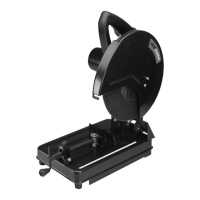
4. For 45° Bevel Cuts:
a. Make a straight cut if needed, as described above.
b. Pull up the Removable Table Leaf, pull out the hinged
Support on the underside of the Table Leaf and
insert the two tabs into the Table Top slots.
c. Place the workpiece on the Removable Table Leaf so that the
edge to be bevel cut rests in the bend of the Table Top.
d. Make sure the workpiece is clear of the Blade, then dry your hands,
plug in the Saw, and turn the Power Switch to the ON position (I).
e. Let the Blade build up to full speed before cutting.
f. Hold the material steadily against the bend in the
Table Top and feed the material into the Blade.
g. When the cut is made, turn the Saw OFF (O). Wait for the Blade to
come to a complete stop before removing any part of the workpiece.
5. To prevent accidents, turn off the tool and disconnect its power supply
after use. Place the Water Tank Drain hole over a bucket large enough to
hold the water. Pull out the Drain Plug and drain the water out of the
Water Tank. Clean, then store the tool indoors out of children’s reach.
Figure 13
Setup for straight cuts:
Figure 14
Bend in Table Top
Setup for 45° bevel cuts:
Drain Plug
Figure 15
General Operating Instructions (cont.)