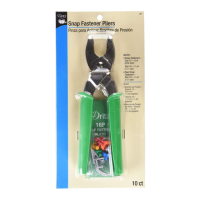
Do you have a question about the Dritz 16P and is the answer not in the manual?
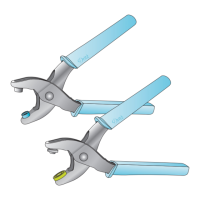
Use two layers of light to medium-weight fabric, reinforced with interfacing, and mark snap positions.
Position garment topside in pliers, align snap prong and socket, then squeeze firmly to apply.
Position garment underside in pliers, align snap prong and stud, then squeeze firmly to apply.
Use the gray tool remover by slipping the hook inside the pliers' ledge and pressing down to release.
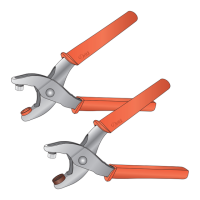
Prepare fabric with two layers of light to medium-weight fabric, reinforced with interfacing, and mark snap positions.
Position garment topside in pliers, align pearl prong and socket, then squeeze firmly to apply.
Position garment underside in pliers, align pearl prong and stud, then squeeze firmly to apply.
Use the gray tool remover by slipping the hook inside the pliers' ledge and pressing down to release.
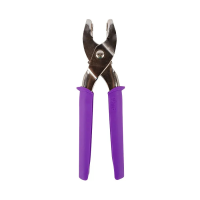
Squeeze pliers together and hook the gray tool remover at the top of the pliers for storage.
Remove worn inserts when tools no longer stay in place and replace them with new ones.
WARNING: CONTAINS SMALL PARTS. Keep away from children under 3.