1. Thoroughly clean and dry the glass
The following steps describe installation using the Standard Windshield
Mounting Bracket. This is the most common installation method and
applies to most sedans and light vehicles with sloped windshields and
standard rear view mirrors. See note below for available options.
CAUTION: This step is critical to prevent the bracket from falling off.
A) Select a location on the windshield behind the rear view mirror on the
passenger side of the vehicle.
B) Using the alcohol wipe provided, thoroughly clean the mounting area.
C) Using a clean, dry cloth, thoroughly dry the mounting area.
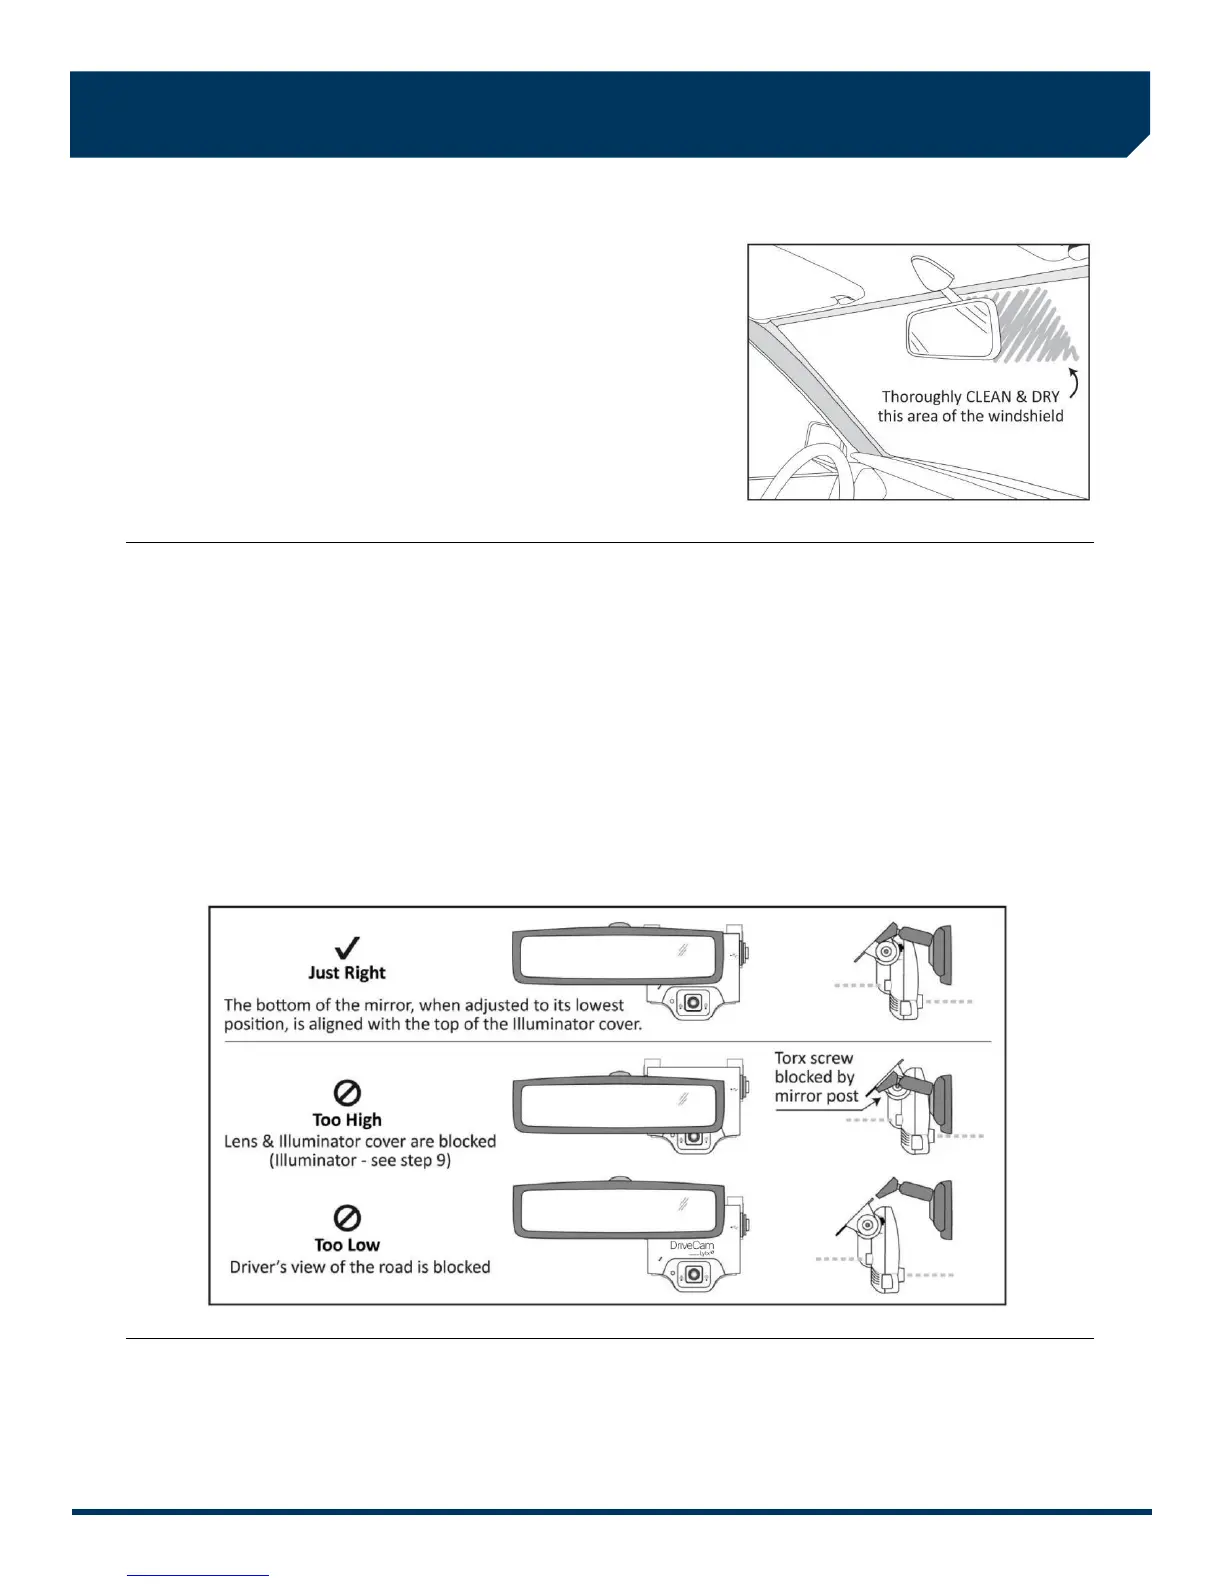
2. Carefully select a mounting location
The VER needs to be mounted in a location that provides an unobstructed view of the interior and exterior (front) of the
vehicle. Ideally, the interior-facing lens should capture a view from the outside shoulder of the driver to the outside
shoulder of a front seat passenger. The exterior-facing lens should capture a clear view of everything in front of the
vehicle, beginning as close to the front of the vehicle as possible without cutting off the horizon.
CAUTION: An improperly positioned VER can significantly reduce the effectiveness of the DriveCam Program.
A) Loosen the Torx screws so the VER can rotate in the bracket.
B) Adjust or move the mirror down to its lowest position.
C) Temporarily position the assembly (VER + bracket) behind the mirror, about one inch to the right of the post, providing
access to the Torx screw and power connection.
Mounting Options: Refer to the DriveCam Mounting Guidelines (DRC 340) if you’re installing in a vehicle without a
standard rear view mirror. The document provides additional details and diagrams about VER mounting in various vehicle
types, including instructions for using the Extended (Bulkhead) Bracket and RAM-Mount (Articulating) Bracket.
Government restrictions regarding the mounting of objects on the vehicle windshield and U.S. DOT exemptions are also
covered.