3. Mark the mounting location on the glass
CAUTION: Do not peel the backing from the adhesive
strips until the next step.
A) Hold the assembly in place and trace the outline of the
bracket on the windshield with a marker.
B) Remove the VER from the mounting bracket.
C) Check the fit of the bracket against the windshield.
If the windshield is curved, you may gently bend the
bracket so it will lie flush against the glass.
Final Location Check:
Before attaching the bracket in the next step, take a moment to verify that you have selected a good mounting location.
Hold the assembly in place and sit in the driver’s seat. Make sure the VER does not block the driver’s view of the road.
Rotate mirrors, sun visors, wipers, and other objects near the VER to make sure those items do not block or interfere
with either lens.
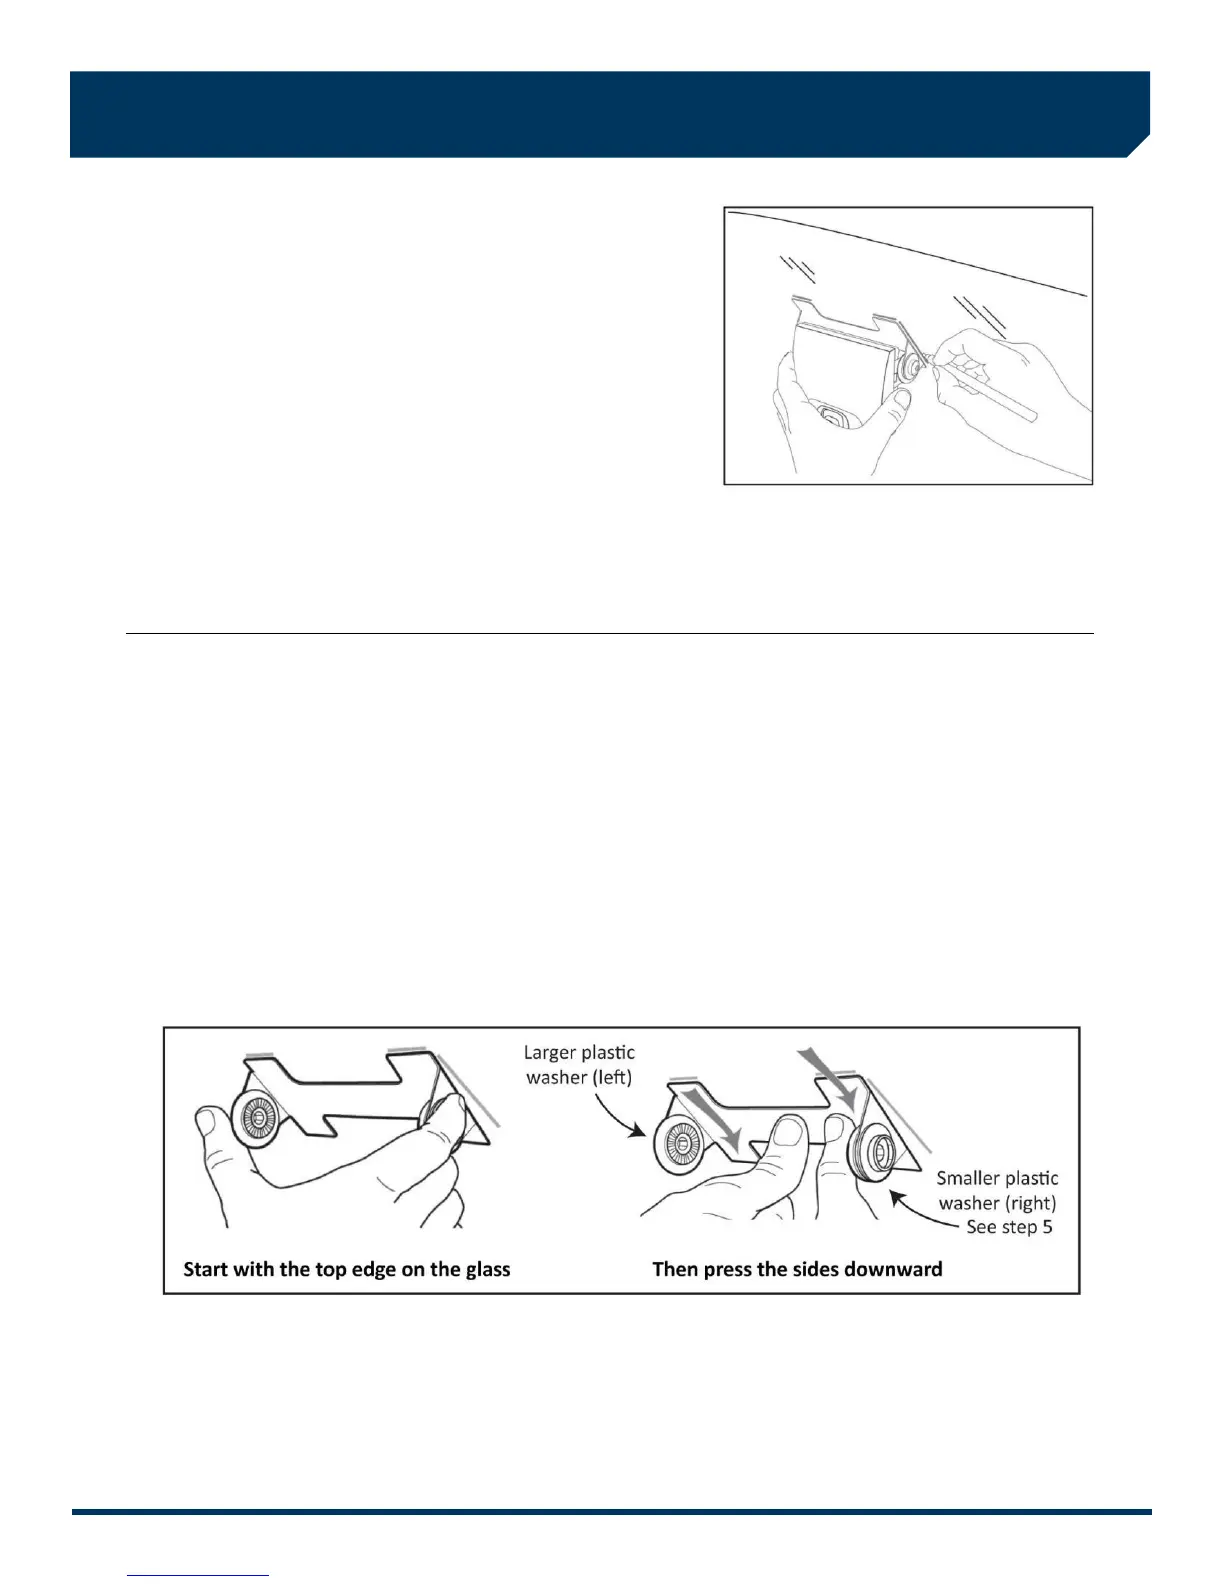
4. Attach the bracket to the windshield
CAUTION: The adhesive is very sticky. Once the bracket is attached, it will not easily come off.
A) Make sure the glass is clean and dry and the air temperature is at least 50 F (10 C).
B) Remove the backing from the adhesive side of the bracket.
C) Make sure the large plastic washer is on the left side of the bracket (see image below or next page).
D) Start by placing the top edge of the bracket against the windshield, aligned with the marks, and make sure it’s level.
E) Press the bracket firmly against the windshield starting at the top and pressing the sides downward.
Do not apply excessive pressure as it may cause the windshield to break.
F) Check from outside the vehicle to make sure there are no large air bubbles under the bracket.
You may need to (carefully) apply additional pressure to the bracket and remove any large air bubbles. Use a small pin
to create an escape path for the air if the problem is persistent.