PHONE: 858-430-4000 WWW.DRIVECAM.COM SUPPORT@DRIVECAM.COM
DRC201 2006-09-27
Page 5 Installing and Testing the DriveCam Event Recorder
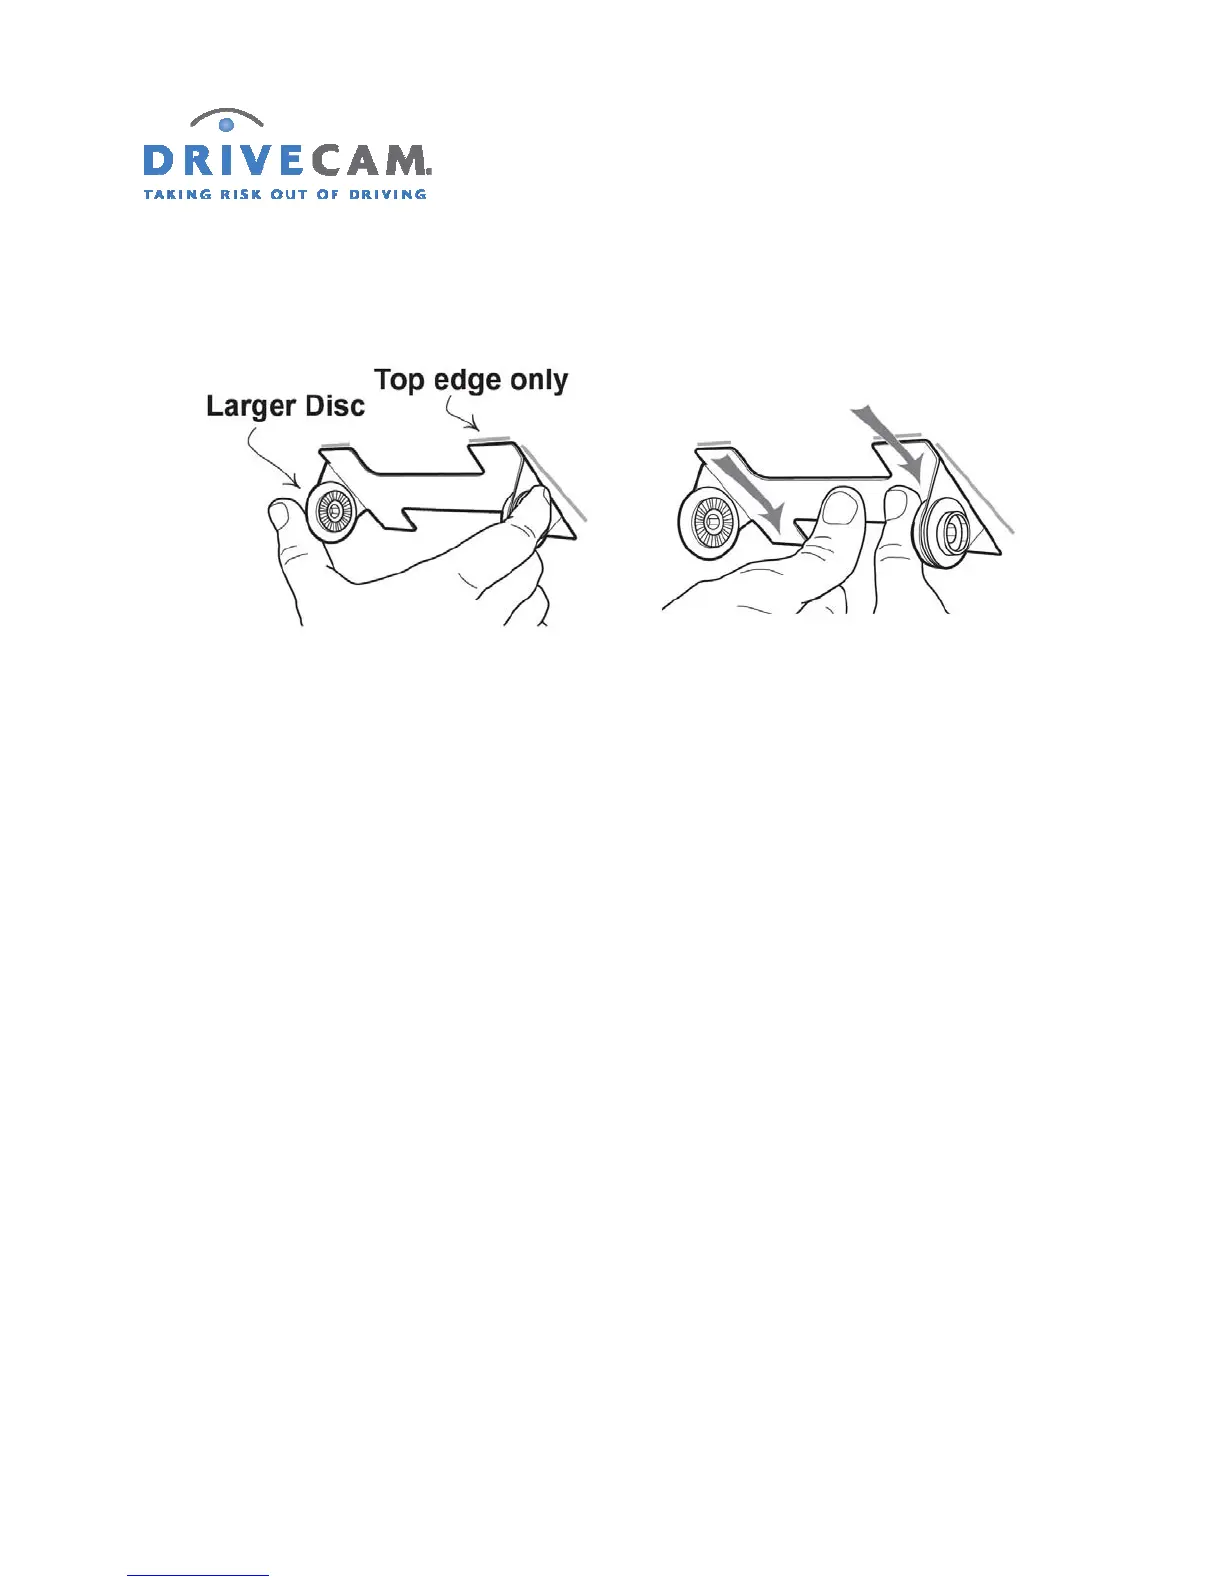
Step 10 Place only the top edge of the mounting bracket against the windshield and make sure it
is level before proceeding.
Step 11 When you are sure that the mounting bracket is positioned correctly, press it firmly
against the windshield starting at the top and pressing the sides downward.
CAUTION: Do not apply excessive pressure as the windshield may break.
Step 12 Check from outside the vehicle to make sure there are no large air bubbles under the
mounting bracket.
If necessary, use a screwdriver handle to (carefully) apply additional pressure to the mounting
bracket and remove any large air bubbles. Use a small pin to create an escape path for the air if
the problem is persistent.