Update 11/22/17
Page 1 of 4
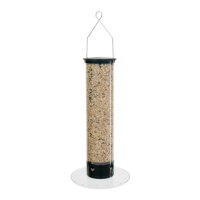
Yankee Flipper Feeder (YF)
Read Precautions and Important Information before operating
Feeder Placement
Hang the feeder far enough away from any deck rail, pole, tree, etc. so that the squirrel must place all of its body weight on the perch ring. The
recommended minimum is 14”, but a greater distance may be preferable since the mechanism is based on weight. A squirrel that is able to lean
across to the feeder by placing only part of its weight on the perch ring may avoid activating the perch ring.
Red squirrels and chipmunks may not be heavy enough to activate the perch ring, but placing the feeder so that they have to jump to it will
significantly increase your chances of deterring them.
Droll Yankees feeders can be disassembled for easy cleaning and part replacement.
Cleaning - Please, for the sake of the birds, keep your feeders clean! Dirty feeders can harm the birds by spreading disease. Instructions for
“Cleaning & Maintaining Your Bird Feeder” can be located on our website under the “support” tab.
Charging
1. Check to ensure the black knob located on the base assembly is in the OFF position.
2. Place the palm of your hand on the bottom of the feeder and insert your thumb and fingers through the spokes of the perch ring. Grasp
the base assembly and twist counterclockwise (viewed from the bottom), approximately 1/2”. You will hear and feel a distinct click,
then lower the base which will separate from the body of the feeder.
3. Insert the AC/DC adapter output plug into the input jack located at the top of the new Power Stick and charge for a minimum of 14
hours but not more than 24 hours. After charging is complete, remove the output plug of the AC/DC adapter from the top of the Power
Stick.
4. Install the base to the body of the feeder by placing the palm of your hand under the base, inserting your thumb and fingers through
the spokes of the perch ring. Grasp the base assembly and insert the three metal locking tabs into the three slots located underneath
the port, and twist clockwise (viewed from the bottom), approximately 1/2”. You will hear and feel a distinct click. The base is
installed correctly when one of the three arrows ( ) on the underside of the base assembly is aligned with the right hash mark on the
side of the port.
Tube Replacement
Removal of old tube
1. Check to ensure the black knob located on the base assembly is in the OFF position.
2. Release the tube from the feeding port by removing the four tube screws.
3. Lift the cap halfway up the bail wire which will allow the cap & bail wire assembly to fall to the side. Gently pull each end of the bail
wire out of the bail rod.
4. Lay the tube on its’ side with the bail rod parallel to the counter or floor. Using the palm of your hand, push down on the tube over the
bail rod until the tube becomes oval/oblong in shape. This will release the tube from the groove on one end of the bail rod. Reach inside
the tube and shimmy the other end out of the hole.
Installation of new tube
1. Install the bail rod by inserting it into both of the designated holes in the top of the tube. Using the palms of your hands, apply pressure
to the outside of the tube at both ends of the bail rod, until the tube locks into each groove.
2. Replace the cap & bail wire assembly by inserting each end of the bail wire into the bail rod. Make certain each end is fully inserted
before sliding the cap back into place on top of the tube.
3. Place the tube on the port aligning the holes in the tube with the holes in the port. Install each tube screw slowly, stopping as soon as
you feel slight resistance. Do not overtighten the screws as this will cause the tube to crack in hot weather from heat expansion,
or in cold weather from ice expansion. Cracking due to expansion, is not covered under our Lifetime Warranty against squirrel
damage.
Base - Removal & Disassembly
Go to: http://drollyankees.com/video/yankee-flipper-power-stick-replacement/to watch a short video on disassembly and reassembly of the base.
1. Check to ensure the black knob located on the base assembly is in the OFF position.
2. Disengage the base of the feeder by placing the palm of your hand on the bottom of the feeder, inserting your thumb and fingers
through the spokes of the perch ring. Grasp the base assembly firmly and twist counterclockwise (viewed from the bottom),