EasyManua.ls Logo

Droll Yankees Yankee Flipper User Manual

Droll Yankees Yankee Flipper
4 pages
To Next Page IconTo Next Page
Page #1 background imageLoading...
Page #1 background image
02/22/16
Yankee Flipper Feeder 0116
Yankee Flipper (YF)
Please read Important Information and Safety Instructions before operating
Charging: Follow steps; Disassemble #1 and #2, and Assemble #5
Disassemble for Easy Cleaning and Part Replacement
1. Check the black activation switch, which is located on the base assembly, is in the “OFF” position.
2. Disengage the base of the feeder by first placing the base in the palm of your right hand with the black activation switch
facing you, while firmly holding the lower section of the tube with your left hand. Insert fingers upward through perch ring
spokes and grasp the base assembly (like a small ball) firmly with your fingers, placing your thumb against the right side of
the black activation switch for leverage, and twist counter clockwise (viewed from the bottom) approximately ½”. You will
feel a distinct click and then lower the base which will separate from beneath the port.
3. Remove the four tube screws to release the tube from the port. The port and silo assembly may be disassembled for easy
and thorough cleaning, by removing the three screws located inside the bottom of the port.
4. Remove the cap and bail wire assembly by sliding the cap up the bail wire. Gently pull each end of the bail wire out of the
bail rod.
5. Remove the bail rod by laying the tube on a flat surface with the bail rod parallel to the table/floor. Apply pressure to the
top of the tube until it becomes oval/oblong in shape to free one side of the bail rod. Reach inside the tube and shimmy
the other end of the bail rod out of its hole.
Assemble
1. Install the bail rod inside the top of the tube by lining the bail rod up with both of the designated holes. Apply pressure to
the outside of the tube at both ends of the bail rod until the tube locks into the groove at each end of the bail rod.
2. Replace the cap and bail wire assembly by inserting each end of the bail wire into the bail rod, making certain they are fully
inserted before sliding the cap back into place on top of the tube.
3. Assemble the port and silo assembly, if you chose to disassemble for easy and thorough cleaning, by placing the silo
assembly inside the port. Hold the silo assembly and port upside down and rotate the silo assembly until the three holes in
the port line up with the three plastic posts on the silo assembly. Replace the three screws.
4. Install the tube by lining up the four holes in the tube with the four holes in the port and replace the tube screws. Do not
overtighten the screws as this will cause the tube to crack, especially in hot weather.
5. Install the base by placing it up inside the port and aligning any of the three arrows on the underside of the base assembly
with the left hash mark on the side of the port, and turn clockwise (viewed from the bottom) until it clicks into place. The
arrow on the base assembly should be aligned with the right hash mark on the port when properly installed.
BASE (Motor Unit): Disassemble for Power Stick and Part Replacement
Note: Two changes were made to the Power Stick in 2008. The switch no longer has a vertical black pin which had a tendency to
indent or puncture the black switch bumper. This change will not affect the performance of the new Power Stick and will work in your
unit. The input jack on top of the Power Stick, for charging purposes, was also changed. Please contact Droll Yankees if your original
AC/DC Adapter (charger) will not fit into the input jack on top of your new Power Stick or if the black switch bumper on your base
assembly has become worn, indented or punctured. The black switch bumper can only be viewed for inspection by removing the
Power Stick from the base assembly.
Please visit: http://drollyankees.com/video/yankee-flipper-power-stick-replacement/ to watch a short video on replacing your
Power Stick.
1. Check the black activation switch, which is located on the base assembly, is in the “OFF” position.
2. Use a 7/16” or 11mm socket, nut driver, or wrench to remove the nut at the bottom of the base, below the perch ring.
Question and Answer IconNeed help?

Do you have a question about the Droll Yankees Yankee Flipper and is the answer not in the manual?

Droll Yankees Yankee Flipper Specifications

General IconGeneral
BrandDroll Yankees
ModelYankee Flipper
CategoryPet Care Product
LanguageEnglish

Summary

Disassemble Yankee Flipper for Cleaning

Check Activation Switch

Ensure the black activation switch on the base is in the 'OFF' position before disassembly.

Disengage Base Assembly

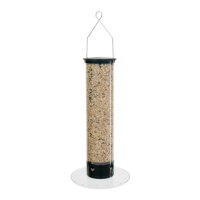
Separate the base from the tube by twisting counter-clockwise, feeling for a click.

Remove Tube Screws

Unscrew the four screws holding the tube to the port for disassembly.

Remove Cap and Bail Wire Assembly

Slide the cap up the bail wire and gently pull wire ends out of the bail rod.

Remove Bail Rod

Apply pressure to the tube to oval it and free one side of the bail rod, then shimmy the other end.

Assemble Yankee Flipper

Install Bail Rod

Insert bail rod into tube holes, applying pressure to lock it into grooves.

Replace Cap and Bail Wire

Insert bail wire ends into the bail rod and slide the cap back into place.

Assemble Port and Silo

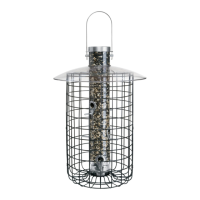
Align silo assembly with port, secure with three screws.

Install Tube

Align tube holes with port holes and replace screws, avoiding overtightening.

Install Base Assembly

Align base assembly with port, turning clockwise until it clicks into place.

Disassemble Base (Motor Unit) for Power Stick

Check Switch and Remove Nut

Ensure switch is OFF and remove the nut at the base bottom.

Remove Base Components

Remove lock washer, hub, perch ring, and friction disc from the drive shaft.

Remove Power Stick

Pull the Power Stick straight upward from the base assembly.

Repair Switch Bumper

Re-glue the black switch bumper if it has separated from the base assembly.

Assemble Base (Motor Unit)

Install Spring and Align Components

Place spring in base cavity and align switch bumper with Power Stick.

Position Drive Shaft

Rotate Power Stick so drive shaft's flat side faces right, then depress spring.

Install Friction Disc, Perch Ring, and Hub

Layer components in order: friction disc, perch ring, hub, ensuring alignment.

Secure with Lock Washer and Nut

Install lock washer and nut, tightening to 10-15 in/lbs for proper function.

Feeder Placement and Operation

Feeder Placement Guidelines

Hang feeder to require squirrels to place full body weight on perch ring.

Cleaning and Sanitizing

Clean with mild detergent and rinse; sanitize with vinegar/water solution.

Important Information

Notes on perch ring contact, Power Stick charging, and cord management.

Important Safety Instructions

General Safety Precautions

Read labels, use common sense, turn switch OFF for transport or cleaning.

Power Stick and Charger Safety

Do not immerse base or charger in water; do not open Power Stick.

Charger Usage

Charge only with provided charger, avoid damp conditions or damaged units.

Troubleshooting Yankee Flipper

Perch Ring Not Activating

Check switch position and switch bumper condition.

Frequent Recharging

Address potential large animal interference or battery memory issues.

Perch Ring Continues Spinning

Verify base assembly, switch function, or Power Stick sticking.

Unable to Remove Hub

Tap the drive shaft end with a hammer to release a corroded hub.

Related product manuals