EasyManua.ls Logo

Droll Yankees Yankee Whipper - User Manual

Droll Yankees Yankee Whipper
2 pages
Print Icon
To Next Page IconTo Next Page
Loading...
01/18/16
Yankee Whipper Feeder 0116
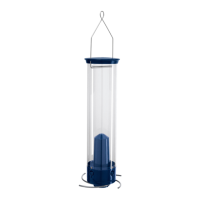
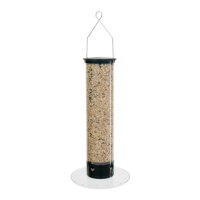
Yankee Whipper
Cleaning: Please for the sake of the birds, keep your feeders clean! Dirty feeders can harm the birds. Clean with a mild dish
detergent using a soft brush, sponge or cloth, and rinse thoroughly with water for simple cleaning. Sanitize: Rinse with a 50/50
solution of white vinegar and water. Do not soak metal components in the 50/50 solution of white vinegar and water as this may
damage the finish. Rinse thoroughly with water. Dry completely before filling with seed.
Disassemble for Easy Cleaning or Part Replacement
1. Remove the solitary Phillips screw in the outside ring on the bottom of the perch assembly.
2. The perch assembly can be removed by turning counter clockwise (viewed from the bottom) until the hash mark on the lip
of the perch assembly lines up with the left hash mark on the port. You will feel a click.
3. Remove the four tube screws to release the tube from the port. The port and silo assembly may be disassembled for easy
and thorough cleaning, by removing the two screws located inside the bottom of the port.
4. Remove the cap and bail wire assembly by sliding the cap up the bail wire. Gently pull each end of the bail wire out of the
bail rod.
5. Remove the bail rod by laying the tube on a flat surface with the bail rod parallel to the table/floor. Apply pressure to the
top of the tube until it becomes oval/oblong in shape to release one side of the bail rod. Reach inside the tube and shimmy
the other end of the bail rod out of its hole.
Assemble
1. Install the bail rod by lining the bail rod up with both of the designated holes in the top of the tube. Apply pressure to the
outside of the tube at both ends of the bail rod until the tube locks into the grooves in the bail rod.
2. Replace the cap and bail wire assembly by inserting each end of the bail wire into the bail rod, making certain they are fully
inserted before sliding the cap back into place on top of the tube.
3. Assemble the port and silo assembly, if you chose to disassemble for easy and thorough cleaning, by placing the silo
assembly inside the port. Hold the silo assembly and port upside down with the hash marks on the port facing you. Rotate
the silo assembly until the three holes in the port line up with the three plastic posts on the silo assembly.
Important: Replace the two screws leaving the one screw hole to the right of the hash marks on the port empty.
4. Install the tube by lining up the four holes in the tube with the four holes in the port and replace the tube screws. Do not
overtighten the screws as this will cause the tube to crack, especially in hot weather.
5. Install the perch assembly by placing it up inside the port and aligning the hash mark on the lip of the perch assembly with
the left hash mark on the port and turn clockwise (viewed from the bottom) until it clicks into place.
6. Replace the solitary Phillips screw in the outside ring on the bottom of the perch assembly.
Spring Replacement for Perch Assembly
1. Follow steps 1 and 2 for removing the perch assembly.
2. Remove the broken spring. Hold the perch which had the broken spring in its upright position. Insert the angled wire on the
spring through the hole in the end of the perch. Lift the spring by the curved end and place over the plastic bracket and
into the slot. Using needle nose pliers, bend the wire that was inserted through the hole upward until it is vertical with the
side of the perch.
3. Follow steps 5 and 6 for installing the perch assembly.
Feeder Placement
Hang the feeder far enough away from any deck rail, pole, tree, etc. so that the squirrel must place all of its body weight on the
perch. The recommended minimum is 14”, but a greater distance may be preferable since the mechanism is based on weight. A
squirrel that is able to lean across to the feeder by placing only part of its weight on the perch may avoid collapsing the perch.
Red squirrels and chipmunks may not be heavy enough to collapse the perch, but placing the feeder so that they have to jump to
it will significantly increase your chances of deterring them.
Question and Answer IconNeed help?

Do you have a question about the Droll Yankees Yankee Whipper and is the answer not in the manual?

Overview

The Droll Yankees Yankee Whipper (YCPW-180) is a bird feeder designed to deter squirrels and other unwanted visitors from accessing birdseed. It operates on a weight-activated mechanism, where the perch collapses under the weight of a squirrel, preventing it from feeding.

Function Description:

The primary function of the Yankee Whipper is to provide a feeding station for birds while actively deterring squirrels. It achieves this through a spring-loaded perch assembly that is designed to collapse when a certain weight (typically that of a squirrel) is applied. This causes the squirrel to lose its footing and fall off, preventing it from accessing the seed. The feeder is designed to be hung, requiring squirrels to place their full body weight on the perch for the mechanism to activate effectively.

Important Technical Specifications:

The feeder consists of several key components:

  • Cap & Bail Wire Assembly (YCP1816): This top assembly includes the cap and a wire loop for hanging the feeder.
  • Bail Rod (YF50): A rod that supports the bail wire and helps secure the cap.
  • Tube (YF30-55): The main cylindrical body of the feeder that holds the birdseed.
  • Silo Assembly (YCP1820): An internal component that helps regulate seed flow and forms part of the weight-activated mechanism.
  • Port (YCP1810): The section where birds access the seed, connected to the silo assembly.
  • Tube Screws (YF40): Four screws that secure the tube to the port.
  • Perch Assembly (YCP180): The weight-activated perches where birds land. This assembly contains the spring mechanism responsible for deterring squirrels.

The mechanism relies on the principle that a squirrel's weight will exceed the threshold of the spring, causing the perch to collapse. Red squirrels and chipmunks may not be heavy enough to activate the mechanism, but placing the feeder where they have to jump to it can still deter them.

Usage Features:

  • Squirrel Deterrence: The core feature is its weight-activated perch system, which collapses under the weight of a squirrel, preventing it from feeding.
  • Hanging Design: The feeder is intended to be hung, ideally far enough away from any support (deck rail, pole, tree) to ensure that a squirrel must place its entire body weight on the perch for the mechanism to work. A recommended minimum distance of 14 inches is suggested, though a greater distance may be more effective.
  • Easy Assembly/Disassembly: The design allows for relatively straightforward assembly and disassembly for cleaning and part replacement. Key steps include removing a solitary Phillips screw to release the perch assembly, and removing tube screws to separate the tube from the port. The bail rod can be removed by applying pressure to the tube to make it oval-shaped, allowing the rod to be shimmed out.
  • Spring Replacement: The manual provides clear instructions for replacing the spring within the perch assembly, indicating that this is a user-serviceable component.

Maintenance Features:

  • Cleaning: Regular cleaning is emphasized for the health of the birds. The feeder should be cleaned with a mild dish detergent, a soft brush, sponge, or cloth, and thoroughly rinsed with water.
  • Sanitization: For deeper cleaning, a 50/50 solution of white vinegar and water is recommended for sanitization. It's important not to soak metal components in this solution to avoid damage to the finish. After sanitizing, a thorough rinse and complete drying are necessary before refilling with seed.
  • Part Replacement: The feeder is designed with replaceable parts, allowing users to maintain its functionality over time. The manual details how to disassemble the feeder to access and replace components like the tube, port, silo assembly, and especially the spring in the perch assembly.
  • Preventing Tube Cracks: When reassembling, users are cautioned not to overtighten the tube screws, as this can cause the tube to crack, particularly in hot weather.

Overall, the Droll Yankees Yankee Whipper is a robust, user-friendly bird feeder focused on providing a secure feeding environment for birds by effectively managing squirrel access through its innovative weight-activated design and ease of maintenance.

Droll Yankees Yankee Whipper Specifications

General IconGeneral
BrandDroll Yankees
ModelYankee Whipper
CategoryPet Care Product
LanguageEnglish

Related product manuals