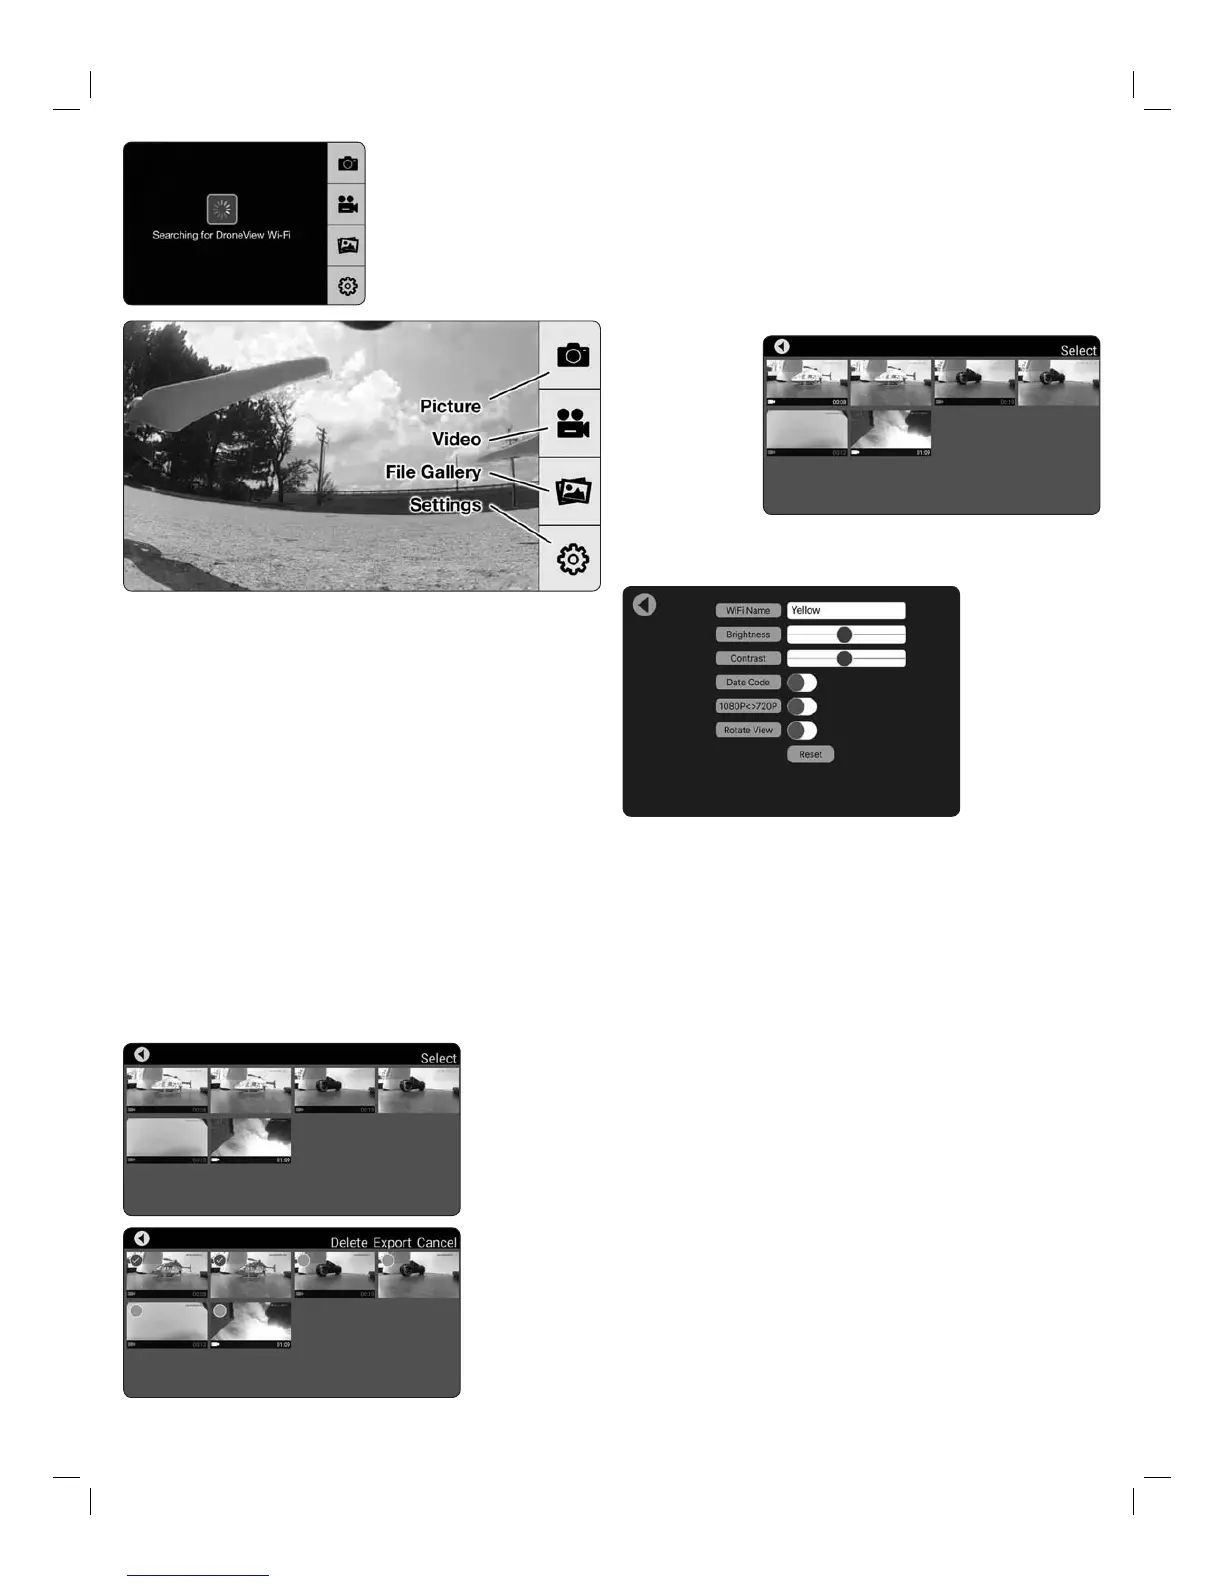
5. With your device connected to
the DroneView WiFi network,
open up the DroneView app. It
may take several seconds for the
app to locate and connect to the
DroneView WiFi network.
NOTE: If you’re in a populated
WiFi environment, it may take longer.
6. Once connected you will see on your device the image seen by the camera
(referred to in this manual as the FPV feed). Press anywhere on the screen to
pull up the main options.
Picture Button - Press to take a still image. Note: pictures cannot be taken with
the app while recording is in progress.
Video Button – Press to start recording (red stop button appears on right when
recording).
File Gallery Button – Opens gallery to display contents of memory card for
viewing, exporting and deleting.
Settings Button – Opens the setting menu.
NOTE: The FPV feed is for the purposes of displaying what the camera is
recording to improve the quality and accuracy of videos and pictures with respect
to the pilot’s intended field of view. We do not recommend attempting to fly the
Dromida XL relying solely on the FPV feed. Delays in the FPV feed can cause the
image shown in the app to not represent the exact current position of the Dromida
XL. Any interruption of the FPV feed will not be present in the recorded video files.
Flying without maintaining line of sight of the quad is unsafe.
FILE GALLERY
Opening the file
gallery displays the
contents of the
memory card in the
camera. Each
thumbnail represents
a picture or video.
Videos have a small
camera icon and the
length of the videos
on the thumbnails.
Pictures can be
viewed by clicking
on the picture
thumbnails. In order
to view videos, you
must first export
them by pressing
Select and then pressing each thumbnail that you wish to export. Press Export
to upload the files to your device. Pictures and videos will be copied to your device’s
camera roll. They can also be viewed in the DroneView app after the exporting
is complete by pressing the thumbnail you wish to view.
NOTE: We do not recommend exporting videos that exceed 3 minutes in
length because of the amount of time it will take to export the files. For longer
videos or a larger quantity of videos, we recommend removing the memory
card from the camera and transferring the contents directly to a PC using a
card reader.
When you have
confirmed that
the files have
been successfully
transferred to your
device’s camera roll,
press Select and
choose the files you
wish to delete if you
no longer want them
in the file gallery.
SETTINGS
The settings menu
allows you to change
the WiFi name, adjust
brightness and
contrast, date code,
resolution mode, and
rotate camera view.
Changing the WiFi
Name will change
how the Camera is
identified in the WiFi
network list.
The Brightness and Contrast will adjust the FPV feed display qualities. Video
and picture files will have the same display qualities as the feed. You may wish
to experiment with these settings depending on lighting conditions and personal
preferences. Press reset to return the brightness and contrast to the default values.
Resolution Mode switches the camera output between 1080p @ 30 frames/sec
and 720p @ 60 frames/sec. 1080p mode will provide you with a larger field of
view from the camera compared to 720p mode. 720p mode has the advantage
of smoother video recording which is also more suitable for post editing such
as applying slow-motion to video footage.
The Date Code will display the current date on the FPV feed when the Date Code
is turned ON. The date will also be seen in video recordings and pictures in the
same format as seen on the FPV feed. The Date Code is automatically updated
to match the date of your device when connected via WiFi network.
Rotate View will rotate the FPV feed and recorded videos and pictures 180°.
This feature is needed when the DroneView camera is used independently of the
Dromida XL with a separate R/C receiver and is mounted on top of a surface
rather than underneath like on the Dromida XL.
If you made any changes in the settings menu then you will be prompted to save
when exiting the settings menu. If you select NO when prompted to save then
the changes will be discarded. iOS Only - If you change the WiFi name then you
will need to exit the DroneView app and select the newly named network in the
WiFi setting options of your device.
USING TWO DEVICES SIMULTANEOUSLY
The DroneView camera can be connected with up to two devices simultaneously.
Two devices will have the ability to connect to the DroneView WiFi network and
share the FPV feed from the camera. Both devices will also be able to take pictures
and start/stop video recording.
5
 Loading...