English
INSTRUCTIONS FOR USE
INSTRUCTIONS FOR USE
Type EUROSIT
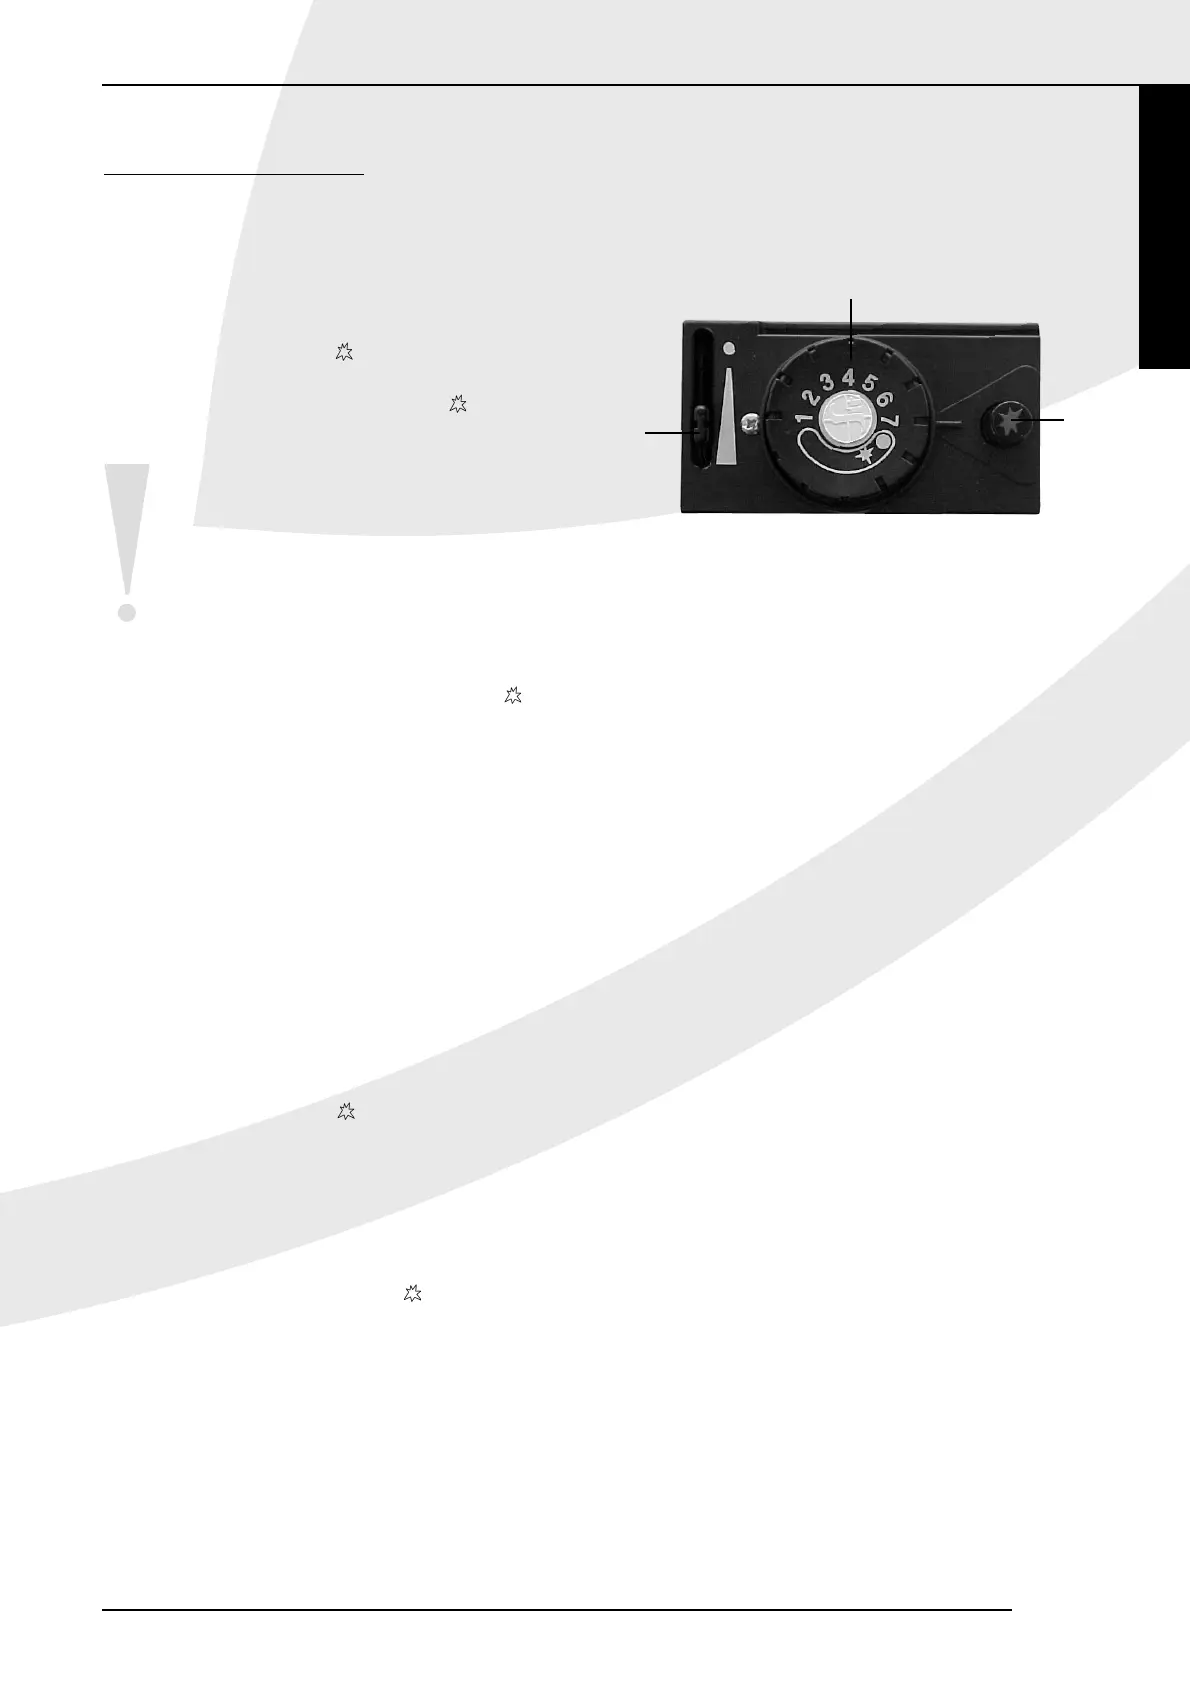
The EUROSIT gas control block has the following controls:
*
rotary switch with the following settings (1):
• off (●)
• ignition and pilot light ( )
• thermostat
*
push button (2) to operate the piezo ( )
*
manual control (3) for the following settings:
• on full
Adjustable between the maximum and minimum
setting of the manually operated gas tap.
• off
Operating
To ignite the pilot light turn the switch (1) to ( ) and
press fully. Turn button (2) a few times as necessary.
Once the pilot light is ignited, keep pressing the button
for approx. 10 seconds. If you release the button the pilot
light should stay alight, if not, repeat the stages above,
pressing the button for a little longer. If the thermostat
has been set to a temperature higher than the room
temperature, the main burner will ignite when the button
is released. The required temperature can be set using the
thermostat button (1).
NB: Should the thermostat demand heat it will have
priority over any manually controlled setting.
If the heater is only to be controlled manually, turn
the thermostat to the lowest setting.
If the thermostat is set to (
), only the pilot light will
burn. Neither the thermostatic tap nor the manually
operated tap will work.
Switching off
To switch the heater off, turn the switch (1) to
● . This
will switch both the main burner and the pilot light off.
Switched to the pilot light setting (
) only the pilot light
will stay alight.
If the heater has been switched off, wait for 5 minutes
before relighting.
1. Thermostat button + push button control the gas
supply to the pilot light
2. Piezo
3. Manual control
N.B.: If the flue spillage sensor is repeatedly activated, a
qualified gas installer should be contacted.
Alto/Basso
21
1.
3.
2.