Do you have a question about the Dru Metro 100 and is the answer not in the manual?
General safety advice and reading of precautions before installation or maintenance.
Installation must comply with applicable national, local, and constructional regulations.
Detailed precautions and safety instructions for competent installers during appliance installation.
Adherence to applicable installation regulations and manual instructions.
Checking the appliance's suitability for the type of gas and gas pressure at the installation site.
Requirements for a safe and compliant gas connection, including tap and pipe dimensions.
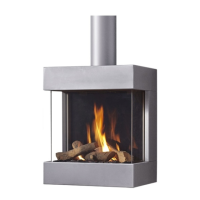
Guidelines for positioning the appliance, including distances, materials, and measurements.
Information on the concentric flue gas/air supply system and its installation options.
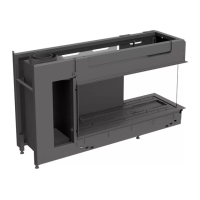
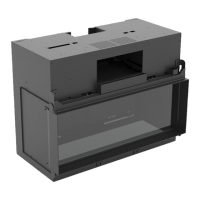
Instructions for mounting the appliance within a chimney breast, including ventilation and material requirements.
Procedure for installing the control box within the chimney breast and connecting components.
Steps for adjusting the appliance based on the concentric system type (wall or roof terminal).
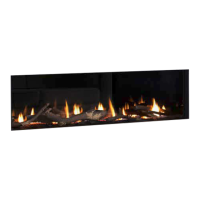
Instructions for correctly placing the decorative wood or pebble set for optimal flame appearance.
Procedures for removing and replacing the glass window for maintenance or cleaning.
Overview of the concentric system (C11/C31 type) and its installation methods.
Specific installation details for the concentric system using a wall terminal.
Specific installation details for the concentric system using a roof terminal.
Guidelines for connecting the appliance to an existing chimney using a special kit.
Instructions for mounting and setting the baffle for appliance adjustment.
Instructions for removing the air inlet guides for appliance adjustment.
Detailed instructions for placing the vermiculite, chips, and branches for the wood set.
Detailed instructions for placing the vermiculite and carrara stones for the pebble set.
Step-by-step guide for safely removing the glass window from the appliance.
Step-by-step guide for safely re-installing the glass window onto the appliance.
Instructions for connecting the receiver unit within the control box to the appliance.
Procedure for installing or replacing batteries in the receiver unit.
Verifying that all gas connections are sealed and gastight.
Checking the gas pressure and pre-pressure of the house installation.
Testing the ignition sequence and function of the pilot and main burners.
Assessing the flame image after the appliance has burned for several hours.
Checking the ignition and operation of the pilot burner.
Testing the smooth ignition and operation of the main burner.
Information on obtaining replacement parts for the appliance.
Troubleshooting guide for issues with remote control transmission or motor operation.
Troubleshooting guide for problems with pilot burner ignition or spark generation.
Troubleshooting guide for the absence of sound signals from the receiver.
Troubleshooting guide for a continuous sound signal indicating a potential issue.
Troubleshooting guide for the absence of a pilot burner flame.
Troubleshooting guide for persistent sparking after pilot ignition.
Troubleshooting guide for pilot burner issues related to the magnetic valve.
Troubleshooting guide for lack of sound and sparks, indicating potential battery or wiring issues.
Troubleshooting guide for no gas flow to the main burner while the pilot is lit.
| Brand | Dru |
|---|---|
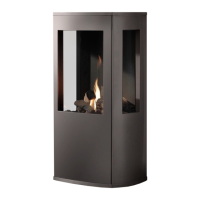
| Model | Metro 100 |
| Category | Indoor Fireplace |
| Language | English |