INSTALLATION CONSIDERATIONS:
PREPARING FOR INSTALLATION:
1.Be sure to carefully read and understand the instructions before attempting to install these
speakers.
2.For safety, disconnect the negative battery terminal from the battery prior to beginning ghe
installation.
3.For easier assembly, we suggest you have all your tools handy-Drill,Allen set, Crimp,
Soldering iron, wire strippers,heat-shrink,etc.
4.Use high quality “Water Proof” connectors for a reliable installationand to minimize signal
or power loss.
5.Think before you drill! Be careful not to cut or drill into gas tank, fuel lines, brake or hydraulic
lines, vacuum lines or electrical wiring when working on any vehicle. if installation in a boat,
take care not cut or drill through the main hull.
6.Never run wires near fuel lines or power (if possible).Running the wires inside the hull or car
area provides the best protection.
7.Avoid running wires over or through sharp edges. Use rubber or plastic grommets to protect
any wires routed through metal,especially the tower.
8.Make sure that the mounting clamp or “L”braket are tight before leaving the dock.
9.Decide early what type of LED lighting you want (if any) and wire accordingly (NOTE:if you
want “Dancing Light” look to the WIFI or RF or BT remote controlled LED light box.The easy
way to have lighting ... YOUR way!)
● An electric drill with bits
● Allen / Hex Key / Wrench Set
● Philips head and standard screw drivers
● wire strippers
● Crimping tool
● VOM (electronic volt ohm meter)
● Heat shrink tubing and heat gun
● Soldering iron
● electronic (Rosen not Acid Core)Solder
NOTE:The stainless steel hardware supplied with your soundbar
has been chosen to resist rust and corrosion. If the particular
hardware supplied will not work for your installation purposes,
please be sure to use only appropriate marine grade(stainless
steel)mounting hardware.
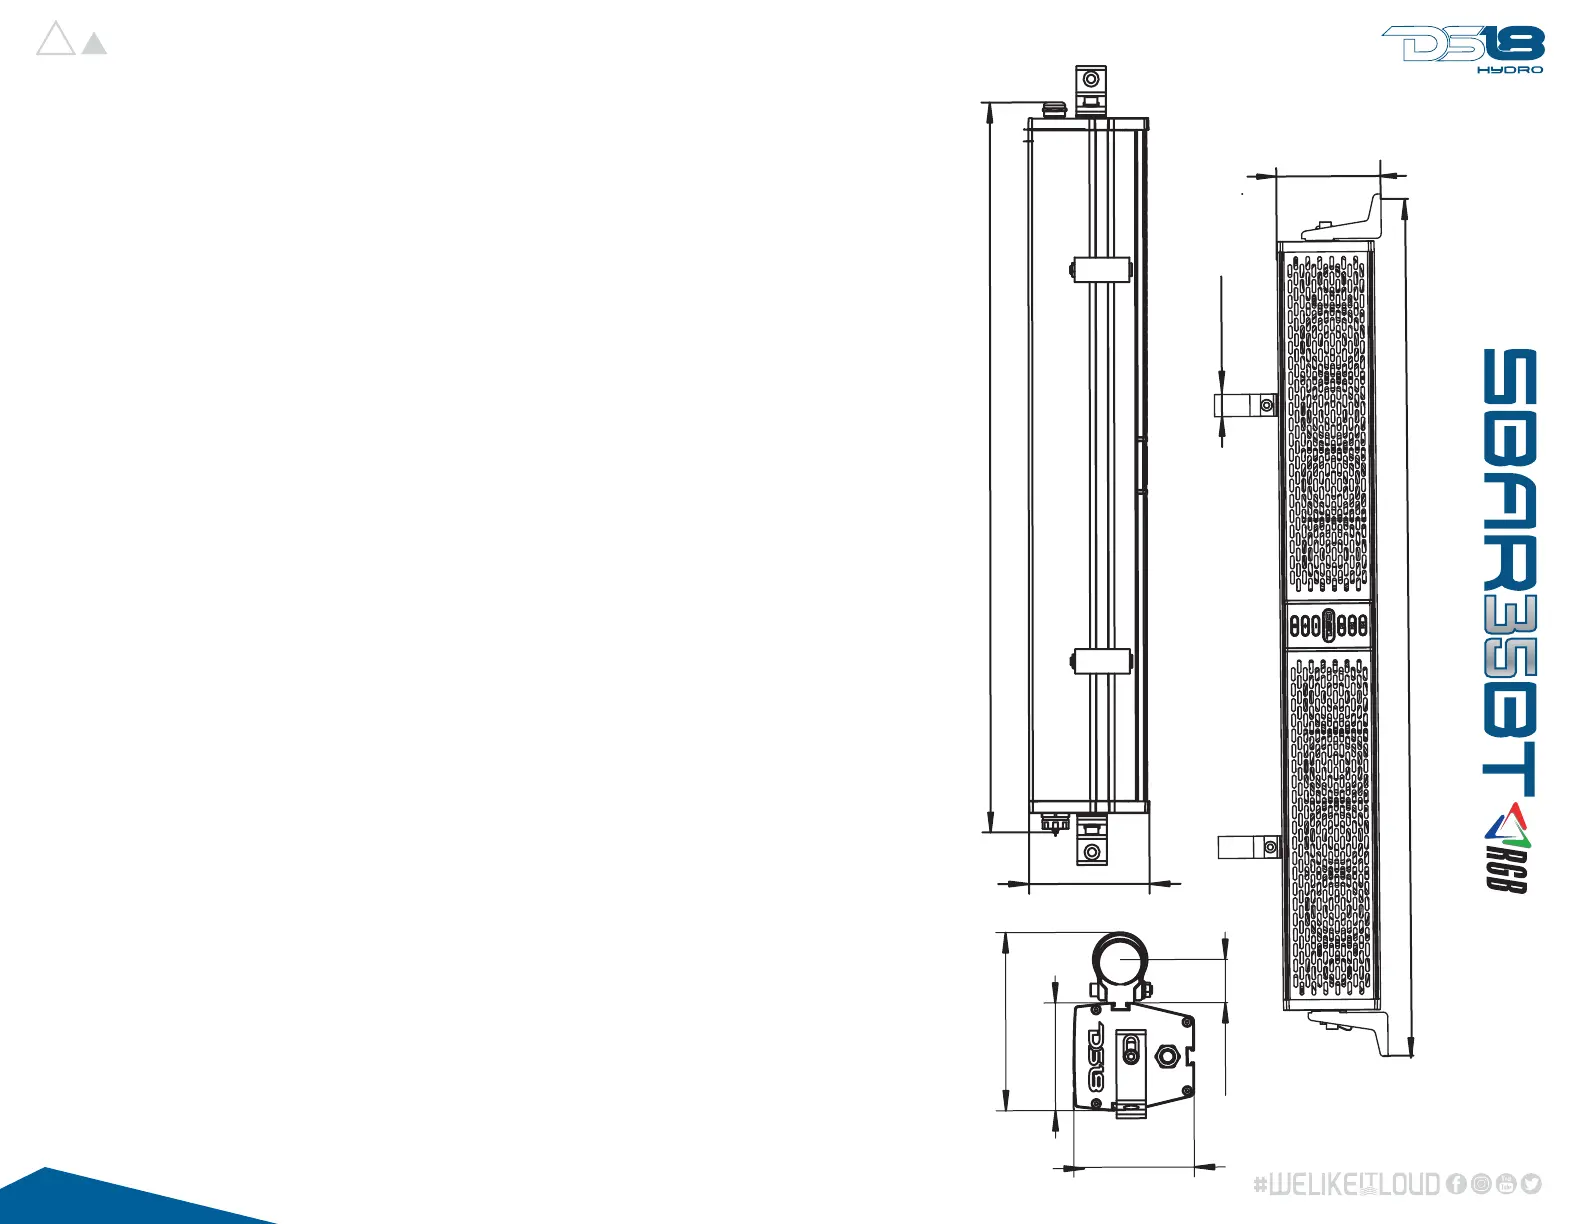
976mm / 38.43”
118mm / 4.65”
25mm / 0.98”
907mm / 35.71”
123mm / 4.84”
123mm / 4.84”
182mm / 7.16”
44.1mm / 1.74”
110mm / 4.33”
 Loading...