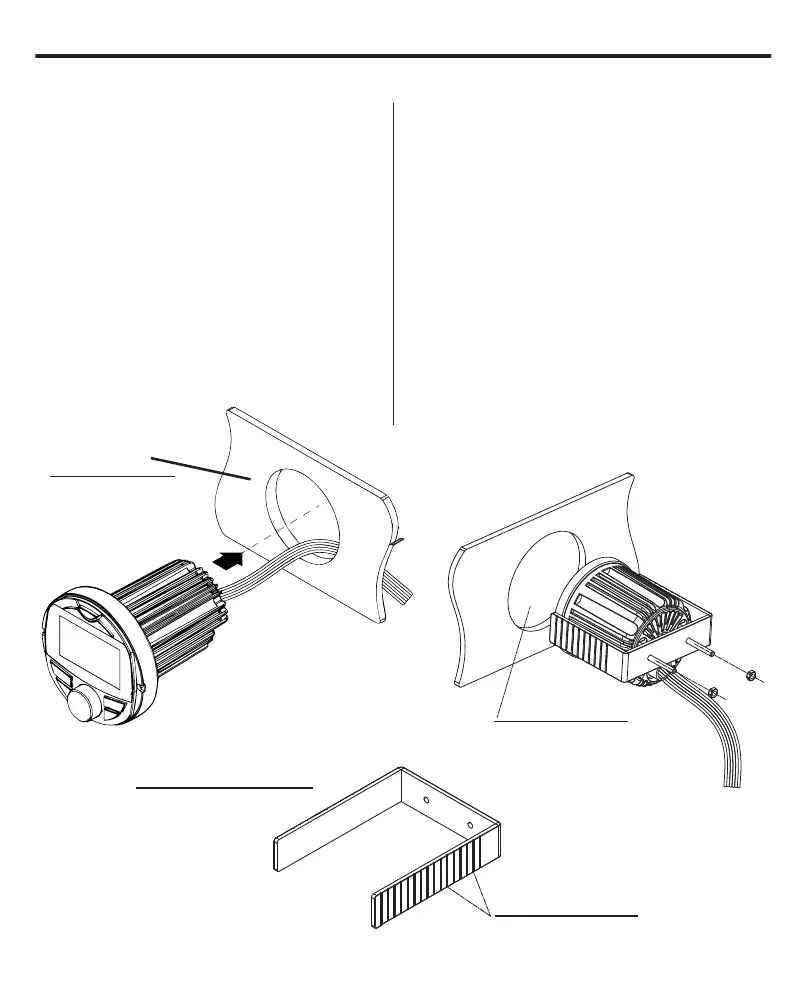
Mounting Bracket
Dashboard
Break Lines
Cutting size
Ø 3” / 76.2mm
Tamaño del Corte
Soporte de Montaje
Tablero
Líneas de Rotura
MOUNTING (USING U BRACKET)
MONTAJE (UTILIZANDO SOPORTE EN U)
To mount the unit, you will need to find a flat surface
with adequate clearance behind it that provides enough
clearance for the unit and all its necessary wiring.
1. Once you have determined a mounting location,
you will need to cut a circular hole 3" (76.2 mm) in
diameter
2. After the hole is cut slide the unit and wiring
through the hole.
3. Take the U b racket and slide over the two studs on
the back of the unit. Tighten down with supplied nuts.
4. Plug in all wiring harnesses and cables. Refer to
the wiring diagram for wire harness connection types.
Para montar la unidad, necesitará encontrar una superficie
plana con un espacio adecuado detrás de ella que
proporcione suficiente espacio para la unidad y todo su
cableado necesario.
1. Una vez que haya determinado la ubicación de montaje,
deberá cortar un orificio circular de 3 “
(76.2 mm) de diámetro.
2. Después de cortar el orificio, deslice la unidad y el
cableado a través del orificio.
3. Tome el soporte en U y deslícelo sobre los dos pernos
en la parte posterior de la unidad. Apriete con las tuercas
suministradas.
4. Enchufe
todos los arneses de cables y cables. Consulte
el diagrama de cableado para conocer los tipos de conexión
del arnés de cables.
INSTALL METHOD 1 / METÓDO DE INSTALACIÓN 1
5
 Loading...