EasyManua.ls Logo

DStv A7 - User Manual

DStv A7
10 pages
Print Icon
To Next Page IconTo Next Page
Loading...
About the Remote Modes
If you have multiple DStv Exploras in your home, or
even in the same room, you need to set the remotes
(and the DStv Exploras) to different “modes”, so
that commands sent from one remote, won’t be
picked up by the other decoder.
This remote has 3 modes and can be set to mode
1, 2 or 3 (the default is mode 1).
Each time you press a button, the STANDBY
button will light up. The colour tells you which mode
the remote is in.
I think the battery is dead. How can I
check?
Press the DStv button. If the STANDBY
button lights up, the batteries are working.
How do I know if the remote is broken?
Press the DStv button. If the STANDBY
button does not light up, the remote is either
broken or needs new batteries. If you put in
new batteries and the STANDBY button still
does not light up when a button is pressed,
you will need to replace the remote. This
remote has a 12-month warranty from the
date of purchase. Please take it to your nearest
MultiChoice Service Centre or Agency together
with your proof of purchase.
If your remote is older than 12 months, you
can buy a new one at any MultiChoice Service
Centre or Agency.
Nothing happens when I press a button
(the DStv Explora does not respond).
Firstly, check that the remote is working by
pressing the DStv button. If the STANDBY
button lights up, the batteries are working.
Now check the colour of the STANDBY button
when any button is pressed :
If it’s red, the remote is in mode 1
If it’s green, the remote is in mode 2
If it’s orange, the remote is in mode 3
Change the mode of the remote and try again.
Your DStv A7 remote is programmable and can
be used to :
Switch your DStv Explora and other audio/
visual equipment on or off in a predefined
sequence
Control other audio/visual equipment
Please visit dstv.com for full information,
including step-by-step instructions.
Advanced Options
6 7 8 9
DStv REMOTE
USER GUIDE
(A7 MODEL)
Backlighting is automatically activated each
time you pick up the remote or when you press a
button. It automatically switches off (times out)
when the programmed number of seconds has
passed (the default is 3 seconds).
To program the backlight timing, follow these
steps :
Press and hold STANDBY and HELP
simultaneously for more than 3 seconds
The STANDBY button will give 2 short red
blinks
Now press the required number*
The STANDBY button will give 1 red blink
Press OK
* Press 0 to disable backlighting
Press 1 to set the timeout to 3 seconds
Press 2 to set the timeout to 6 seconds
Press 3 to set the timeout to 9 seconds
Press 4 to set the timeout to 12 seconds
Press 5 to set the timeout to 15 seconds
Press 6 to set the timeout to 18 seconds
Press 7 to set the timeout to 21 seconds
Press 8 to set the timeout to 24 seconds
Press 9 to set the timeout to 27 seconds
Backlighting
Mode 1 : Red
Mode 2 : Green
Mode 3 : Orange
To change modes, press and hold the INFO and
BACK buttons. The remote will change to the next
mode, with the STANDBY button confirming the
change by giving 2 blinks in the colour of the next
mode.
To change to the next mode, press and hold the
INFO and BACK buttons again. The remote will
again change to the next mode, with the STANDBY
button confirming the change by giving 2 blinks in
the colour of the next mode.
IMPORTANT
The DStv Explora must be set up to “listen” for the
correct mode. You can do this in DStv Central.
Press the DStv button
Go to “Settings”
Select System Settings
Select Remote Control
If the remote is set to mode 1, set mode 2 and
3 to Ignore
If the remote is set to mode 2, set mode 1 and
3 to Ignore
If the remote is set to mode 3, set mode 1 and
2 to Ignore
If your DStv Explora is part of an XtraView
setup, please consult with your DStv Accredited
Installer for remote mode settings.
Rechargeable batteries are not
recommended for use with this remote.
*
DStv Catch Up and BoxOffice are available in
selected countries on selected packages and require
payment of the monthly Access Fee.
**
ShowMax on the connected Explora is available in
selected countries. Separate subscription as well as a
monthly DStv Subscription (including payment of the
Access Fee) required. Visit ShowMax.com for more
information, including Terms and Conditions
Troubleshooting
Question and Answer IconNeed help?

Do you have a question about the DStv A7 and is the answer not in the manual?

Summary

About this Remote

DStv Remote (A7) Button Overview

Using the DStv Remote - Hotlinks

The Remote Buttons

STANDBY Button

Allows quick standby control and rebooting of the DStv Explora.

TV POWER and AV Buttons

Can be programmed to control other audio/visual equipment.

CATCH UP*, BOXOFFICE*, PLAYLIST, SHOWMAX** Hotlinks

Direct access to DStv Catch Up, BoxOffice, Playlist, and ShowMax features.

Backlighting

About the Remote Modes

Troubleshooting

Advanced Options

Overview

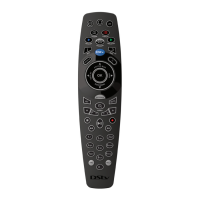
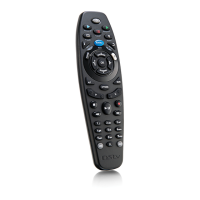
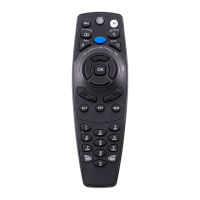
The DStv Remote (A7 Model) is a versatile control device designed to enhance your DStv viewing experience, particularly with DStv HD Decoders and DStv Exploras. This remote is built with user convenience in mind, offering a range of features that simplify navigation and control of your entertainment system.

Function Description

The primary function of the DStv Remote (A7 Model) is to provide comprehensive control over your DStv HD Decoder or Explora. It allows you to perform essential actions such as changing channels, adjusting volume, accessing program guides, and managing recordings. Beyond basic control, the remote supports multiple modes, enabling it to interact with different DStv Exploras in the same household without interference. This is particularly useful in multi-decoder setups, ensuring that commands from one remote are only picked up by the intended decoder.

A key advanced feature of the A7 remote is its programmability. It can be configured to control other audio/visual equipment, such as TVs or sound systems, through a feature called SimpleSet™. This allows you to consolidate control of multiple devices into a single remote, reducing clutter and simplifying your entertainment setup. The remote can be programmed to switch your DStv Explora and other audio/visual equipment on or off in a predefined sequence, or to control other audio/visual equipment independently. Detailed instructions for this advanced programming are available on the DStv website.

The remote also includes dedicated hotlinks to quickly access popular DStv Explora features. These hotlinks provide one-touch access to the TV Guide, DStv Catch Up*, BoxOffice*, your Playlist, DStv Central, and Search. This design streamlines navigation, allowing you to jump directly to your desired content or feature without having to navigate through multiple menus.

Usage Features

The DStv Remote (A7 Model) is packed with features designed to make your viewing experience intuitive and enjoyable.

Basic Controls:

  • STANDBY: Puts the DStv Explora into standby or brings it out of standby. Holding this button down will reboot the Explora.
  • TV POWER: Controls the power of programmed audio/visual equipment.
  • AV: Switches the input source on programmed audio/visual equipment.
  • P+ / P-: Changes channels. When scrolling through lists or the TV Guide, it scrolls a page or a day at a time, respectively.
  • V+ / V-: Adjusts the volume, provided the audio is set to Variable. If audio is set to Fixed, these buttons will not change the audio.
  • MUTE: Mutes the audio. It can also be set to "half mute" mode via User Preferences in Settings.
  • 1-0 (Numbers / SMS keyboard): Used to change channels, enter/edit text, and for other numerical inputs.
  • PLAY / PAUSE: Toggles between playing and pausing content. Holding this button activates Slow Motion.
  • STOP: Stops a recording in progress or stops viewing a recording.
  • FF (Fast Forward): Fast forwards content. Pressing multiple times increases the speed.
  • REW (Rewind): Rewinds content. Pressing multiple times increases the speed.
  • REC (Record): A quick way to schedule a recording on any program.

Navigation and Information:

  • TV GUIDE: Provides access to 8 full days of programming information, helping you plan your viewing. It can also be accessed via the DStv button and "Planner."
  • INFO i: Displays more information about a highlighted program, including a detailed synopsis.
  • BACK: Removes onscreen items or saves your settings.
  • OK: Selects onscreen items and displays available actions for highlighted content (e.g., setting reminders, series recordings).
  • STATUS BAR: Provides information about your current viewing position and doubles as the UP arrow for navigation. It's also useful for quickly "jumping" through content using FF or REW when displayed.
  • BOOKMARK: Creates a bookmark in recorded content, allowing you to easily find specific spots later. This button also doubles as the DOWN arrow.
  • REPLAY: Instantly jumps video back 10 seconds at a time. This button also doubles as the LEFT arrow.
  • GRID: Displays the channel grid, allowing you to move the highlight and see what's on other channels. This button also doubles up as the RIGHT arrow.
  • ALT: Switches between the last two viewed channels.
  • OPTIONS: Displays available choices on any screen. When viewing TV, it allows changing Language or Aspect Ratio. In menus, it can change the order of items or display.
  • SEARCH: Accesses A-Z listings of sport and movies, new series, or allows searching for programs by title. It can also be accessed via the DStv button and "Search."
  • HELP: Displays contextual support where available. To go directly to the HELP section of the menu, press the DStv button followed by HELP.

Hotlinks for Quick Access:

  • CATCH UP:* Direct access to DStv Catch Up, offering hours of series, movies, sporting highlights, and kids' shows. Also accessible via the DStv button and "Watch Now."
  • BOXOFFICE:* Direct access to BoxOffice, where you can rent blockbuster movies for 48 hours. Also accessible via the DStv button and "Watch Now."
  • PLAYLIST: Direct access to your Playlist, listing all your recordings. Also accessible via the DStv button and "Watch Now."
  • SHOWMAX : Direct access to ShowMax, where you can stream series and movies. Also accessible via the DStv button and "Watch Now."
  • DStv (DStv Central): Goes directly to DStv Central, the Explora's central menu for all content and settings.
  • PROFILE: Used to access selected features.
  • TV: When using menus or apps, this button acts as a hotlink back to video. When watching content, it's a hotlink back to live TV.

User Experience Enhancements:

  • Backlit Buttons: Ideal for night-time viewing, the buttons illuminate automatically when the remote is picked up or a button is pressed. The backlighting switches off after a programmed timeout (default is 3 seconds). The timeout can be customized from 0 (disabled) to 27 seconds.
  • Visual Feedback: The remote provides visual feedback when a button is pressed, confirming that the command has been registered.
  • SMS Keys: Facilitates easy text entry for search functions or other inputs.

Remote Modes: The A7 remote supports 3 modes (default is mode 1), indicated by the color of the STANDBY button when a button is pressed:

  • Mode 1: Red
  • Mode 2: Green
  • Mode 3: Orange These modes are crucial for multi-decoder environments to prevent cross-device interference. To change modes, press and hold the INFO and BACK buttons simultaneously. The STANDBY button will blink twice in the color of the next mode to confirm the change. The DStv Explora must also be configured to "listen" for the correct mode via DStv Central settings (Settings > System Settings > Remote Control). For XtraView setups, consulting a DStv Accredited Installer for remote mode settings is recommended.

Maintenance Features

The DStv Remote (A7 Model) is designed for straightforward maintenance, primarily revolving around battery management and troubleshooting.

Battery Management:

  • The remote operates on standard batteries. To check if the batteries are working, press the DStv button; if the STANDBY button lights up, the batteries are functional.
  • If the STANDBY button does not light up, the remote either needs new batteries or is broken. If new batteries are inserted and the STANDBY button still doesn't light up, the remote may need replacement.
  • Important Note: Rechargeable batteries are not recommended for use with this remote.

Troubleshooting:

  • Remote not responding:
    1. First, check if the remote itself is working by pressing the DStv button. If the STANDBY button lights up, the batteries are fine.
    2. Next, check the color of the STANDBY button when any button is pressed to determine the remote's current mode (Red for mode 1, Green for mode 2, Orange for mode 3).
    3. If the remote's mode does not match the Explora's listening mode, change the remote's mode and try again.
  • Warranty: The remote comes with a 12-month warranty from the date of purchase. If it breaks within this period, you can take it to a MultiChoice Service Centre or Agency with proof of purchase for replacement.
  • Out of Warranty: If the remote is older than 12 months, a new one can be purchased from any MultiChoice Service Centre or Agency.

Backlight Timing Adjustment: The backlighting timeout can be programmed to suit user preference:

  1. Press and hold STANDBY and HELP simultaneously for more than 3 seconds.
  2. The STANDBY button will give 2 short red blinks.
  3. Press the desired number (0-9) to set the timeout (0 for disabled, 1 for 3 seconds, up to 9 for 27 seconds).
  4. The STANDBY button will give 1 red blink.
  5. Press OK to confirm.

This comprehensive set of features ensures that the DStv Remote (A7 Model) is a reliable and user-friendly tool for controlling your DStv entertainment system, offering both basic functionality and advanced customization options.

DStv A7 Specifications

General IconGeneral
Batteries2 x AAA
CompatibilityDStv decoders
FeaturesNavigation buttons, volume control, channel selection
Infrared RangeUp to 10 meters
ButtonsPower, volume, channel, navigation, menu, exit, info

Related product manuals