Blocked Vent ShutoffPressure Switch Check:
To check the operation of the vent safety switch (PI), remove
the inlet pipe from the air inlet connector and remove the exhaust
vent from the induced draft motor vent coupling. Place the furnace
into operation. Gradually cover up the air inlet; the main burners
should shut OFF. Remove the restriction and the unit should
relight. Repeat the procedure, restricting the vent coupling outlet.
Replace the vent piping and reseal the opened joints as required.
Blocked Drain Safety Pressure Switch Check:
The blocked drain safety switch (P2) has only one tube
connected to it. To check the operation of the blocked drain safety
switch, place the unit into operation and gradually pinch the tube
closed. The unit should shut OFF. Release the restriction on the
tubing and the unit should retight.
The operational checkout is now complete. Be sure to adjust
the thermostat to the desired setting and inform the homeowner
how to operate the furnace system before leaving the job site.
SERVICING THE FURNACE
CAUTION
Label all wires prior to disconnection when
servicing controls, Wiring errors can cause
improper and dangerous operation.
VER!FY PROPER OPERATION AFTER
SERVICING.
WARNING
The ability to properly perform maintenance on
this equipment requires certain mechanical skills
and tools. If you are at all uncertain, contact your
dealer for qualified m_ntenance and service
since improper service Could lead to furnace
shutdown or a hazardOUs condition which could
lead to an unsafe condition and bodily harm.
7. Reattach all wiring and piping as per the wiring diagram
and installation insmactions.
8. Turn on utilities and check for leaks using soapy water and
a brush.
9. A visual check of the main burner and pilot flame should be
made at the beginning of each heating season. See Figure
2.12 for proper pilot flame.
10. Check the input rate and adjust if necessary.
11. Perform a safety check of the limit control and blocked vent
shutoff switches and the blocked drain shut off switch.
12. Check the air filter, clean and/or replace as necessary.
13. Periodic cleaning of condensing coil and drain lines maybe
necessary for proper operation.
14. Replace the appropriate access panel or door.
Ne_er use an 6pen flame _hen _fing for g_
ie_i Userf _opea fl_e _oU!d [eadt6
:or explosi0n! :: :::
certain metalS. Pipinl_
with :clean water after leak
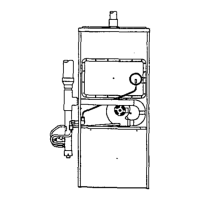
Combustion Component Check:
The heat exchanger, gas burners and venting system must
be checked each year, prior to the heating season, by a qualified
dealer/serviceman.
The following procedures should be performed:
1. Remove appropriate access panel or door (see Figure 1.16).
2. Remove the burner/manifold assembly from the furnace,
following the instructions found on this page.
3. Place the burner/manifold assembly on a flat work area and
vacuum the burners. It might be necessary to use a soft
bristly brush to remove dirt and then vacuum. While
manifold assembly is out, check pilot location.
4. Remove the burner opening inlet plate and the flue collector
box. This will expose both the burner and flue openings of
the primary heat exchangers.
5. Vacuum the length of each heat exchanger tube using a
straight attachment into the burner openings and the flue
openings.
6. Replace the flue collector box, burner opening inlet plate,
and burner/manifold assembly. Insure that all gaskets are
properly positioned and that no leaks exist.
Manifold (or Burner/Manifold) Removal/Replacement:
1. Make sure that all utilities (gas and electricity) are turned
off upstream of the furnace.
2. Remove the louvered access panel by sliding the panel
straight up, swinging the bottom of the panel away from the
furnace, and pulling the panel down and out of the furnace.
3. Disconnect the gas line from the gas valve. Be sure that a
wiring diagram is available, or be ready to mark any wires
that are disconnected. Unplug the four wire connector from
the gas valve.
20246506 Issue 9939 Page 15 of 22
 Loading...