This document serves as an installation manual for the Duprinter models DP-A100II/A105II and DP-A120II/A125II, providing essential information for service personnel to ensure safe and correct setup.
Function Description
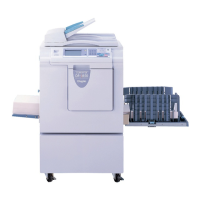
The Duprinter is a printing device designed for efficient and high-volume duplication. Its core function involves creating masters and then using these masters to print multiple copies. The installation process covers the initial setup of the printer unit, including the attachment of the support tray, connection to power, and the crucial steps for preparing the device for operation by setting the master roll and ink pack. The device is designed to handle master making and printing, with features to adjust ink density for optimal print quality.
Usage Features
The Duprinter is designed with several features to facilitate its use and ensure proper operation.
- Unpacking and Initial Setup: The manual outlines a clear process for unpacking the printer unit and verifying its contents against a provided list of items, including the printer unit, installation manual, instruction manual, warranty (USA only), master holder, power cord, and support tray unit. This ensures all necessary components are present before installation begins.
- Physical Installation: The printer unit must be placed on a flat, level surface. It is emphasized that lifting the printer unit requires two or more persons to prevent injury. After placement, all remaining fixing tapes must be removed. The support tray unit is then attached by loosening and re-tightening four screws.
- Power Connection: The Duprinter requires a specific power supply depending on the model (220 VAC or 120 VAC). For 220 VAC models, it needs a 50 Hz, 8 A power supply of at least 230 V. For 120 VAC models, it requires a 60 Hz, 15 A power supply of at least 120 V. The supplied power cord must be firmly inserted into the inlet on the Duprinter and then into a suitable outlet. It is crucial to position the Duprinter close to the power outlet and avoid connecting multiple loads to a single outlet. If an extension cord is necessary, it must meet specific voltage and amperage requirements and not exceed a certain length (5m for 220 VAC, 5m for 120 VAC). The power cord should never be stepped on or crushed. After connecting, the power switch is pressed to turn on the device, and the control panel should display normally.
- Master Roll Setting: A new master roll is taken from its bag, and master holders are inserted deeply into both ends. The upper cover of the machine is opened. The master roll is then set in the correct direction. The seal on the master is peeled off and pulled out, ensuring the black line is on the operator's side. The edge of the master is inserted until it contacts the roller. Finally, the master set lever (thermal head escape lever) is pushed, which automatically pulls in the master. If the master does not pull in, it should be gently pressed as far as possible. The upper cover is then closed.
- Drum Preparation: The JOG switch is pressed and held until the drum stops with a beep. The front cover is opened, and a lever is lifted. The drum handle is pulled out straight until it stops. The drum unit is then pulled out while gripping the stay at the upper part and slightly lifting the near end. It is critical to hold the drum unit level with both hands and avoid pressing or scratching its surface. The master clamp is opened and closed once or twice by moving a lever. The drum unit is then placed back into the machine by aligning the drum guide roller onto the rail, pushing it in about 10 cm while slightly lifting the front end, and then pushing it gently until it stops. The lever is lifted toward the user while pushing the drum in, and finally, the lever is lowered until it stops. The front cover is then closed.
- Ink Pack Setting: The front cover is opened, and the ink pack holder is pulled down. The cap is removed from a new ink pack, and the ink pack is inserted so that the groove on its lip fits onto the U groove of the holder. The ink pack is pushed in until it reaches the set line. The ink pack holder is then pushed back, and the front cover is closed.
- Ink Replenishment: To replenish ink, the power switch is turned on while simultaneously pressing the PRINT SPEED keys to access HELP mode. The NUMERIC keys are used to enter "04," and then the PRINT key is pressed. The drum will rotate, and the ink pump will run for approximately 30 seconds until replenishment is complete, indicated by a beep-beep-beep tone. The power is then turned off and on again. After replenishment, master making and printing are performed. The image may appear light until the ink is fully spread over the drum surface, which typically takes about 20 continuous pages.
Maintenance Features
The Duprinter includes features and instructions to maintain print quality and ensure the longevity of the device.
- Adjusting Ink Amount: This is a critical maintenance feature to ensure consistent print density.
- Rear Side Knob Adjustment: To adjust the ink amount using the knob on the rear side, the stopper of the drum is lifted, and the drum is rotated by hand until the master clamp is at the top. One screw is loosened to displace the cover, allowing access to the ink adjusting knob. After adjustment, the cover must be moved back to its original position and secured with the screw.
- Operator's Side Knob Adjustment: The ink amount can also be adjusted using a knob on the operator's side, accessible from the gap between the outer frame and the drum.
- Density Correction: If prints are too dark or too light, adjustments can be made in 3-step increments (minus direction for darker, plus direction for lighter) using both the rear and operator's side knobs simultaneously. There are seven steps in total (standard and ±3 steps) for adjusting image density. After each adjustment, dozens of sheets should be printed to stabilize the density.
- Drum Position Reset: After adjusting the ink amount, the drum rotated in step 1.1 must be returned to its original position, ensuring the stopper fits into the drum's groove. It is crucial not to rotate the drum in the opposite direction of the arrow to prevent ink overflow.
- Troubleshooting Wrinkled Masters: If the master becomes wrinkled during setting, the power should be turned OFF, the master roll pulled out, and then reset. Pushing the master set lever (thermal head escape lever) again while setting the master can help remove wrinkles.
- Safety Precautions: The manual emphasizes several safety precautions that are integral to maintenance and operation. These include warnings against touching the drum or rollers during JOG switch operation, putting hands or fingers inside the machine while it is operating, and removing covers affixed with warning labels, as movable cutters inside the machine can cause injury. It also warns against leaving an ink pack uncapped for longer than necessary.
- Optional Equipment Installation: The manual advises that optional equipment should only be installed after the machine itself has been installed and test-run to confirm normal function. Specific installation procedures for optional equipment are detailed in their respective installation manuals.