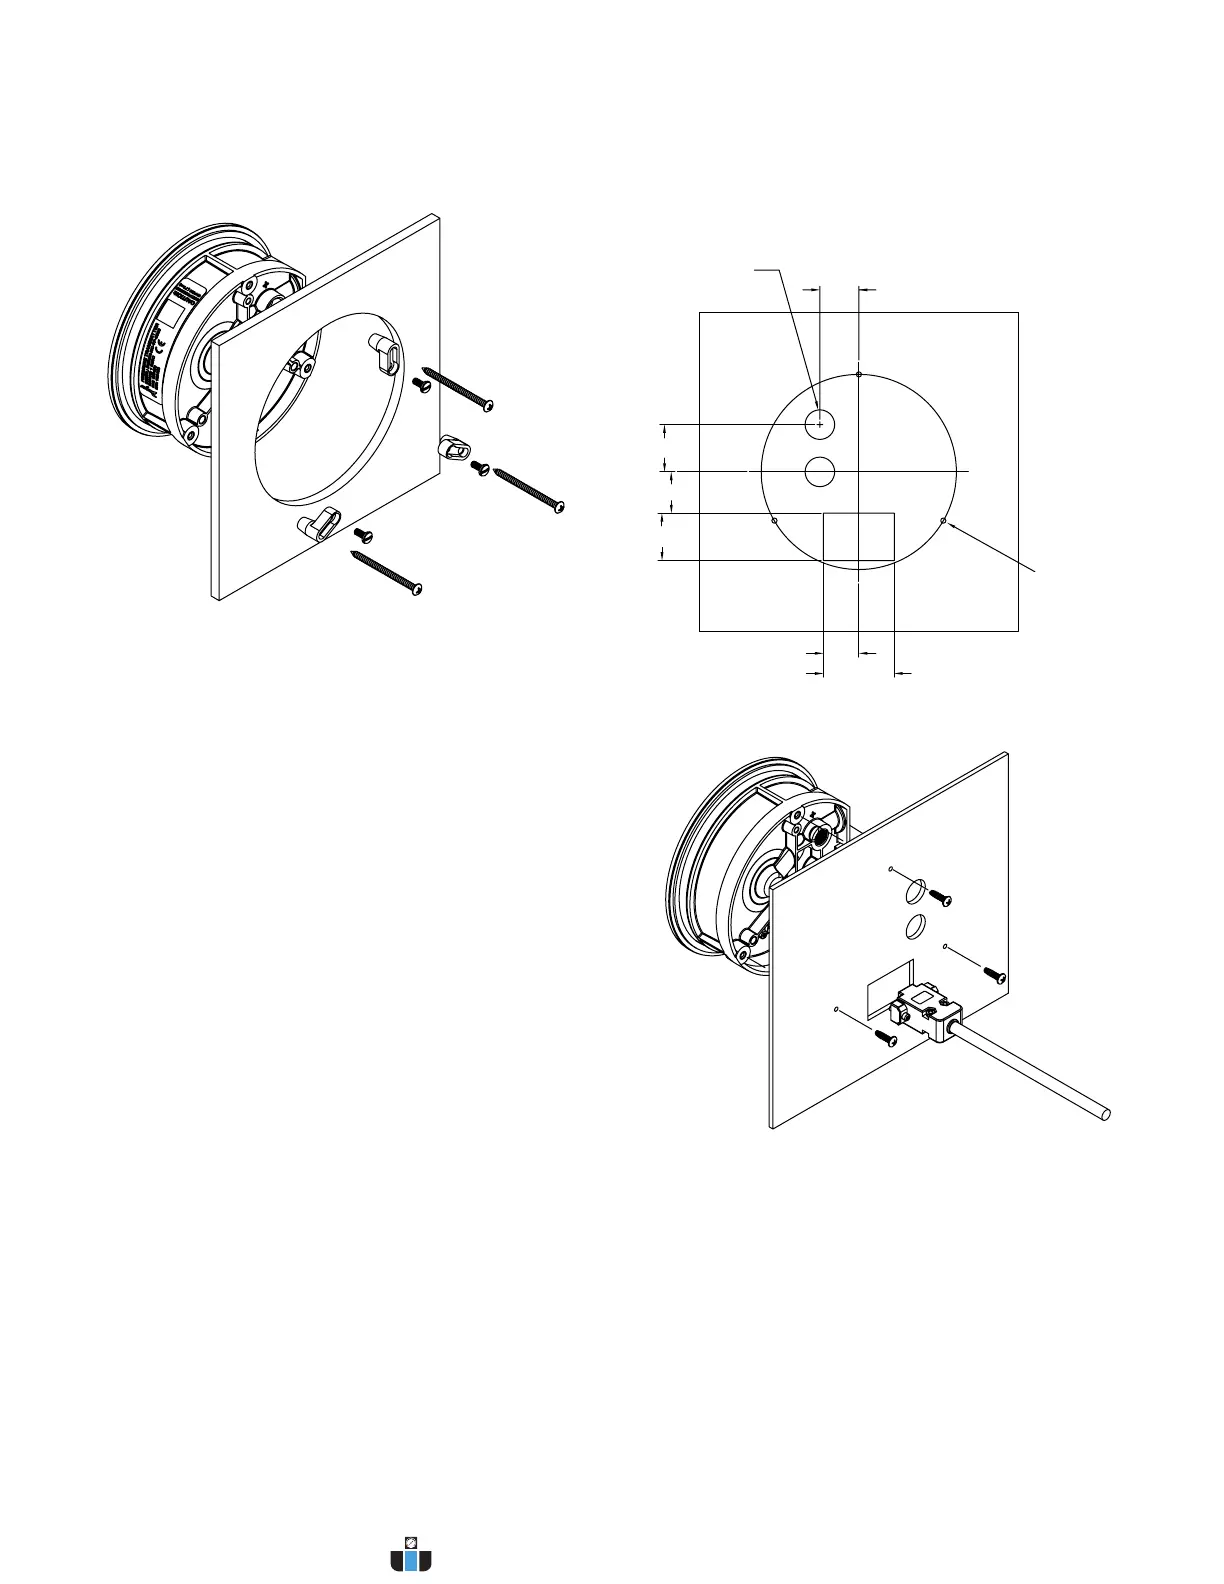
MOUNTING
The DHC may be either panel (ush) mounted or surface mounted.
Panel Mounting Including -SS Bezel:
1. Cut a 4-9/16˝ (116 mm) diameter hole in the panel.
2. Insert gage and secure in place with provided screws and mounting lugs as
shown in Figure 1.
Figure 1: Panel mount
Figure 2: Surface mount
Figure 3: Surface assembly with rear pressure connections
Surface Mounting
1. Use the drill template (Figure 4 on the next page) on the front of the desired
mounting surface. Provide three 3/16˝ diameter holes in panel on a 4-1/8˝
diameter bolt circle. Cut the opening for the terminal block as shown in Figures 2
and 4.
2. If the rear pressure connections are to be used, also provide 1/2˝ diameter holes
as shown in Figures 2 and 4.
3. Insert 6-32 machine screws from rear of mounting surface, threading them into
tapped holes on back of transmitter and tighten.
[3] HOLES FOR
#6 SCREW
EQUALLY SPACED
ON Ø4-1/8
[104.78] B.C.
3/4 [19.05]
53/64
[20.96]
FOR PRESSURE
CONNECTION
DRILL TEMPLATE
NEEDS TO BE USED
FROM PANEL FRONT
www.calcert.com sales@calcert.com1.800.544.2843
0
5
10
15
20
25
30
 Loading...