- 5 -
If you purchased the DXE-UWA-KIT and would like to add the coax strain relief, order DXE-
CSR8X-1 for RG-8X, or DXE-CSR213-1 for RG-213 from DX Engineering.
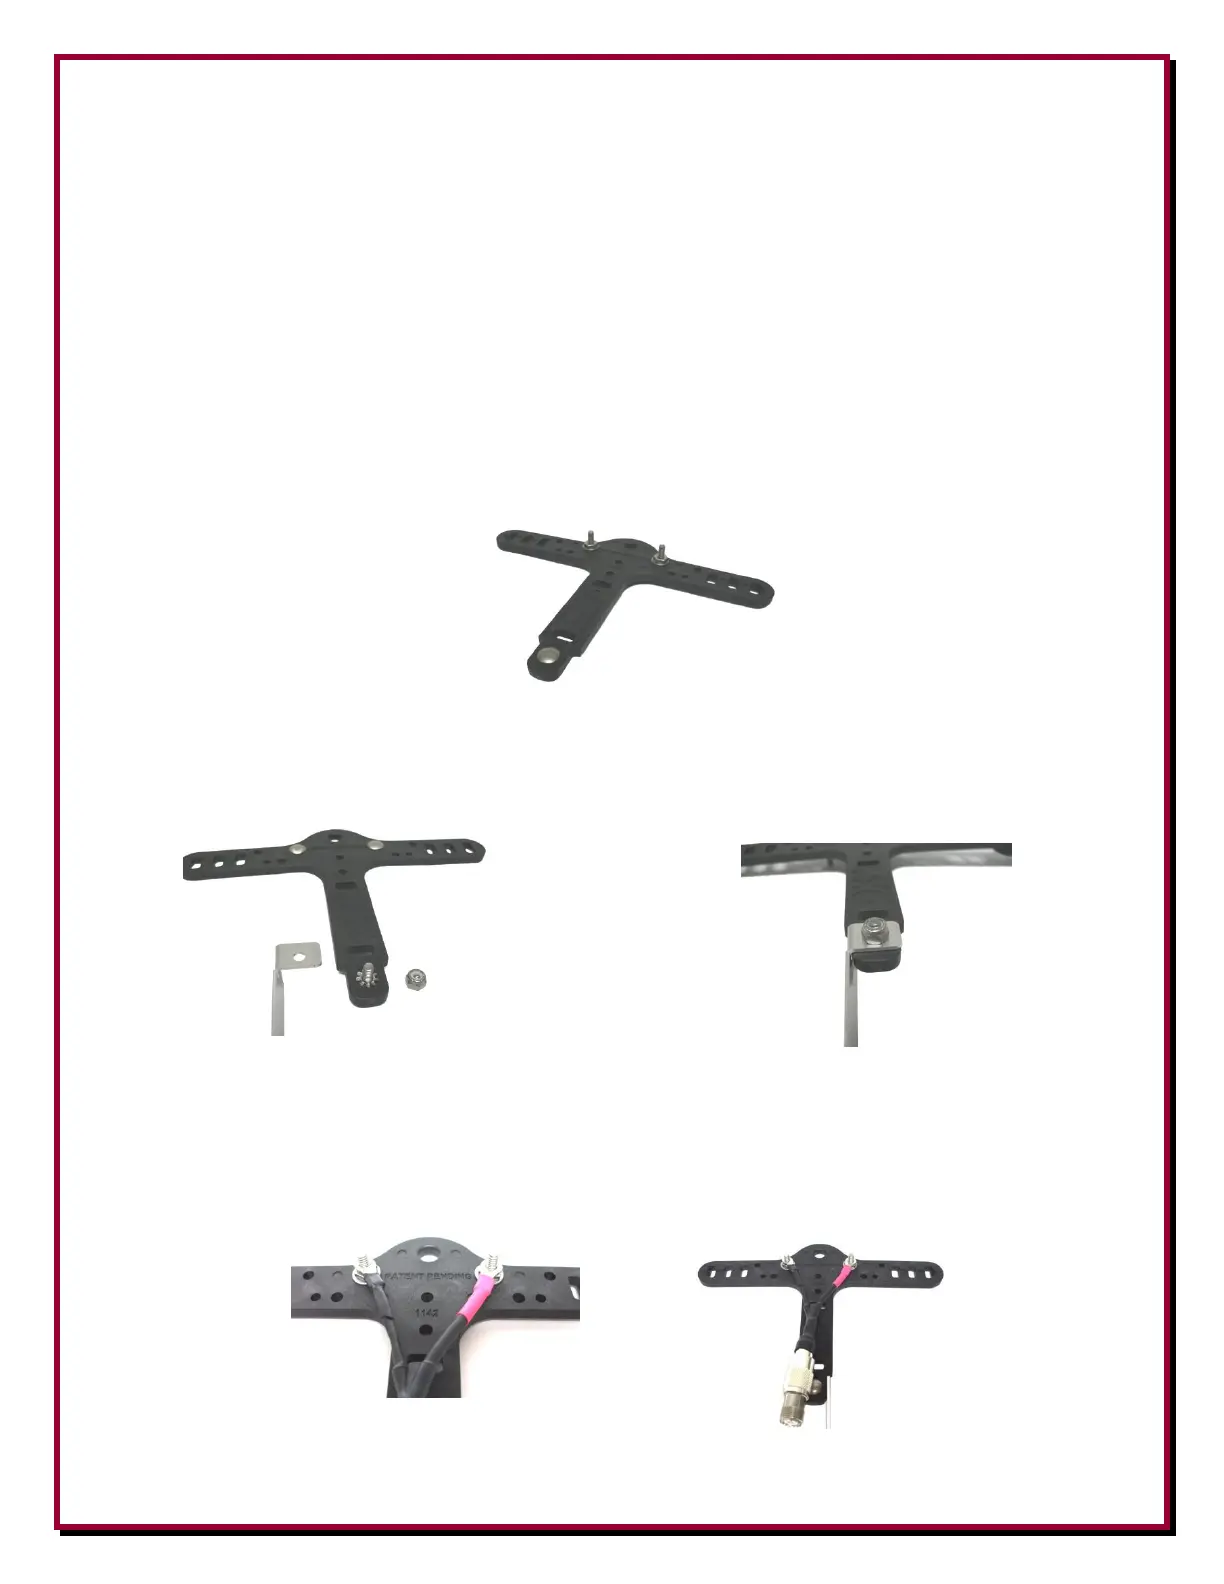
Coaxial Cable Strain Relief Bracket Assembly
Both the DXE-UWA8X-KIT and DXE-UWA213-KIT contain the parts found in the DXE-UWA-
KIT, (minus the #8 hardware) plus a cable/connector pigtail and cable strain relief. The pigtail for
the 8X-KIT uses RG-8X coaxial cable. The pigtail for the 213-KIT uses RG-213 coaxial cable.
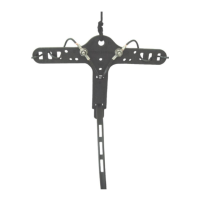
Place the 5/8” carriage bolt through the hole in the bottom of the Center-T assembly as shown in
Figure 4. To fully seat the carriage bolt, use a flat washer and hex nut. Hand tighten the nut in
place and then use a 3/8” wrench tighten the hex nut. As you tighten the nut, the carriage bolt will
draw itself into the support. Tighten the nut until the carriage bolt head is flush to the Center-T.
Figure 4 - Bottom Hole - Carriage Bolt Installed
Remove the nut and washer that were used to fully seat the carriage bolt. Install the star washer
followed by the Cable Strain Relief Bracket, then a Nyloc nut onto the carriage bolt (Figure 5).
Securely tighten the Nyloc nut using a 3/8” wrench or 3/8” nut driver.
Figure 5 - Strain Relief
Bracket Installation
Pigtail Installation
Firmly attach the UHF Female to Female Adapter to the Coaxial Cable Pigtail. Place the pigtail
terminal lugs over the bolts in the Center-T (Figure 6). Use hex nuts to temporarily hold the pigtail
in place on the carriage bolts. Later, when you add the antenna wire, additional hardware will be
added as needed and then tightened.
Figure 6 - Pigtail Installed