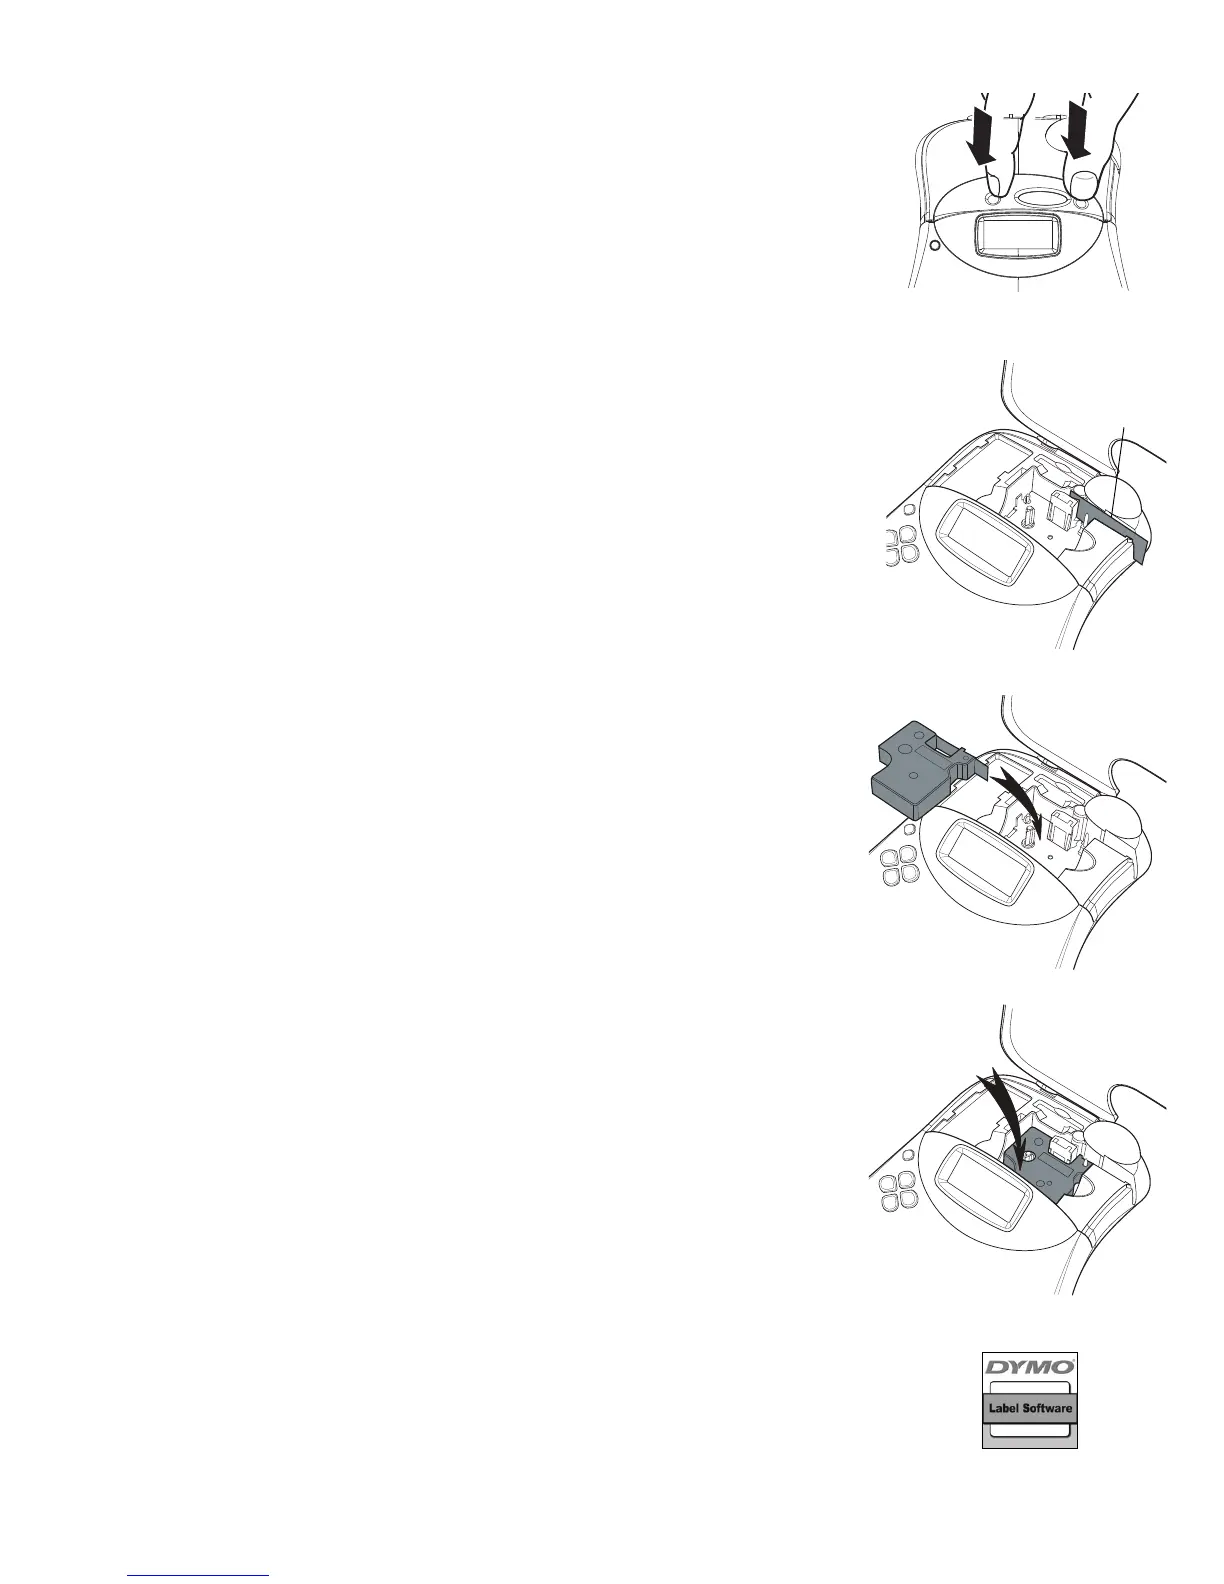
3. Inserting the Tape Cassette
Your label maker comes with one label cassette. You can purchase
additional tape cassettes from your local office supply retailer.
To insert the tape cassette
1 Press and release the tape cassette cover to open the tape
compartment. See Figure 3.
x The first time you use the label maker, remove the protective
cardboard insert from the tape exit slot. See Figure 4.
2 Make sure the tape and ribbon are taut across the mouth of the cassette
and that the tape passes between the guideposts. If necessary, turn the
spool clockwise to tighten the ribbon.
3 Insert the cassette and press firmly until the cassette clicks into place. See
Figure 5 and Figure 6.
4 Close the tape cassette cover and press
A
to turn on the power.
You are now ready to print your first label. For complete details on how to
use the label maker refer to the LabelManager 450D User Guide.
4. Installing the Software
x Do not connect the label maker to your computer until asked to do so
during the software installation.
To install the software on a Windows system
1 Insert the DYMO Label Software CD into your CD-ROM drive. After a few
seconds, the installation screen appears. If the screen does not appear:
a. Click Start and then Run on the Windows taskbar. The Run dialog
box appears.
b. Enter D:\install.exe (where D is the letter of the CD-ROM drive)
and click OK.
2 Select the language to install and follow the on-screen instructions.
To install the software on a Mac OS system
1 Insert the DYMO Label Software CD into the CD-ROM drive.
After a few seconds, the DYMO Label Software Installer icon appears.
2 Double-click the Installer icon and follow the instructions. See Figure 7.
If you do not see the label maker in the printer list when the installation is
complete, refer to the ReadMe file for instructions on how to add the label maker.