Model
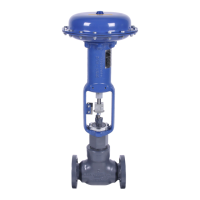
DFC Valve Actuator
Operation, Parts and Instruction Manuals
Dyna-Flo Control Valve Services Ltd.
Edmonton, Alberta, CANADA
Website: www.dynaflo.com
Phone: 780
• 469 • 4000
Toll Free: 1 • 866 • 396 • 2356
Fax: 780 • 469 • 4035
Instruction Manual May 2007
10
Casing-Mounted Travel Stops
! NOTICE !
For casing-mounted travel stop options
refer to Figure 8. These options are avail-
able to limit travel in both down and up
directions.
Adjusting Casing-Mounted Travel Stops
1 Remove the travel stop caps (Key 34, Types 3
& 4) and loosen jam nuts (Key 40) if they
impede adjustments in Step 2.
2 Use the jam nuts (Key 40, Type 3), the exten-
sion stem (Key 39, Type 4) and travel stop
screw (Key 37, Type 5) to adjust the travel
limit.
3 After adjustments have been made, it will be
necessary to re-tighten the jam nuts (Key 40)
and replace the travel stop caps (Key 34, Types
3 & 4).
Casing-Mounted Travel Stop Disassembly
!
NOTICE !
For maintenance purposes it is only neces-
sary to disassemble the travel stops as far
as need be to accomplish the required
maintenance.
1 Remove the travel stop cap (Key 34). For down
travel stops (Type 3) the jam nuts (Key 40)
must be loosened so that the travel stop is not
causing any spring compression.
! WARNING !
Disconnect all power lines and pneumatic
lines making sure the actuator is depres-
surized prior to commencing disassembly.
Remove any power source that may cause
the actuator to spontaneously move. For
down travel stops relieve any spring
pressure or compression before you start
the disassembly process, this can be done
by lowering the spring adjuster (Key 21).
! CAUTION !
Use bypass valves or completely shut off
process media to isolate the valve from
the process pressure and fluids. Remove
any tubing or piping from the connection
on top of the yoke (Key 32).
2 Using a wrench on the jam nuts (Key 40) un-
screw the extension stem (Key 39) and remove
it. Inspect the extension stem for damage or
corrosion, replace if necessary.
3 Remove all the diaphragm casing cap screws
(Key 18) and nuts (Key 19). Lift the upper dia-
phragm casing (Key 5) from the actuator. For
Types 3 and 4 the travel stop assembly will be
removed with the upper diaphragm casing.
4 Record the position of the travel stop (Key 36)
compared to the cap screws (Key 42) for reas-
sembly purposes. Remove the travel stop and
cap screws.
5 Inspect all travel stop parts for damage or
corrosion and replace if necessary.
Casing-Mounted Travel Stop Assembly
1 Reassembly the actuator parts in reverse order
starting at Step 4 of the Casing-Mounted Travel
Stop Disassembly, be sure to apply anti-seize
compound to the threads of the extension
stem (Key 39). Return the cap screws (Key 42)
and travel stop (Key 36) to their original posi-
tion as recorded in Step 4. Refer to the Upper
Diaphragm Casing Assembly procedures on
Page for instruction on casing reassembly.
2 Retighten the spring adjuster (Key 21) to its
original position and adjust the travel stops to
their desired limits as per Adjusting Casing-
Mounted Travel Stop procedures.
 Loading...