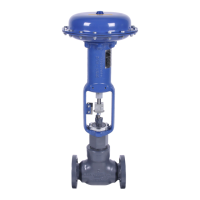
Model
DFC Valve Actuator
Operation, Parts and Instruction Manuals
Dyna-Flo Control Valve Services Ltd.
Edmonton, Alberta, CANADA
Website: www.dynaflo.com
Phone: 780
• 469 • 4000
Toll Free: 1 • 866 • 396 • 2356
Fax: 780 • 469 • 4035
Instruction Manual May 2007
8
Maintenance
(cont’d)
Upper Diaphragm Casing Disassembly
(cont’d)
7 Remove the bushing (Key 15) from the actua-
tor being careful not to damage the bushing,
seals or actuator yoke. The actuator stem
(Key 3) and spring adjuster (Key 21) may be
used with extreme caution to remove the
bushing. By threading the spring adjuster part
way onto the actuator stem the assembly may
be inserted up into the yoke and used as a
plunger to push out the bushing.
8 Using a pick set or small screwdriver, remove
the o-rings (Keys 16 & 17) from the bushing
being careful not to damage bushing surfaces.
Inspect the sealing surfaces of the bushing for
deep scratches and corrosion, replace if nec-
essary. O-rings and gaskets should normally be
replaced during maintenance.
Lower Diaphragm Casing Removal
1 Remove the lower diaphragm casing cap
screws (Key 18) and lift lower diaphragm casing
(Key 4) off of the yoke (Key 1). Remove the
lower casing gasket (Key 13) clean and inspect
the yoke / lower casing sealing surfaces for
damage. O-rings and gaskets should be re
placed during maintenance.
! NOTICE !
For the DFC Size 3220 inspect the o-ring
groove on the top surface of the yoke
(Key 1) for any deep scratching or corro-
sion. Also check the lower diaphragm
casing (Key 4) for any deformation exces-
sive tightening may have caused. O-rings
and gaskets should be replaced during
maintenance.
Actuator Assembly
! CAUTION !
Before assembling the actuator, make
sure that the yoke and actuator are
securely supported with a clamping device
and on a surface that will support the
assembled actuator weight.
! NOTICE !
Use an anti-seize compound that is
approved for the service conditions that
the actuator is being installed into.
Lower Diaphragm Casing
Bushing Installation
1 Coat the lower diaphragm gasket (Key 13) with
anti-seize compound and place on to the yoke
(Key 1) (on a DFC size 3220 actuator there is
an o-ring in place of the gasket). The holes of
the gasket should align with the holes on the
yoke.
2 Install the lower diaphragm casing (Key 4),
tighten cap screws (Key 12) using a criss-cross
pattern. DO NOT over tighten the cap screws
as excessive tightening could warp the casing
or deflect and cause the gasket to leak.
3 Lubricate the bushing seals (Keys 16 & 17) with
silicone-based lubricant and place them into
the bushing (Key 15) as shown in Figure 6. Pack
the inside of the bushing with lubricant
(Lubriplate
®
Mag-1 or equivalent) and insert the
bushing into the yoke (Key 1). The bushing is
held in place with the snap ring (Key 14) that
fits into the groove in the yoke above the
bushing (Refer to Figure 6).
Spring Installation
! NOTICE !
It may be desirable to have an appro-
priately sized block of wood nearby to be
placed in the bottom of the yoke to be
used as support for the stem/spring
assembly while working on the actuator.
1 Coat the stem (Key 3) threads with anti-seize
compound and thread the spring adjuster (Key
21) onto the stem. Place the spring seat (Key
20) onto the stem so that it rests on the spring
adjuster as show in Figure 7.
2 Insert the spring (Key 2) into the barrel on the
yoke (Key 1) and slide stem assembly from
Step 1 into the yoke. It may be necessary to
support the spring/stem assembly using a
block of wood or similar item while assembling
the upper portion of the actuator.
 Loading...