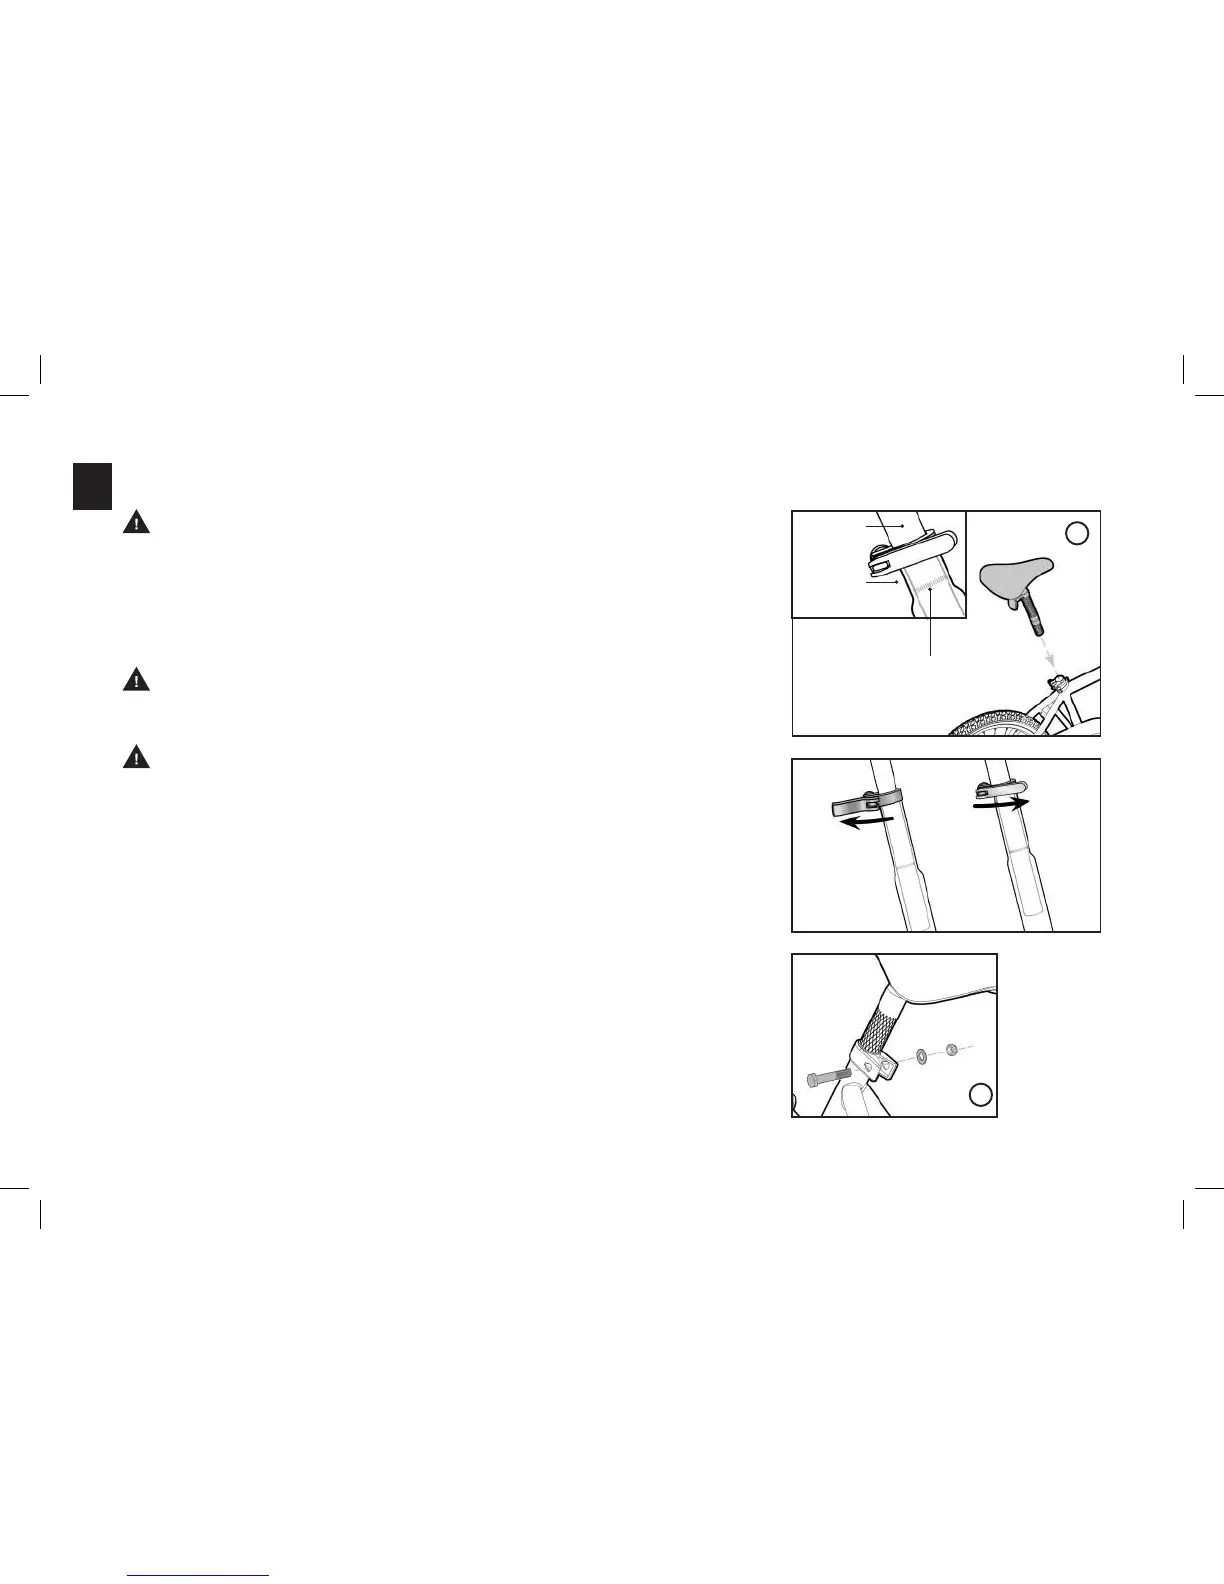
2. SEAT
WARNING: The seatpost must be inserted far enough so that the minimum
insertion marks cannot be seen.
Add some white grease to the inside of the seat tube, and slide the seatpost
into the bicycle. Make sure that the minimum insertion mark is completely
covered and that the seat is pointing forward in alignment with the bicycle.
CAUTION Operate the quick release lever by hand only. Do not use a hammer
or any other tool to tighten the quick release lever.
WARNING: If the quick release lever is not tightened properly, the seatpost
can loosen while riding. This can cause a loss of control and injury to the rider or others.
If your bike has a quick release lever (see Figure 1), tighten it by holding the
lever in the “open” position and tightening the nut on the opposite side by
hand. Slowly close the quick release lever, and you should notice resistance
when the lever is half way shut. Firmly continue to push the lever until it is in
the “closed” position, and the word “close” is showing. The seat should not be
able to move back and forth with the quick release lever in the closed position.
Make sure the lever is also parallel with the seat clamp itself.
If your bike has a standard seat clamp (see Figure 2), use an adjustable
wrench(es) to tighten the nut securely. The seat should not be able to move back
and forth with the seat clamp tightened.
Minimum insertion marks are
located on the seatpost
Seat tube
Seatpost
1
Open
Closed
2
15
C