SEAT ADJUSTMENT
You can adjust the up and down tilt of
your seat as well as the forward and
back position by loosening the seat
post hardware at the bottom of your
seat. (See Figure 1.) Be careful not to
loosen them all the way so that the
nut comes off on either side. Loosen
enough to make the adjustments, and
re-tighten the nuts.
To raise or lower your seat, use the
quick release lever (see Figure 2) or an
Allen wrench on the seat clamp- (see
Figure 3) depending on the style of
clamp your bike comes with. Make
sure the minimum insertion marks on
the seatpost are completely covered.
(See Figure 4.) Close the quick release
lever, or tighten the Allen nut on your
seat clamp until it is secure, and the
seat will not move or sink with the rider
seated.
WARNING The seatpost
must be inserted far enough so that
the minimum insertion marks cannot
be seen.
BICYCLE ADJUSTMENTS
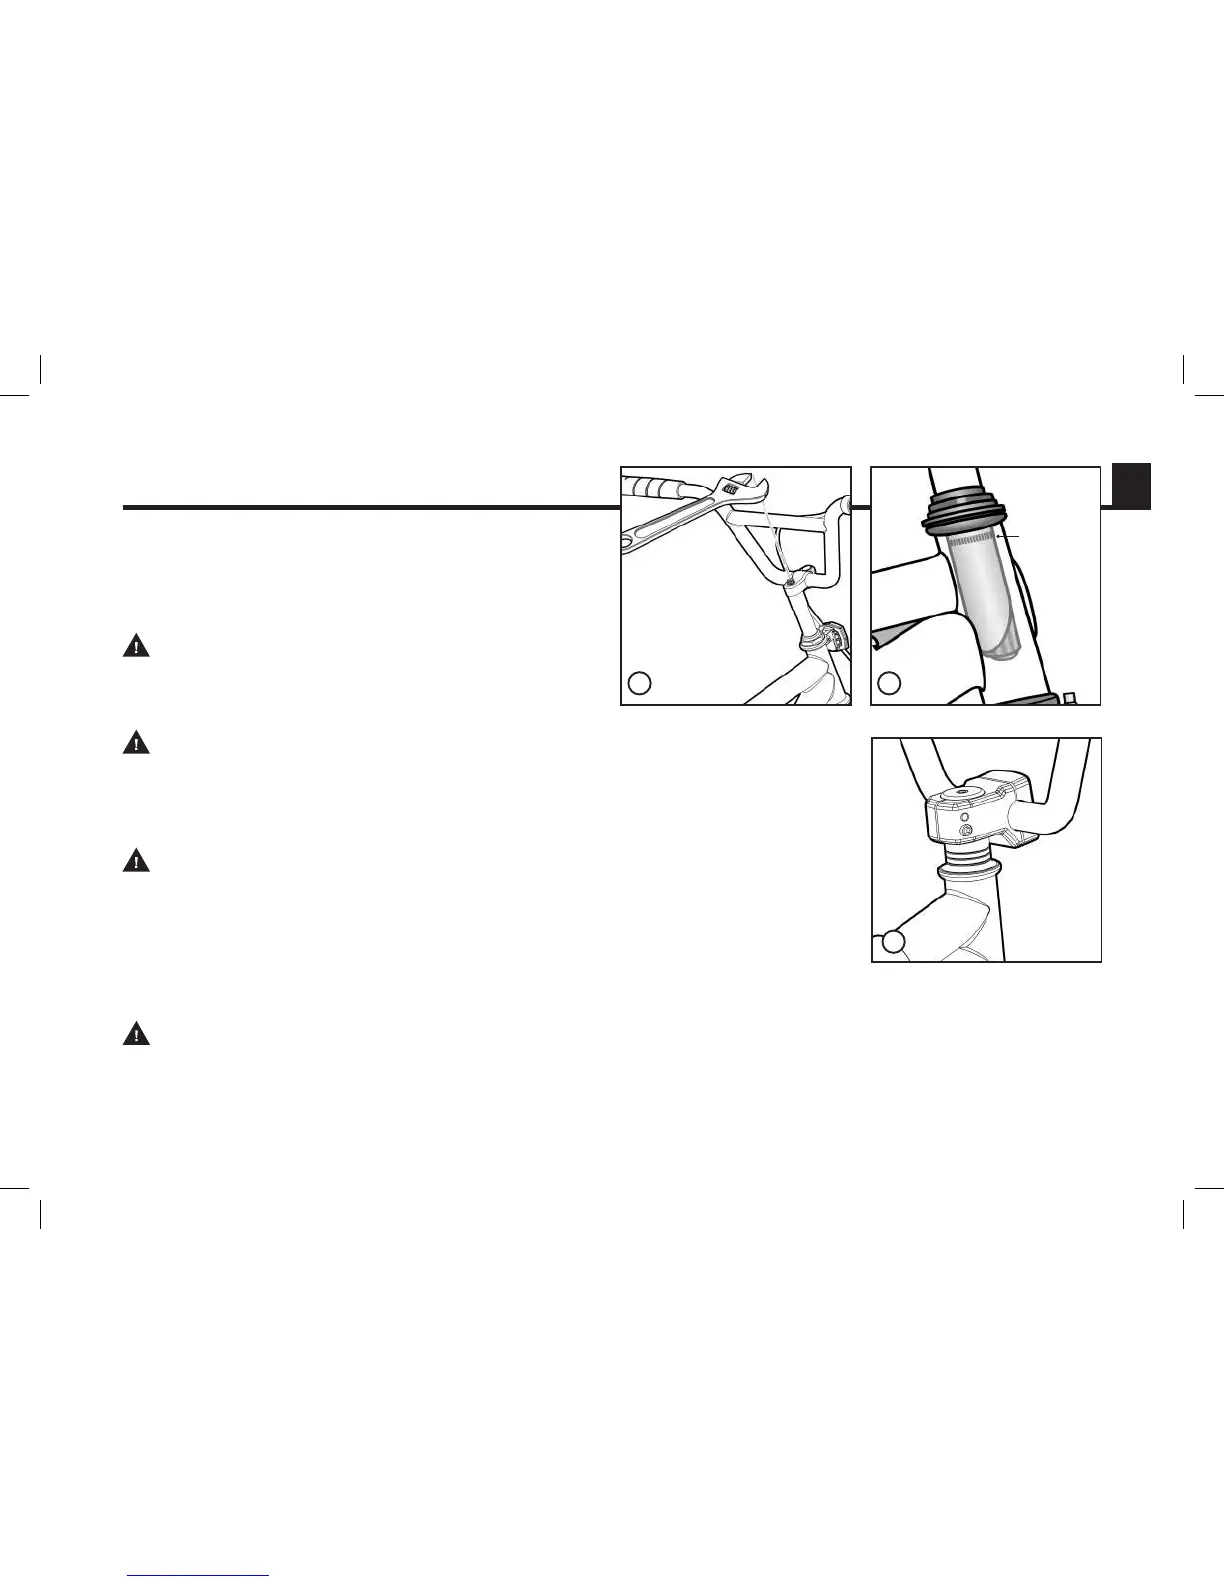
STEM ADJUSTMENT
To raise or lower your stem, use an adjustable wrench or
Allen wrench on the stem bolt to loosen the stem. (See
Figure 1.) Do not remove this bolt completely, as the stem
wedge may fall inside your frame. Make sure the stem is
inserted enough so that the minimum insertion marks on
your stem are completely covered. (See Figure 2.)
WARNING: To prevent steering system damage and
possible loss of control, the stem must be inserted enough so that
the minimum insertion marks are completely covered.
WARNING: Do not over tighten the stem bolt. Over
tightening the stem bolt can damage the steering system and cause
a loss of control. If necessary re-adjust the handlebar and tighten
the handlebar clamp nut.
WARNING: Threadless stem systems should not be
adjusted or loosened by anyone other than an experienced bicycle
shop mechanic.
For threadless stem systems, the stem cannot be raised or
lowered without removing components and re-adjusting.
This should not be attempted, but should be taken to a
bicycle shop for any adjustment. (See Figure 3.)
Minimum
insertion
mark
29
D
1 2
Threadless
stem system
3