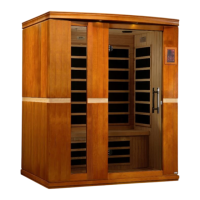
28
towards the rear of the sauna. After you have located the red and black
wires labeled “TEMP SENSOR”, disconnect them. Connect the spare
temperature sensor. For testing purposes, insert the “TEMP SENSOR”
(you just connected) down the vent on the roof so that it is now inside the
sauna. Then go to the control panel and press the power button. If the
heat emitters now heat, then the temperature sensor was the cause of the
problem. You may have to wait about five minutes to confirm if the heat
emitters are generating heat. Remove the original temperature sensor
from its hole and replace it with the spare one.
Solution: If your control panel displays “-L”, it may be an error code and
we assume both control panels are displaying this. If so, then it means
there is a communication issue between the control panel, power supply,
and temperature sensor. Please proceed to the following:
Step A:
1. Reconnect the sauna’s power cord. Make sure the control panel is
turned ON. Two individuals will be needed. One individual will
continuously watch the "-L" on the control panel to see if it changes while
a second person goes up to the roof and locate the "PANEL CONTROL"
harness connection that was connected during the assembling of the
sauna room. Check both ends of this connection including at the power
supply box.
2. Disconnect the "PANEL CONTROL" harnesses (both ends) and then
reconnect making sure that the connection is snug and tight.
3. Also and while up on the roof, please located the temperature sensor
wire. The temperature sensor is the black probe that is sticking out of the
interior ceiling above your head as you sit on the bench. Disconnect the
connection and reconnect to make sure the connection is snug and tight.
4. The individual watching the control panel can let you know if the "-L"
ever changed. If the "-L" is still displayed on the control panel, then we
need to rule out a control panel issue. Please proceed to Step B.
Step B:
1. Make sure to first unplug the sauna’s power cord from the wall outlet or
power source. If the sauna is hard wired straight to the breaker in the
Electric Panel, turn the breaker to the “OFF” position.
2. Remove the exterior wood frame around the exterior control
panel. Simply unscrew the screws holding the wood frame on.
3. Once the wood frame has been removed, lift the control panel up and
out. On the backside of the control panel, you will see a connection
plug. This connection plug needs to be removed. In some cases, there is a
plastic tie that holds the connection plug in place during shipment. This tie
will have to be cut before the connection plug can be unplugged. You do
not need to replace this tie. There are several connections, but you only
have to be concerned with the black connection. You want to unplug by
 Loading...